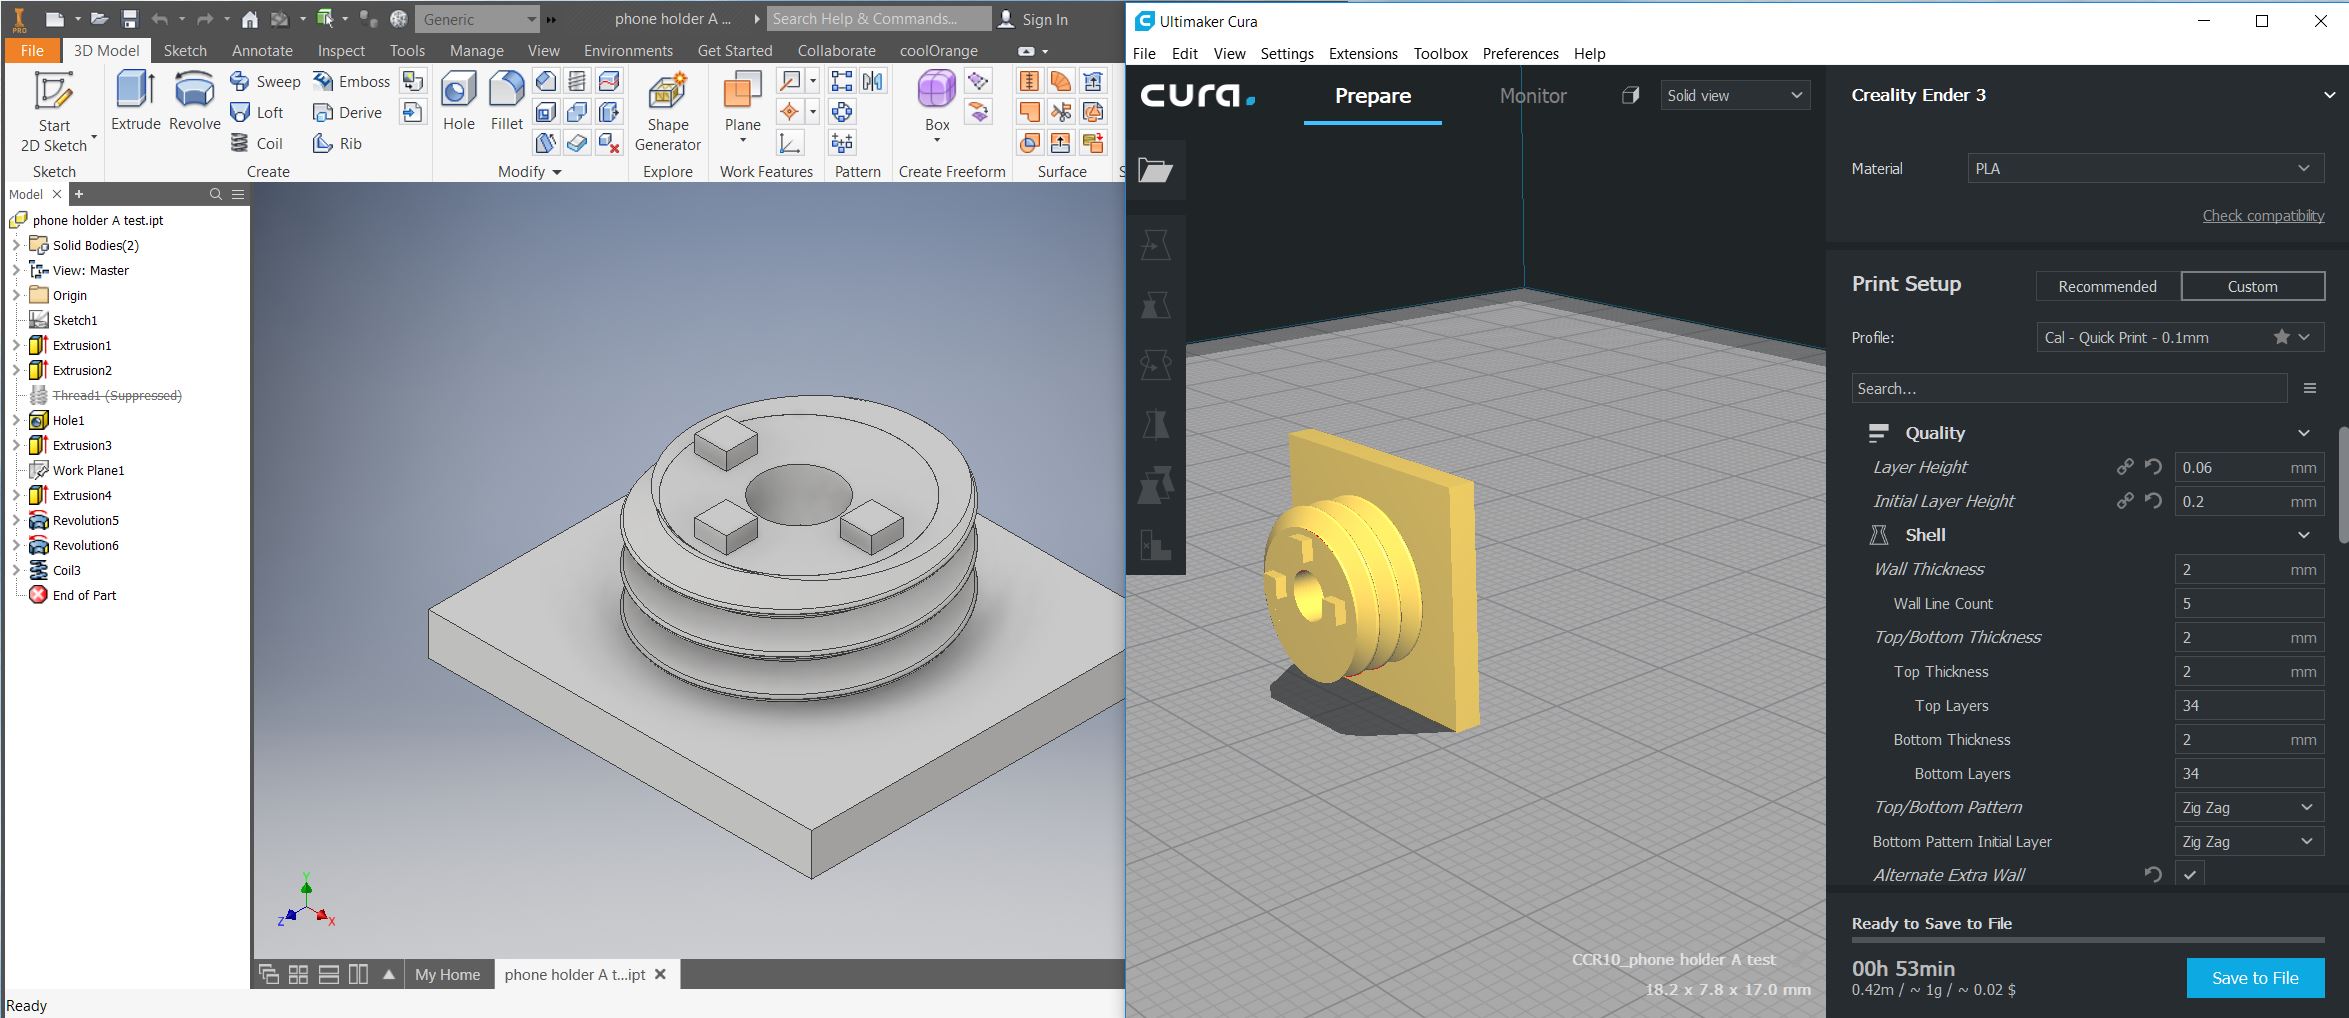
This how-to is for exporting a part from Autodesk Inventor and importing to Ultimaker Cura for 3D Printing. Once you export an STL file, it can be used with programs other than Cura.
Step 1
Open your part in Autodesk Inventor
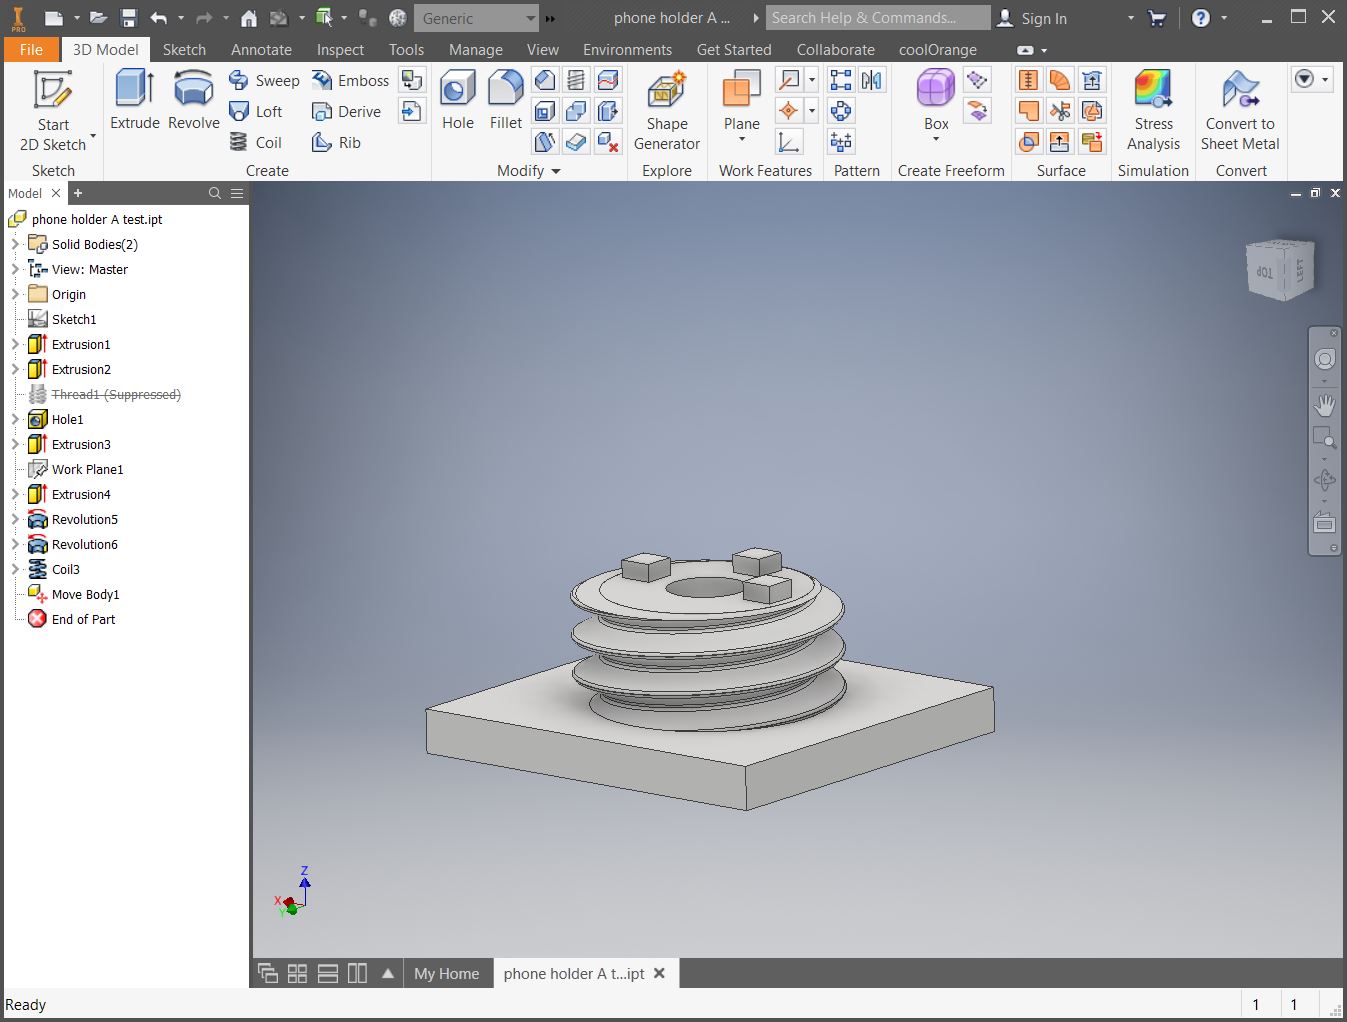
Step 2
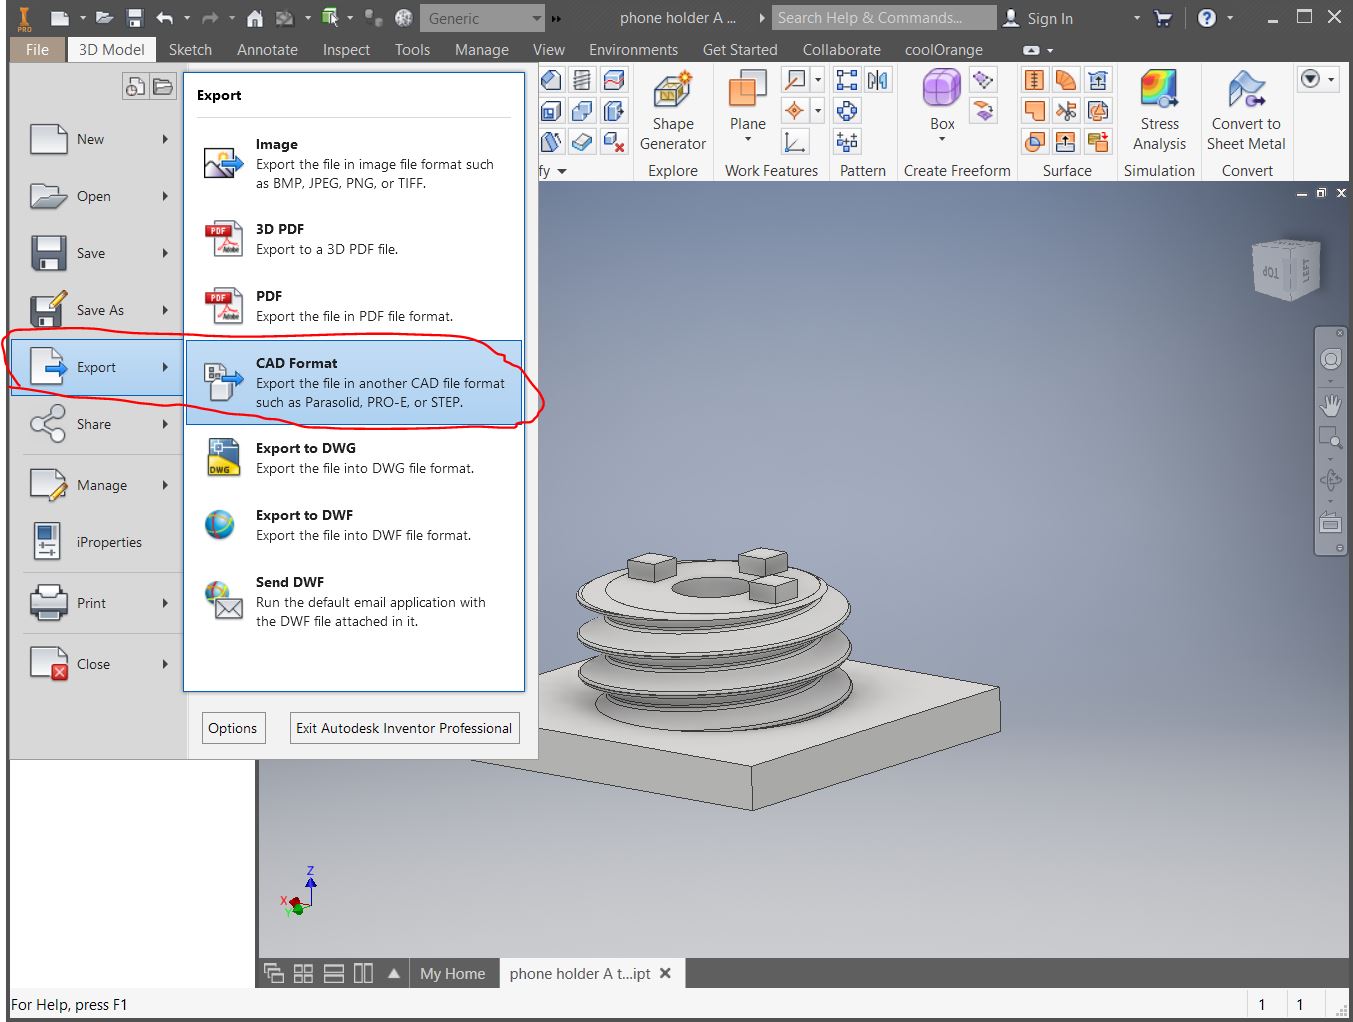
Go to File->Export->CAD Format
Step 3
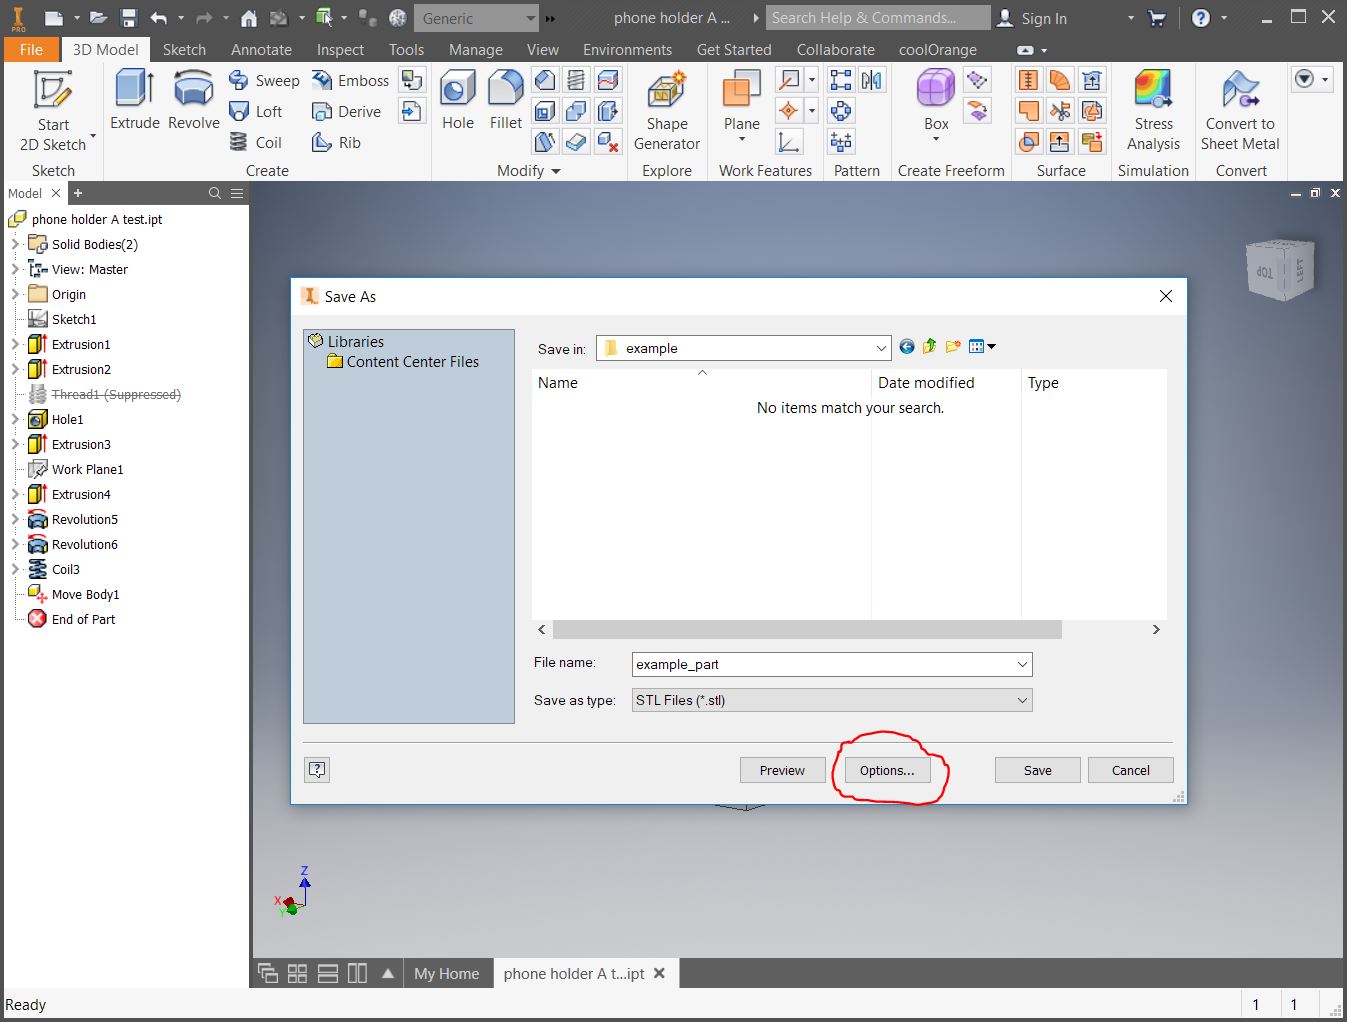
A “Save As” box should appear.
Click “Options”
Step 4
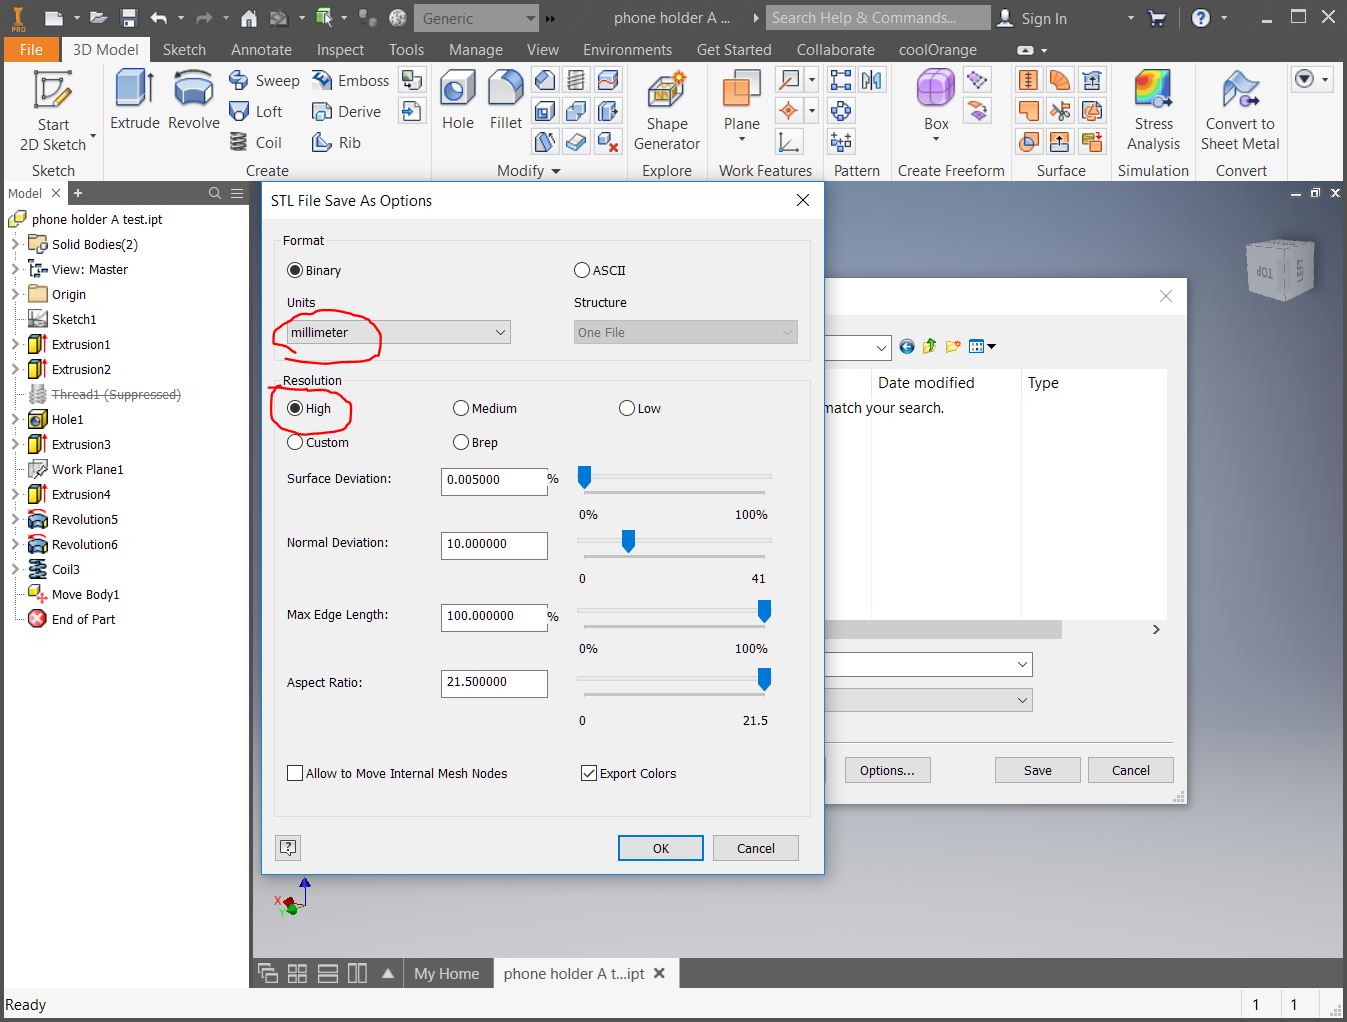
Confirm “Units” is the same as the units you designed in. If this is incorrect, the part will be the wrong size in Cura.
For “Resolution”, check “High”
Click “OK” and Save
Step 5
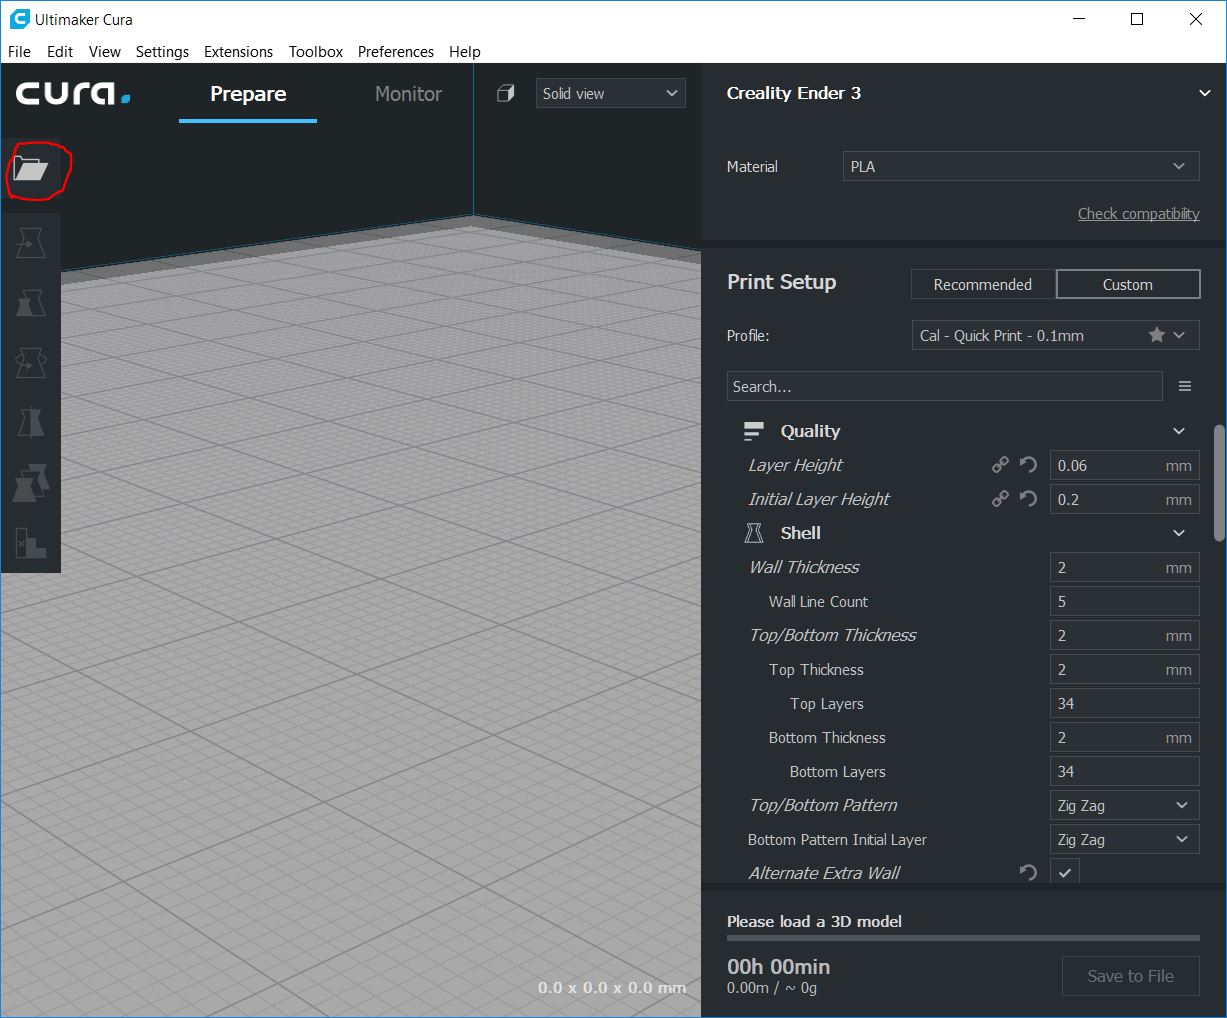
Open Cura
Click the “Open” icon in the upper left corner
Step 6
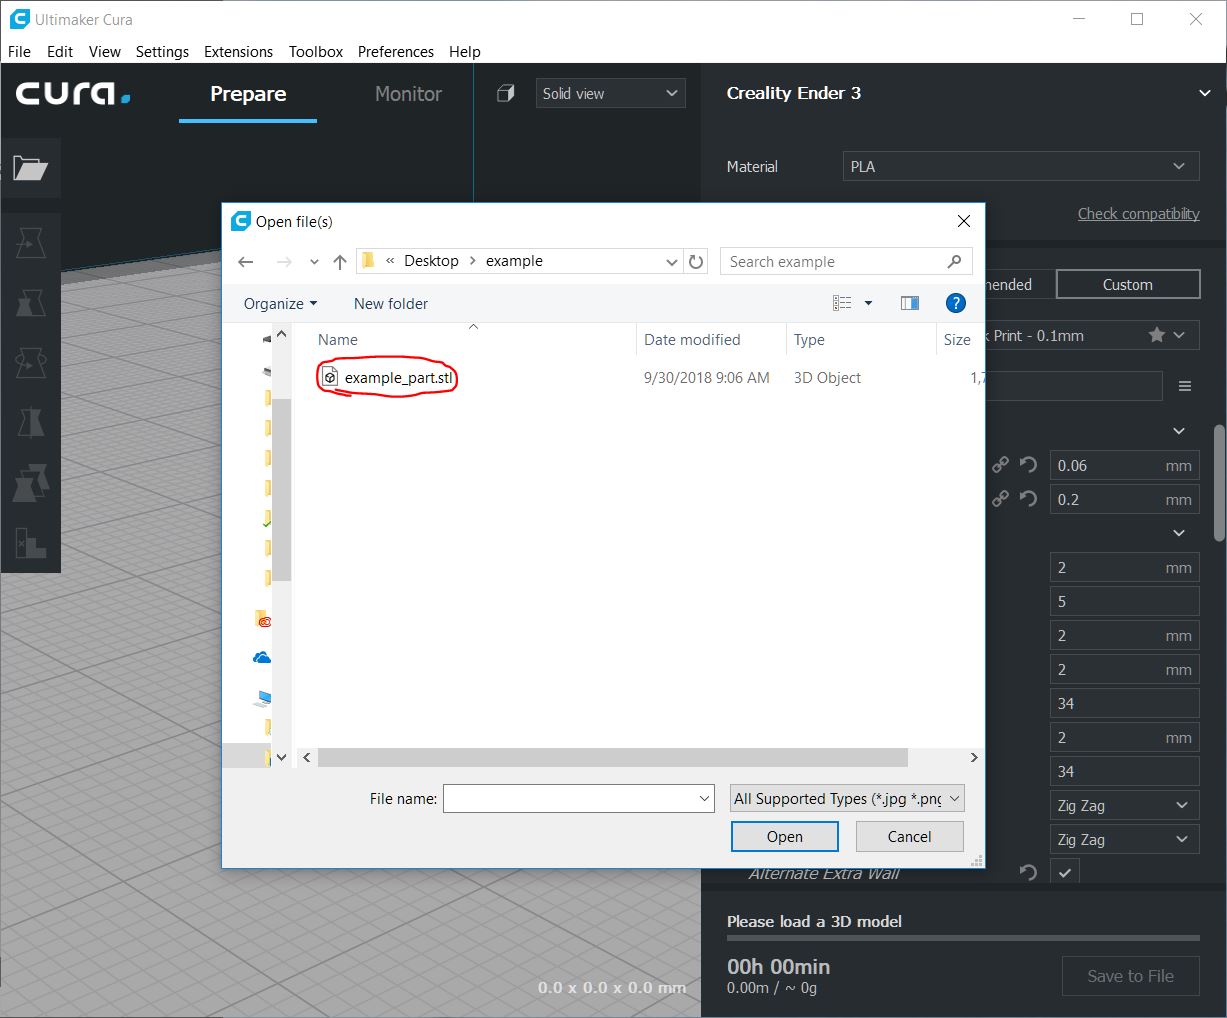
Open your .STL file
Step 7
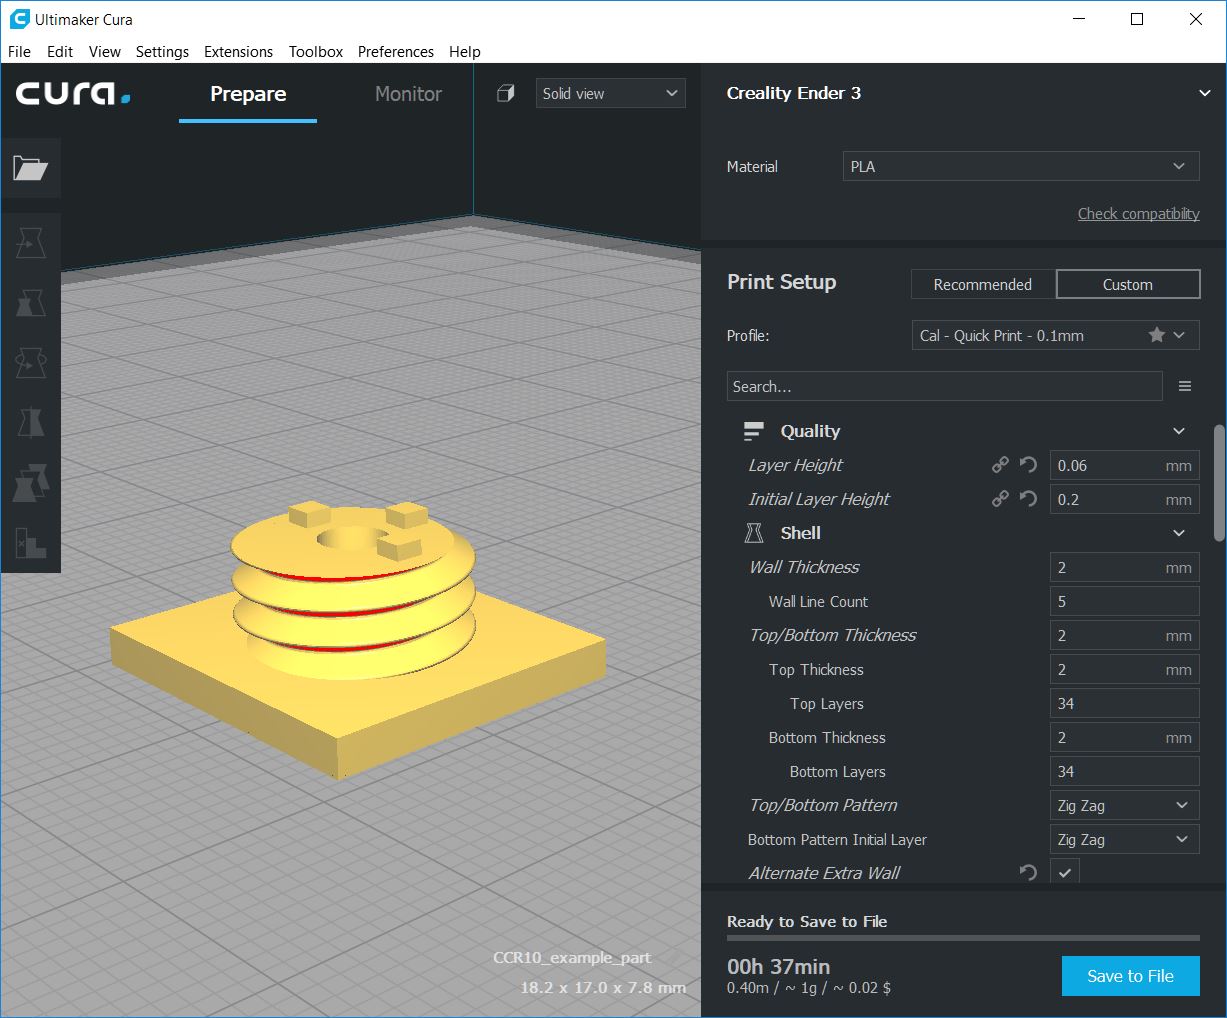
Your part should now be imported into Cura.
If you make changes to the part in Inventor, you need to repeat this entire process.
Troubleshooting
Is your part not properly rotated?
You can manually rotate in Cura, but if you’d like to fix this issue permanently, see my how-to here.