
This guide is for removing keys off a Lenovo ThinkPad T450s and should also work for the T430, T440, T450, and T460.
There are fragile retaining clips on the underside of each key. Repetitive removal will surely break them. Once the clip breaks, it must be replaced.
Key Removal

Wedge your finger underneath the upper left and pull directly up until you hear a single click.

Now wedge your finger underneath the upper right and pull directly up until you hear another single click.


The key should now be free to be removed.
If you’re just replacing the key or removing debris underneath the key, then you are done. If the plastic bracket is broken, follow the steps below to remove the bracket.
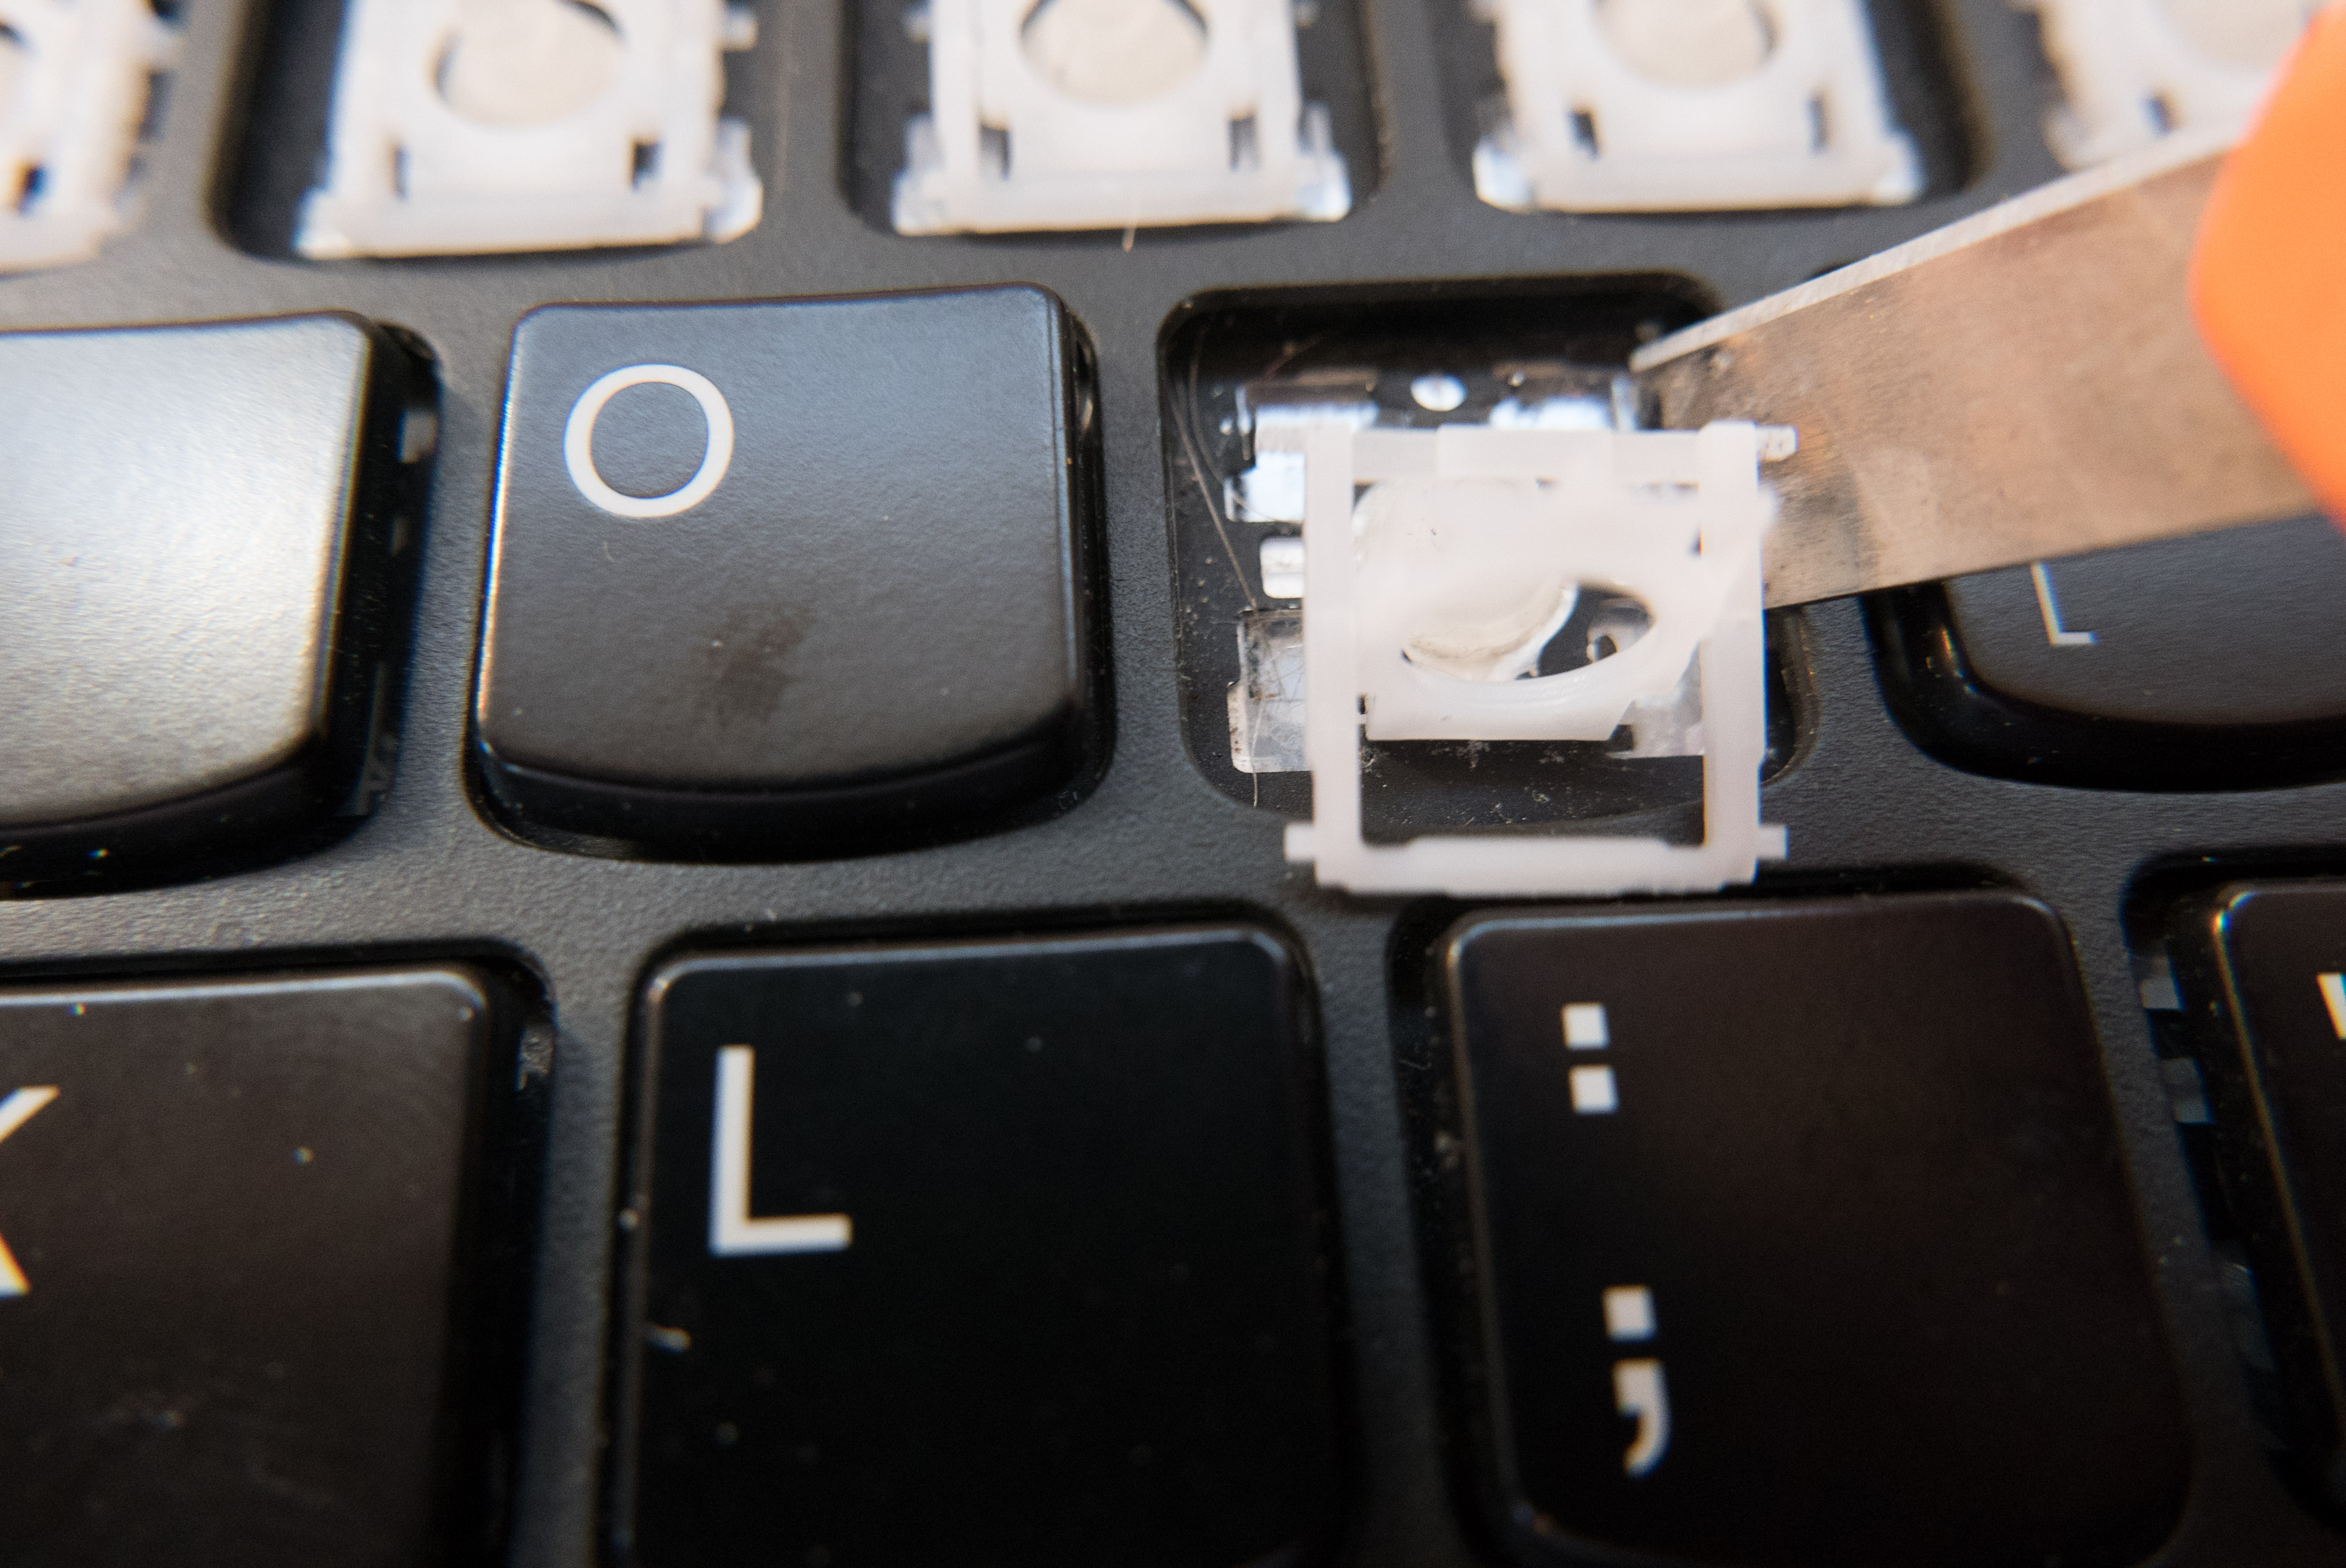
Plastic Bracket Removal
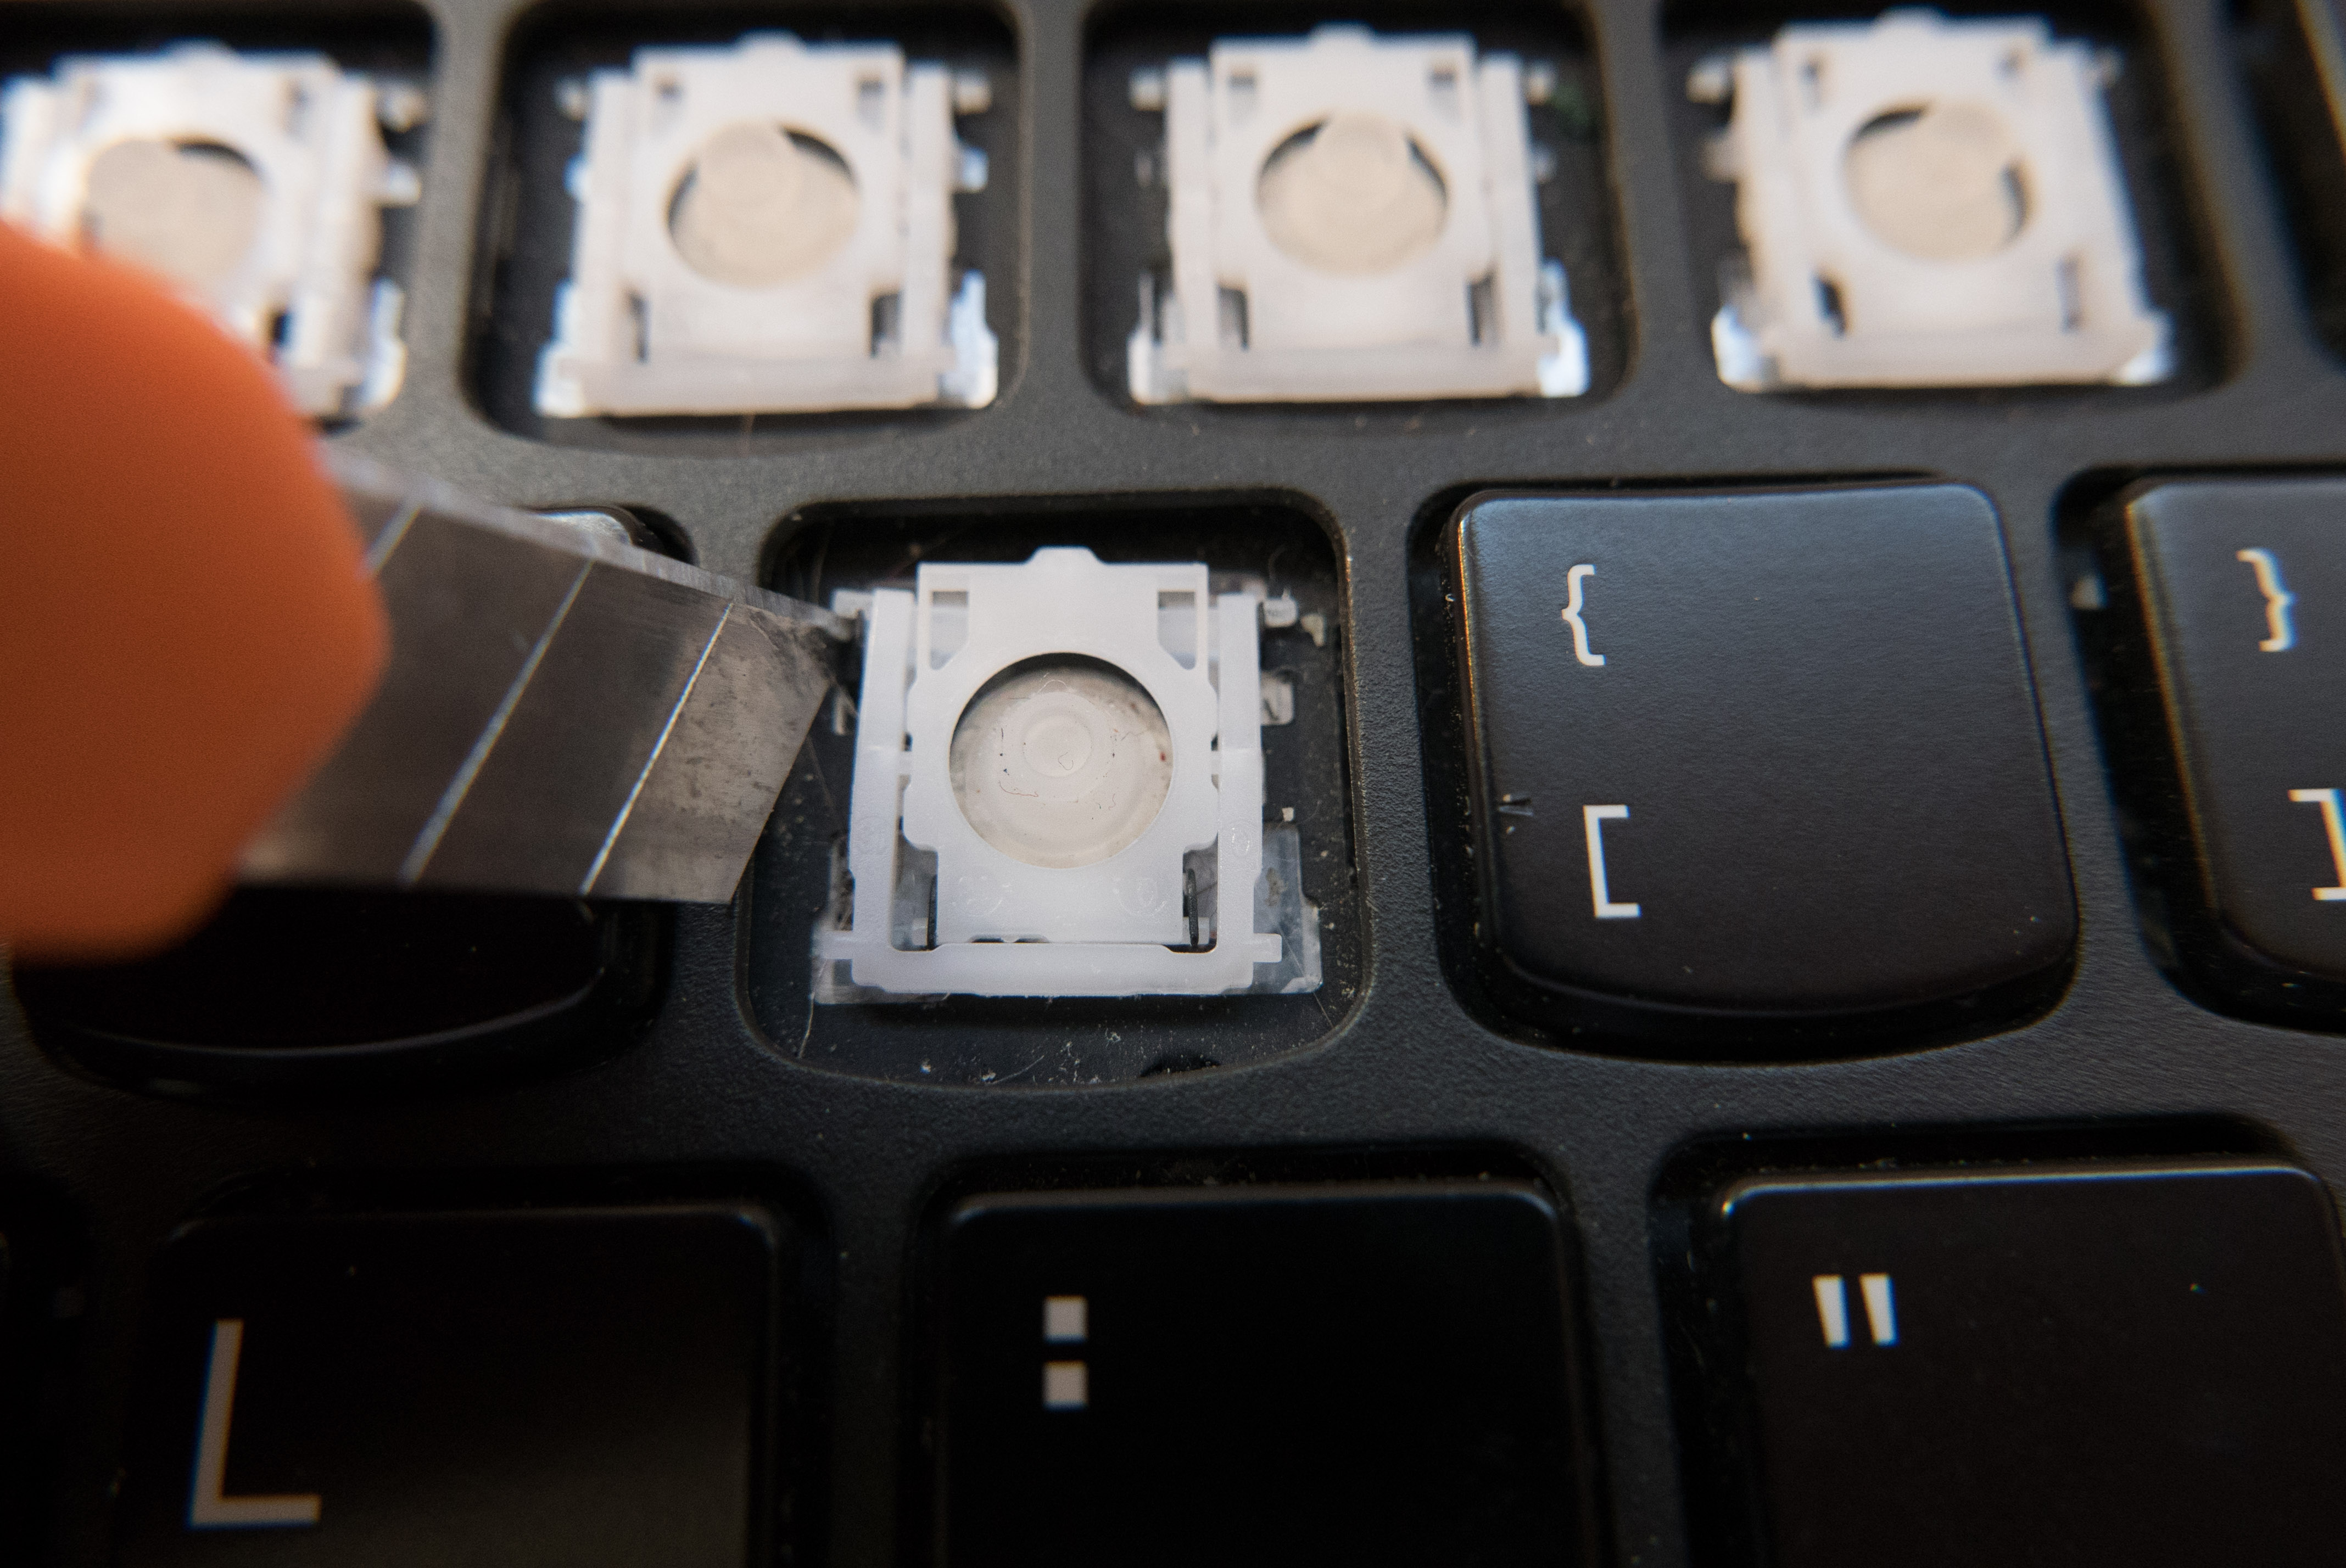
Using a small flathead screwdriver or razor blade, gently push forwards on the little arm. Once you have pushed forwards enough, you can then push upwards, freeing the arm from its retaining hinge.
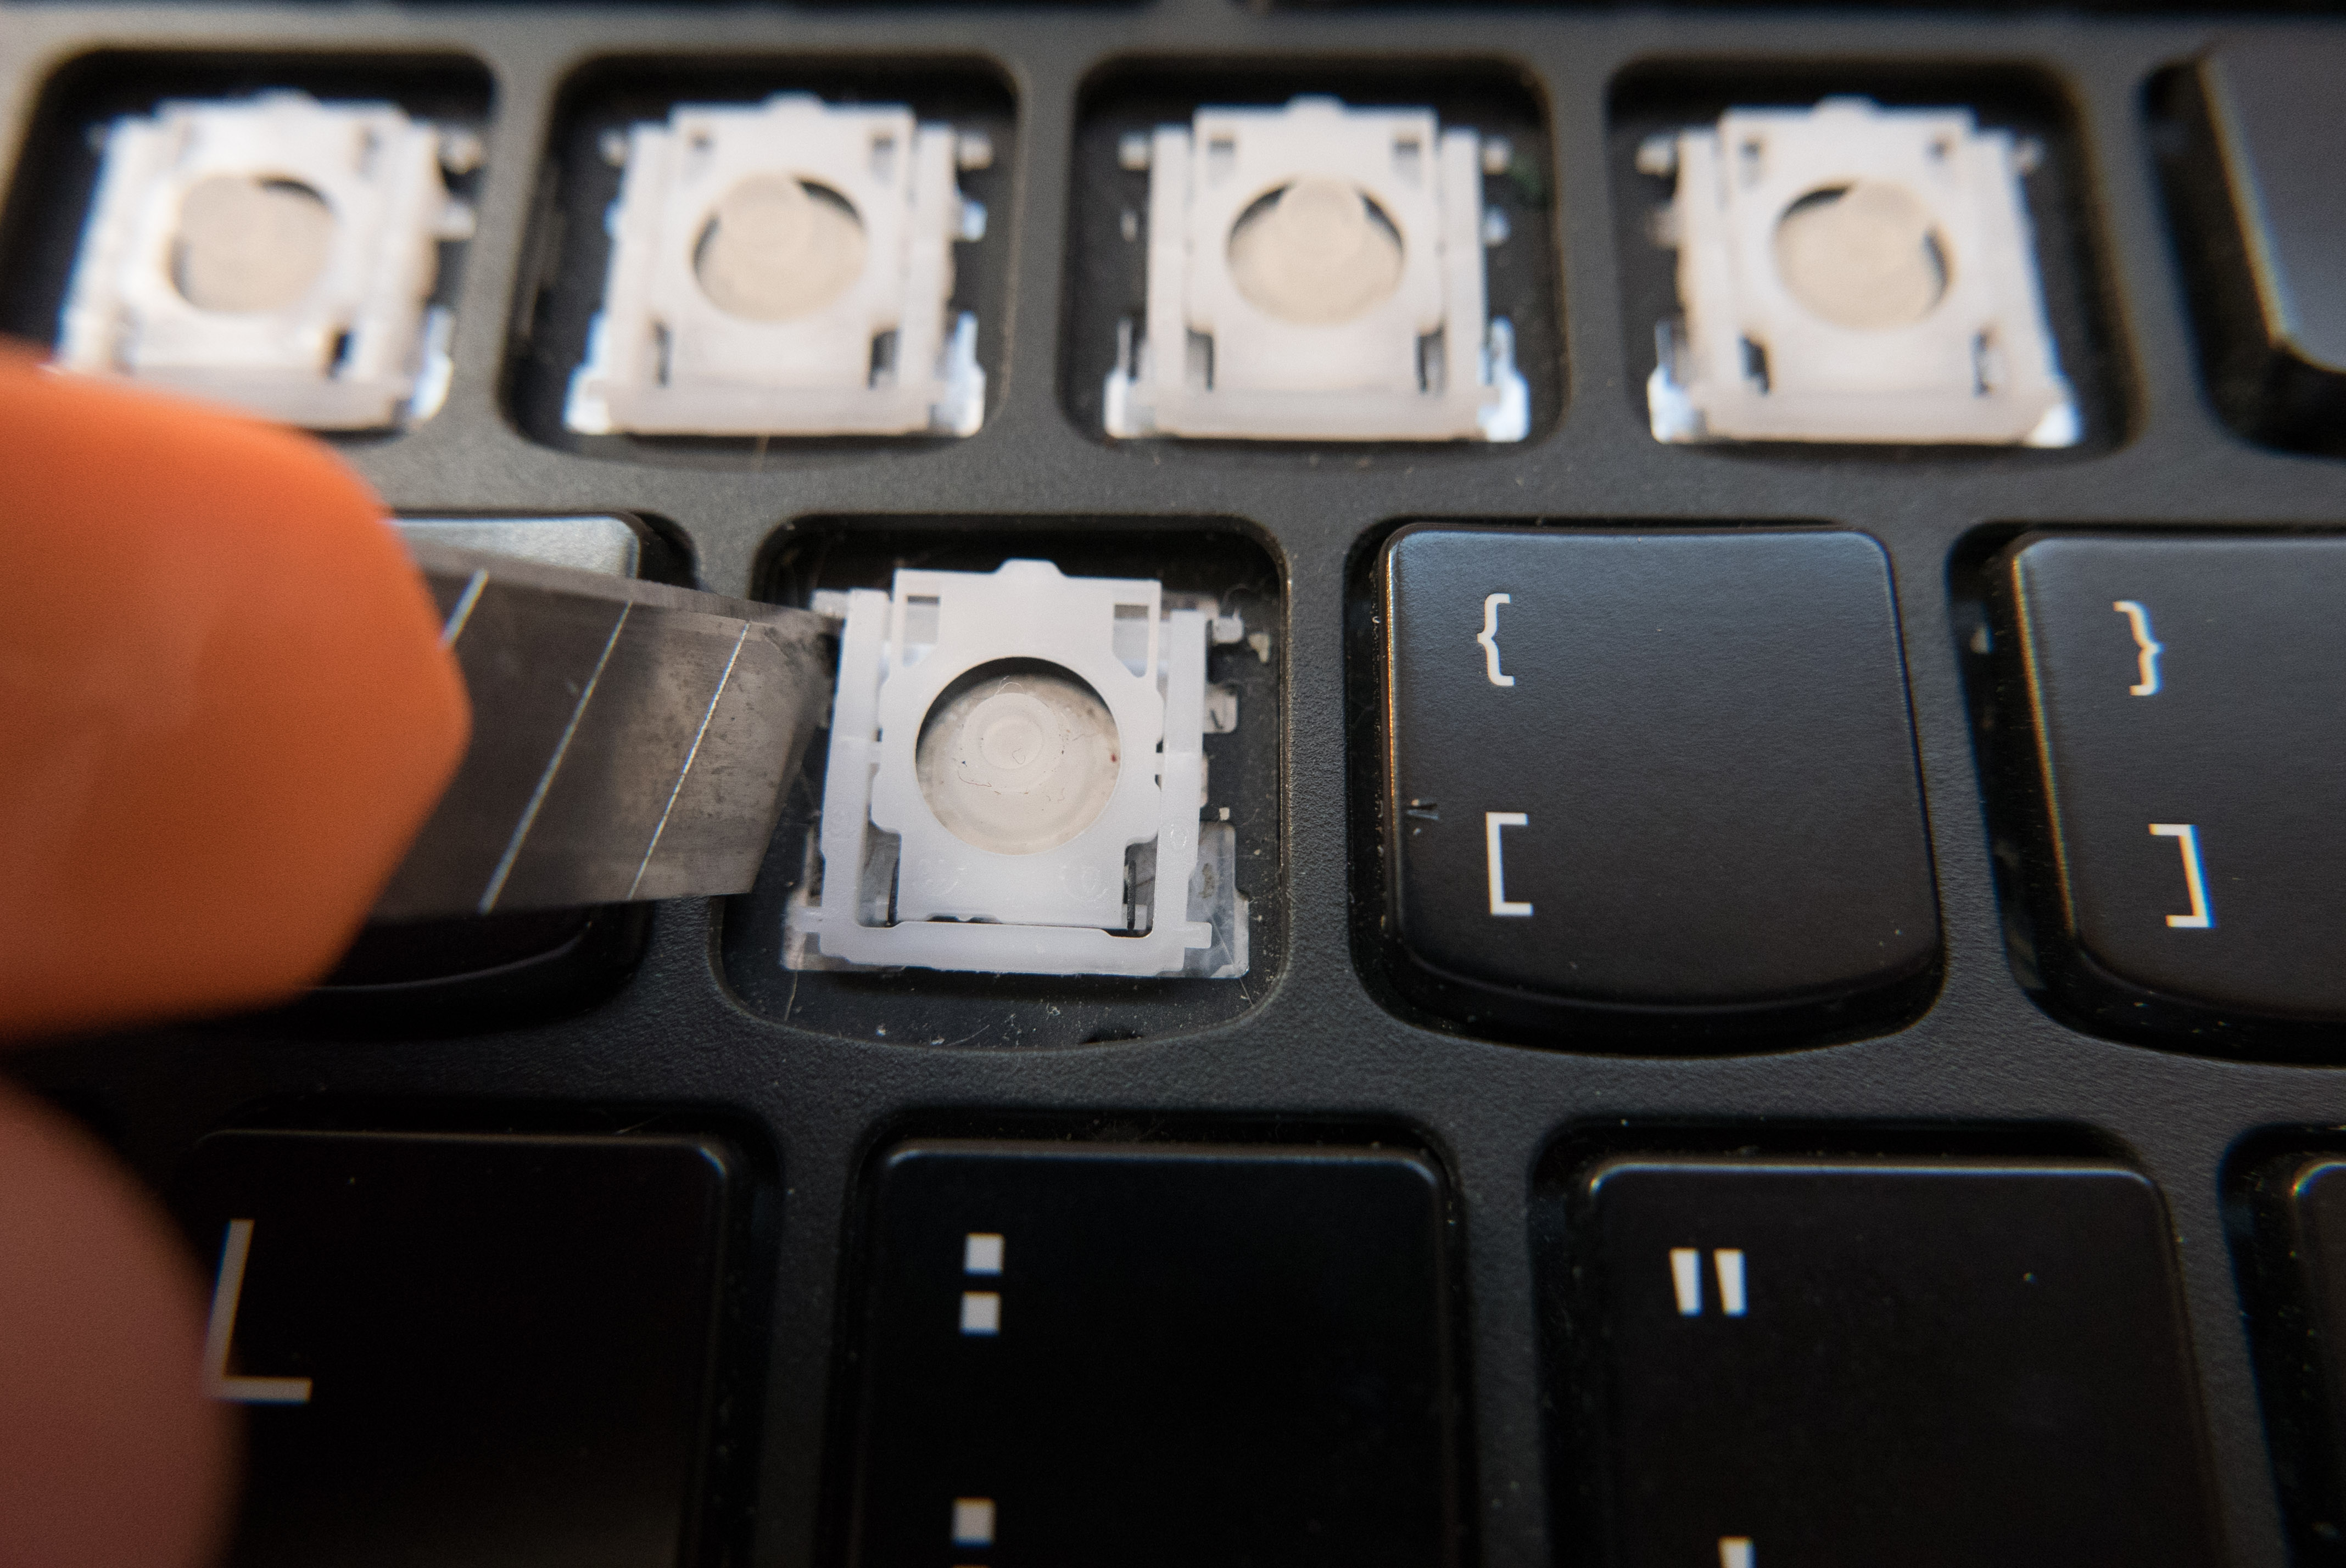
The arm has been pushed upwards. You can see it is now free.
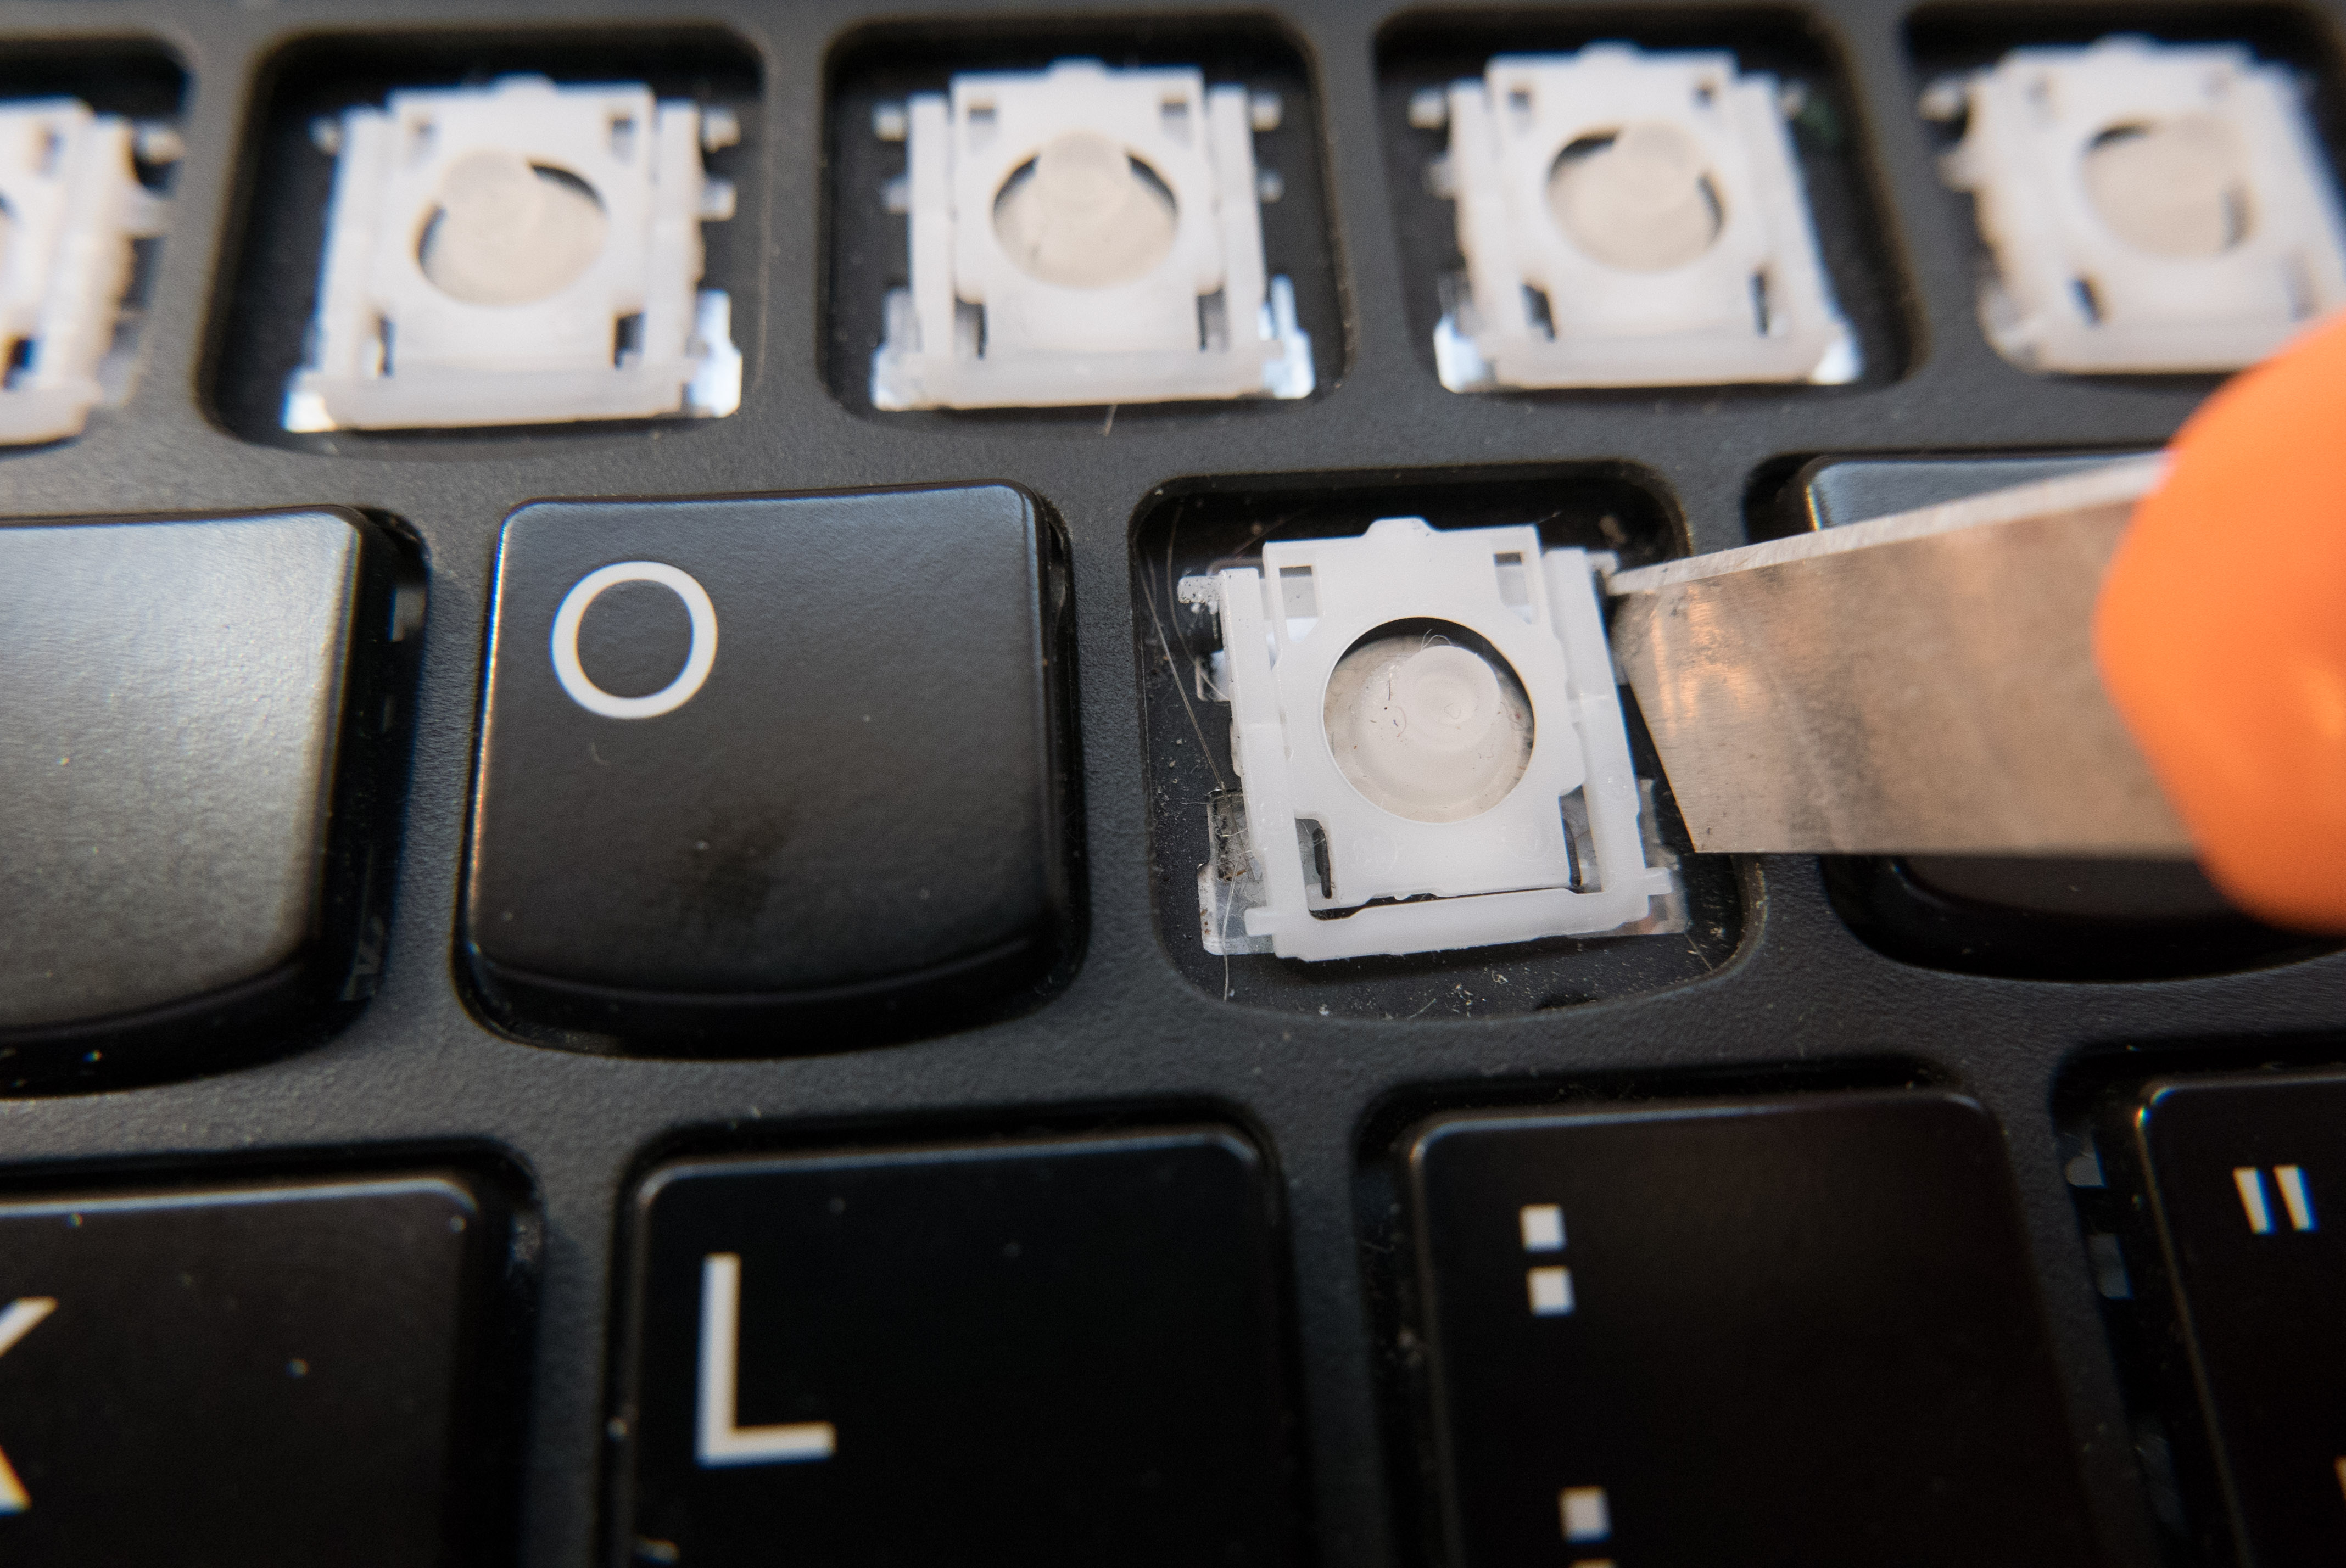
We’ll repeat the same procedure on the other side. The second side always requires less force.
And it is free. The lower part of the bracket slips out on its own.
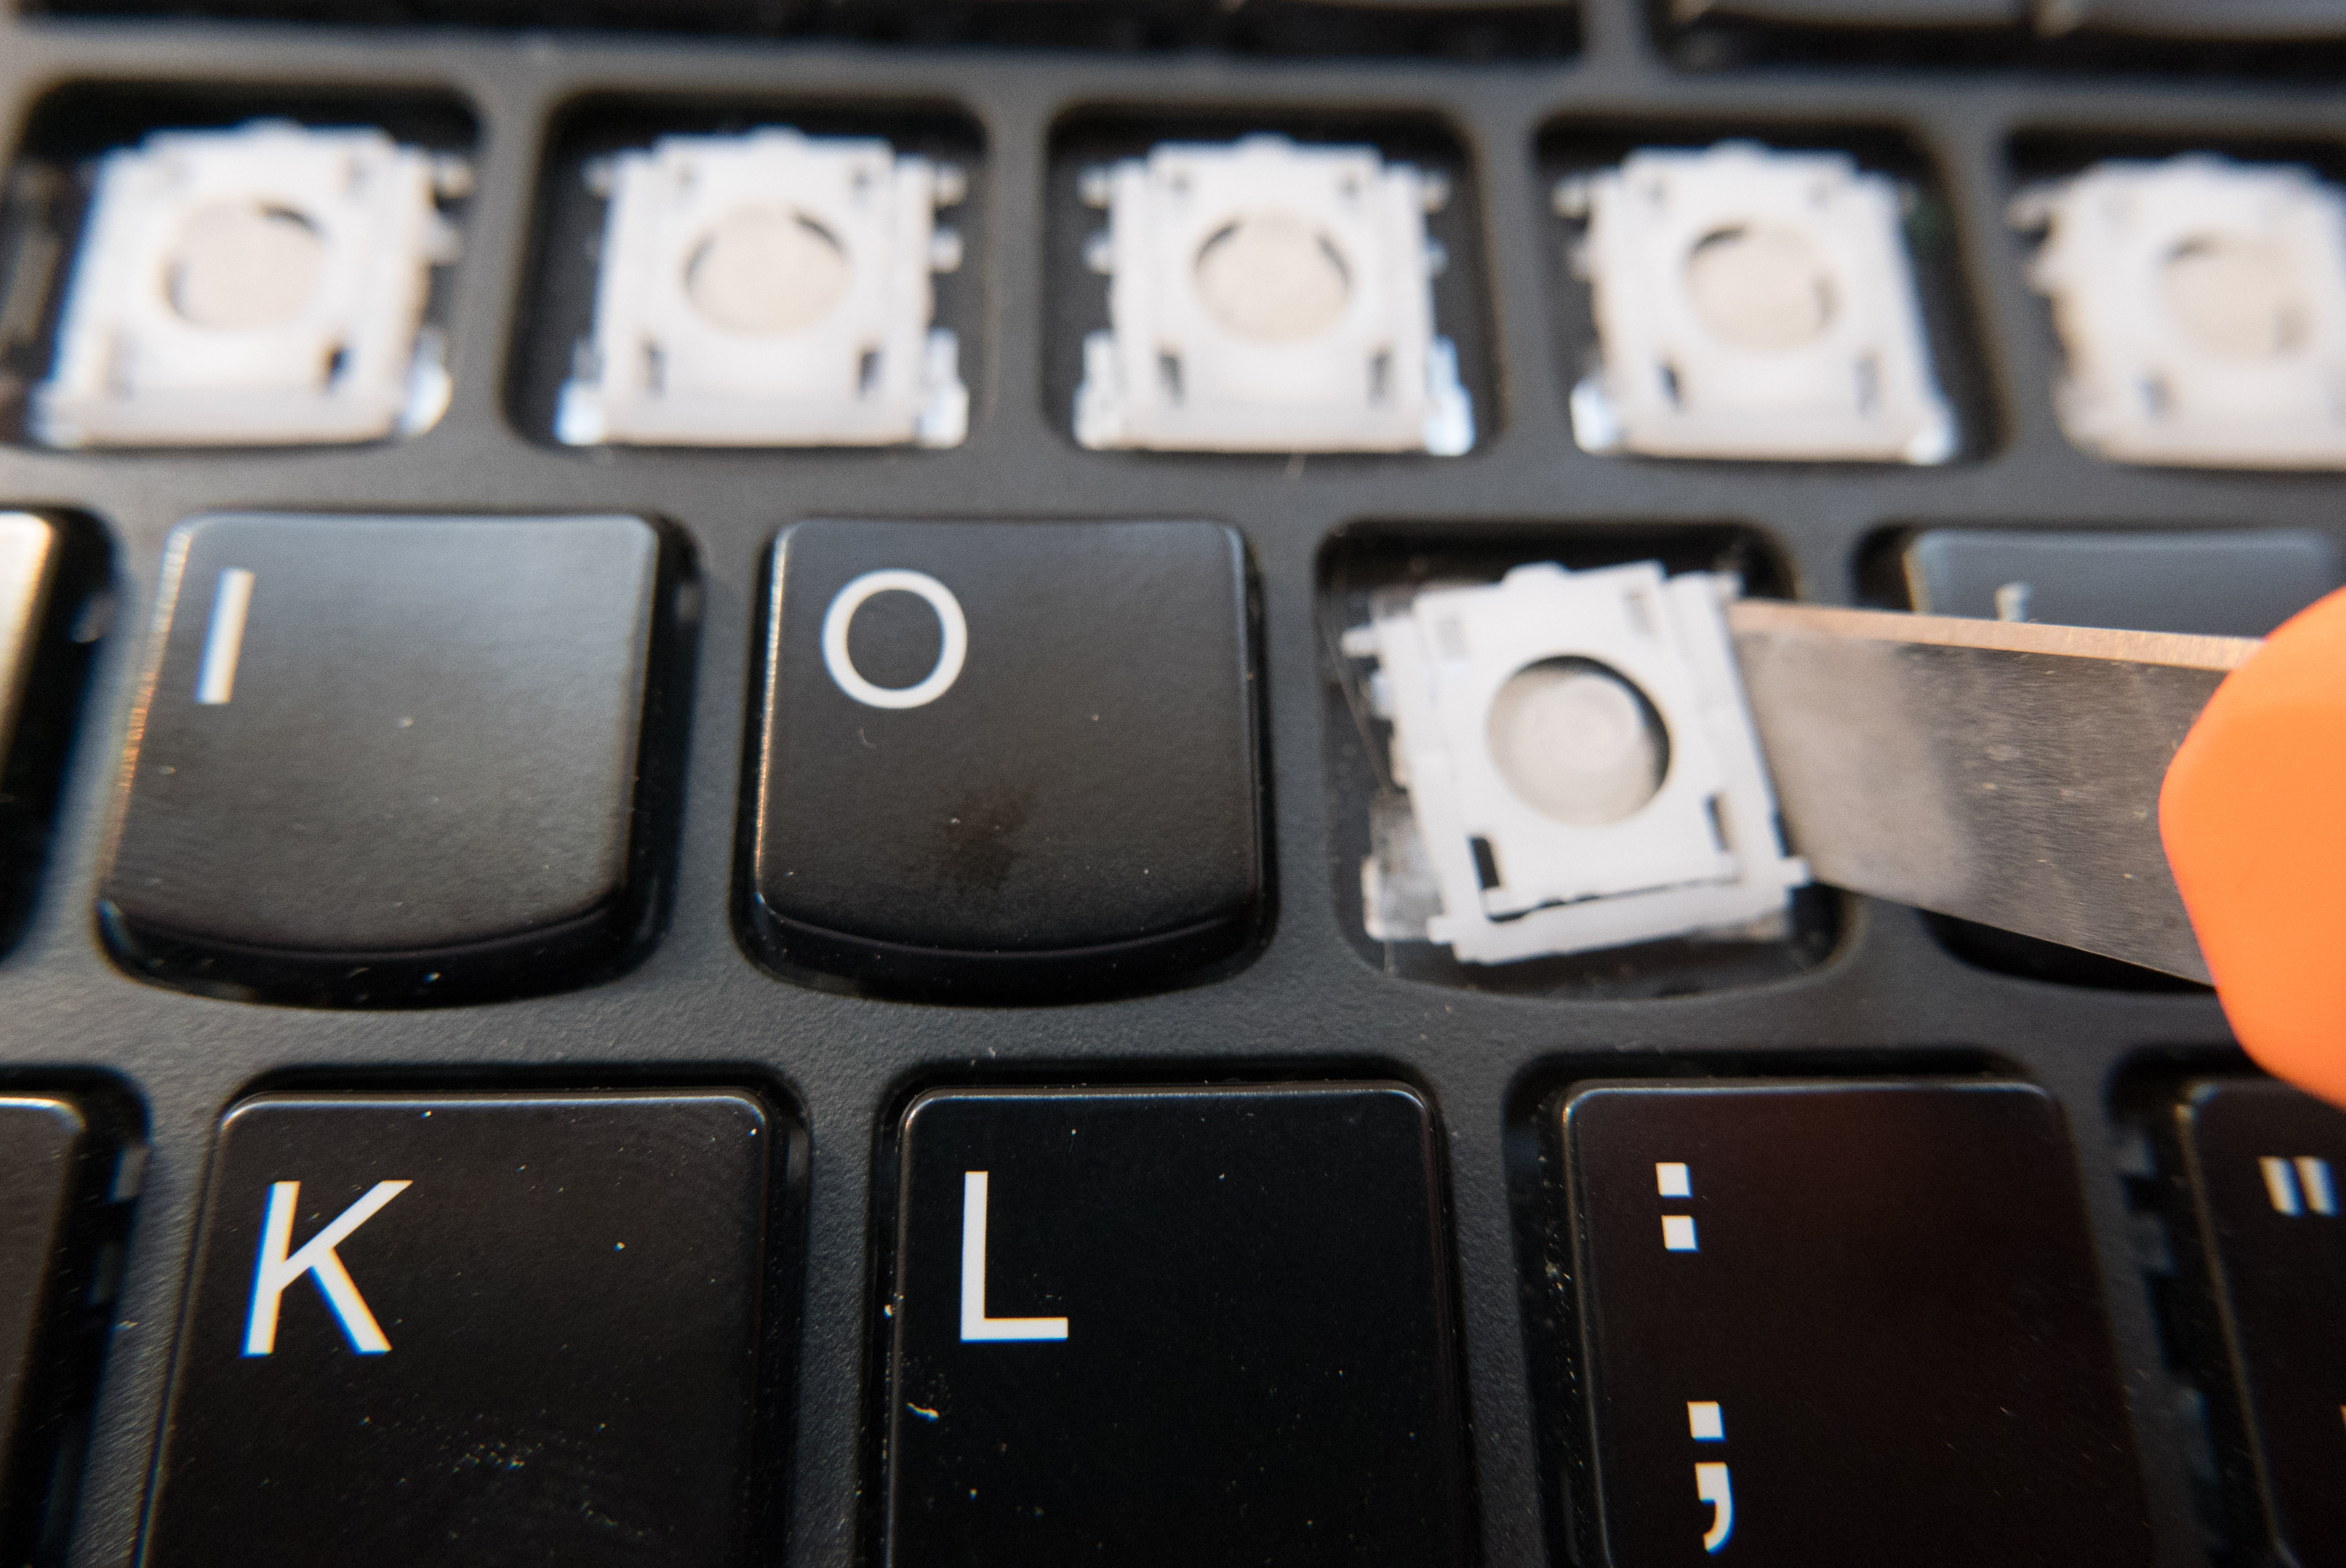
Continue to use your screwdriver or screwdriver to wiggle the bracket free.
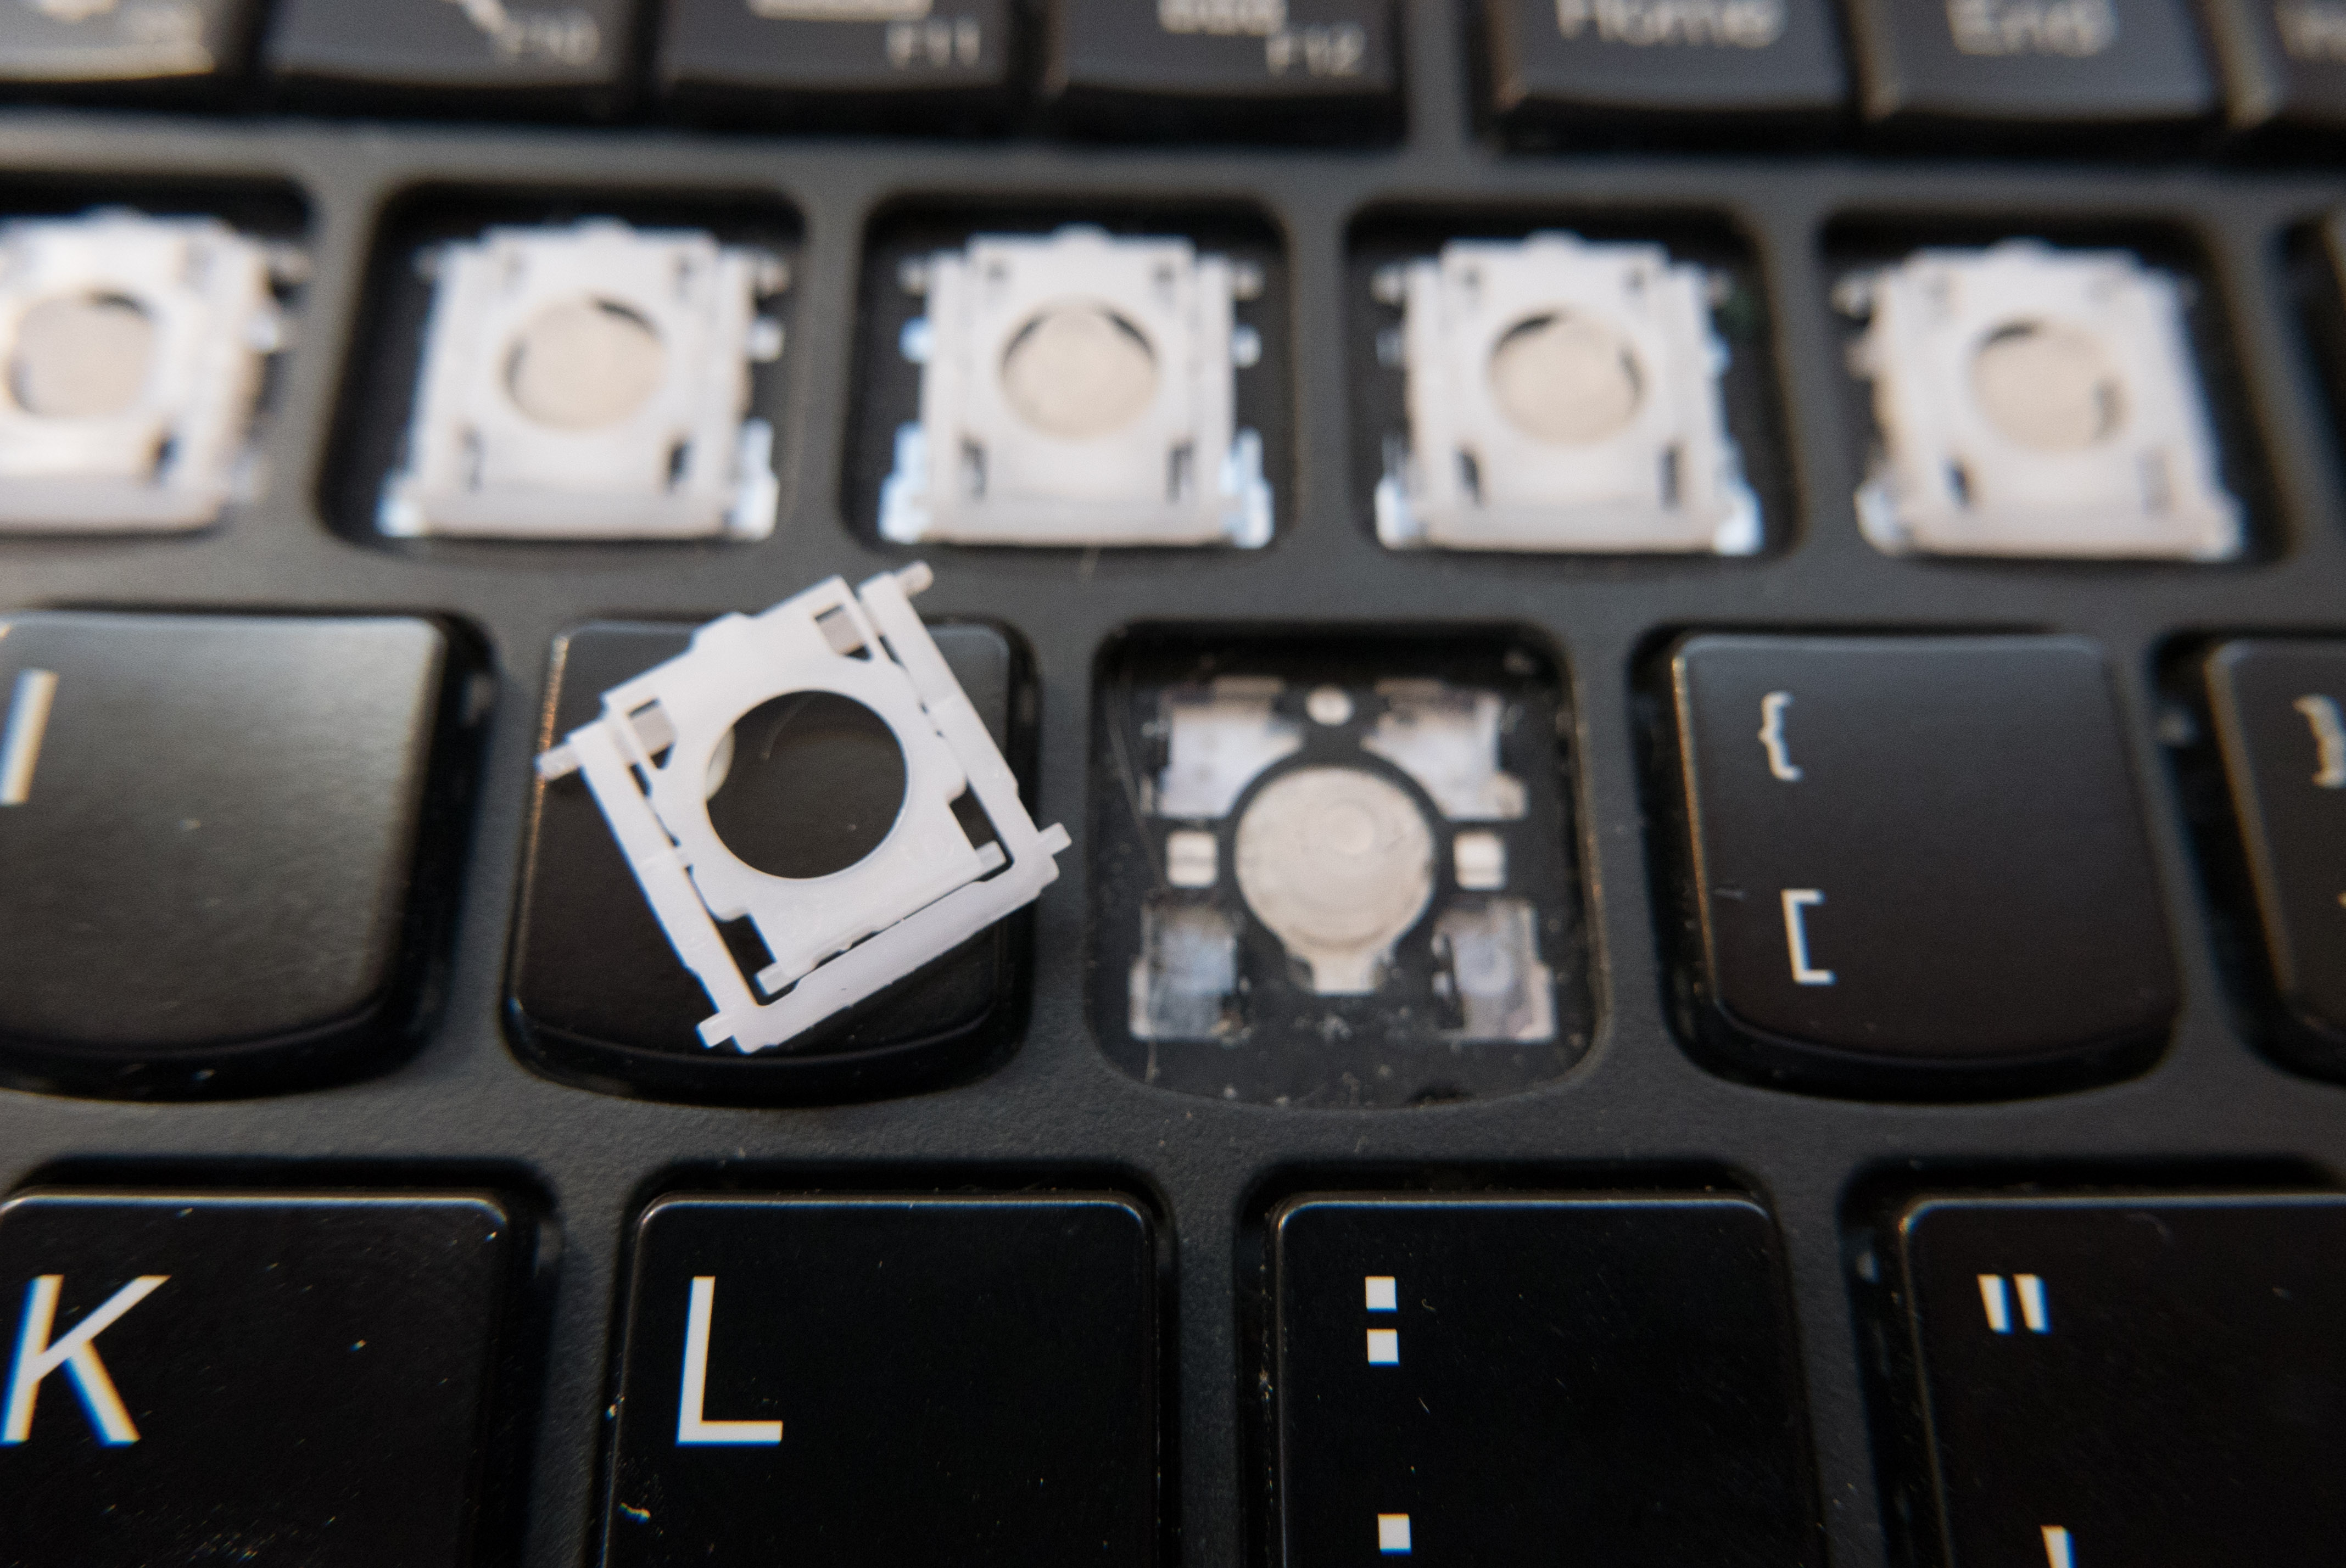
And the bracket has been freed!
Reassembly follows the same steps in reverse.
Usefull.
Helpfull.
Thanx. 🙂
nice post.. http://google.com
Thanks!
Works on my X1 carbon aswell
Thanks, just what I needed to fix a not working key on my ThinkPad 1X Ultrabook. There was debri under the key that was easy to remove with the key top off.
Thank you! Very useful. Just didnt want to force and damage them
Its easier to remove the keys with something like a pin or a toothpick (gently of course)
HELL NAW I BROKE MY DAMN COMPUTER!!!
great guide thanks
i m gonna try it in t420
thanks fixed my x1 uranium with carbon dioxide titanium built into the tantalum capacitor system after it stopped working because of the thinkpad
Great
that’s how to remove it. removing things is easy. I need how to fucking install it
very usefull as i was scred of breaking the bracket but how you mentioned to snap from up is very informating and i hope evenry one that needs the info finds your page