Kicker’s Free Airs left a legacy in the market. They have almost no enclosure requirements and are often drop-in upgrades.
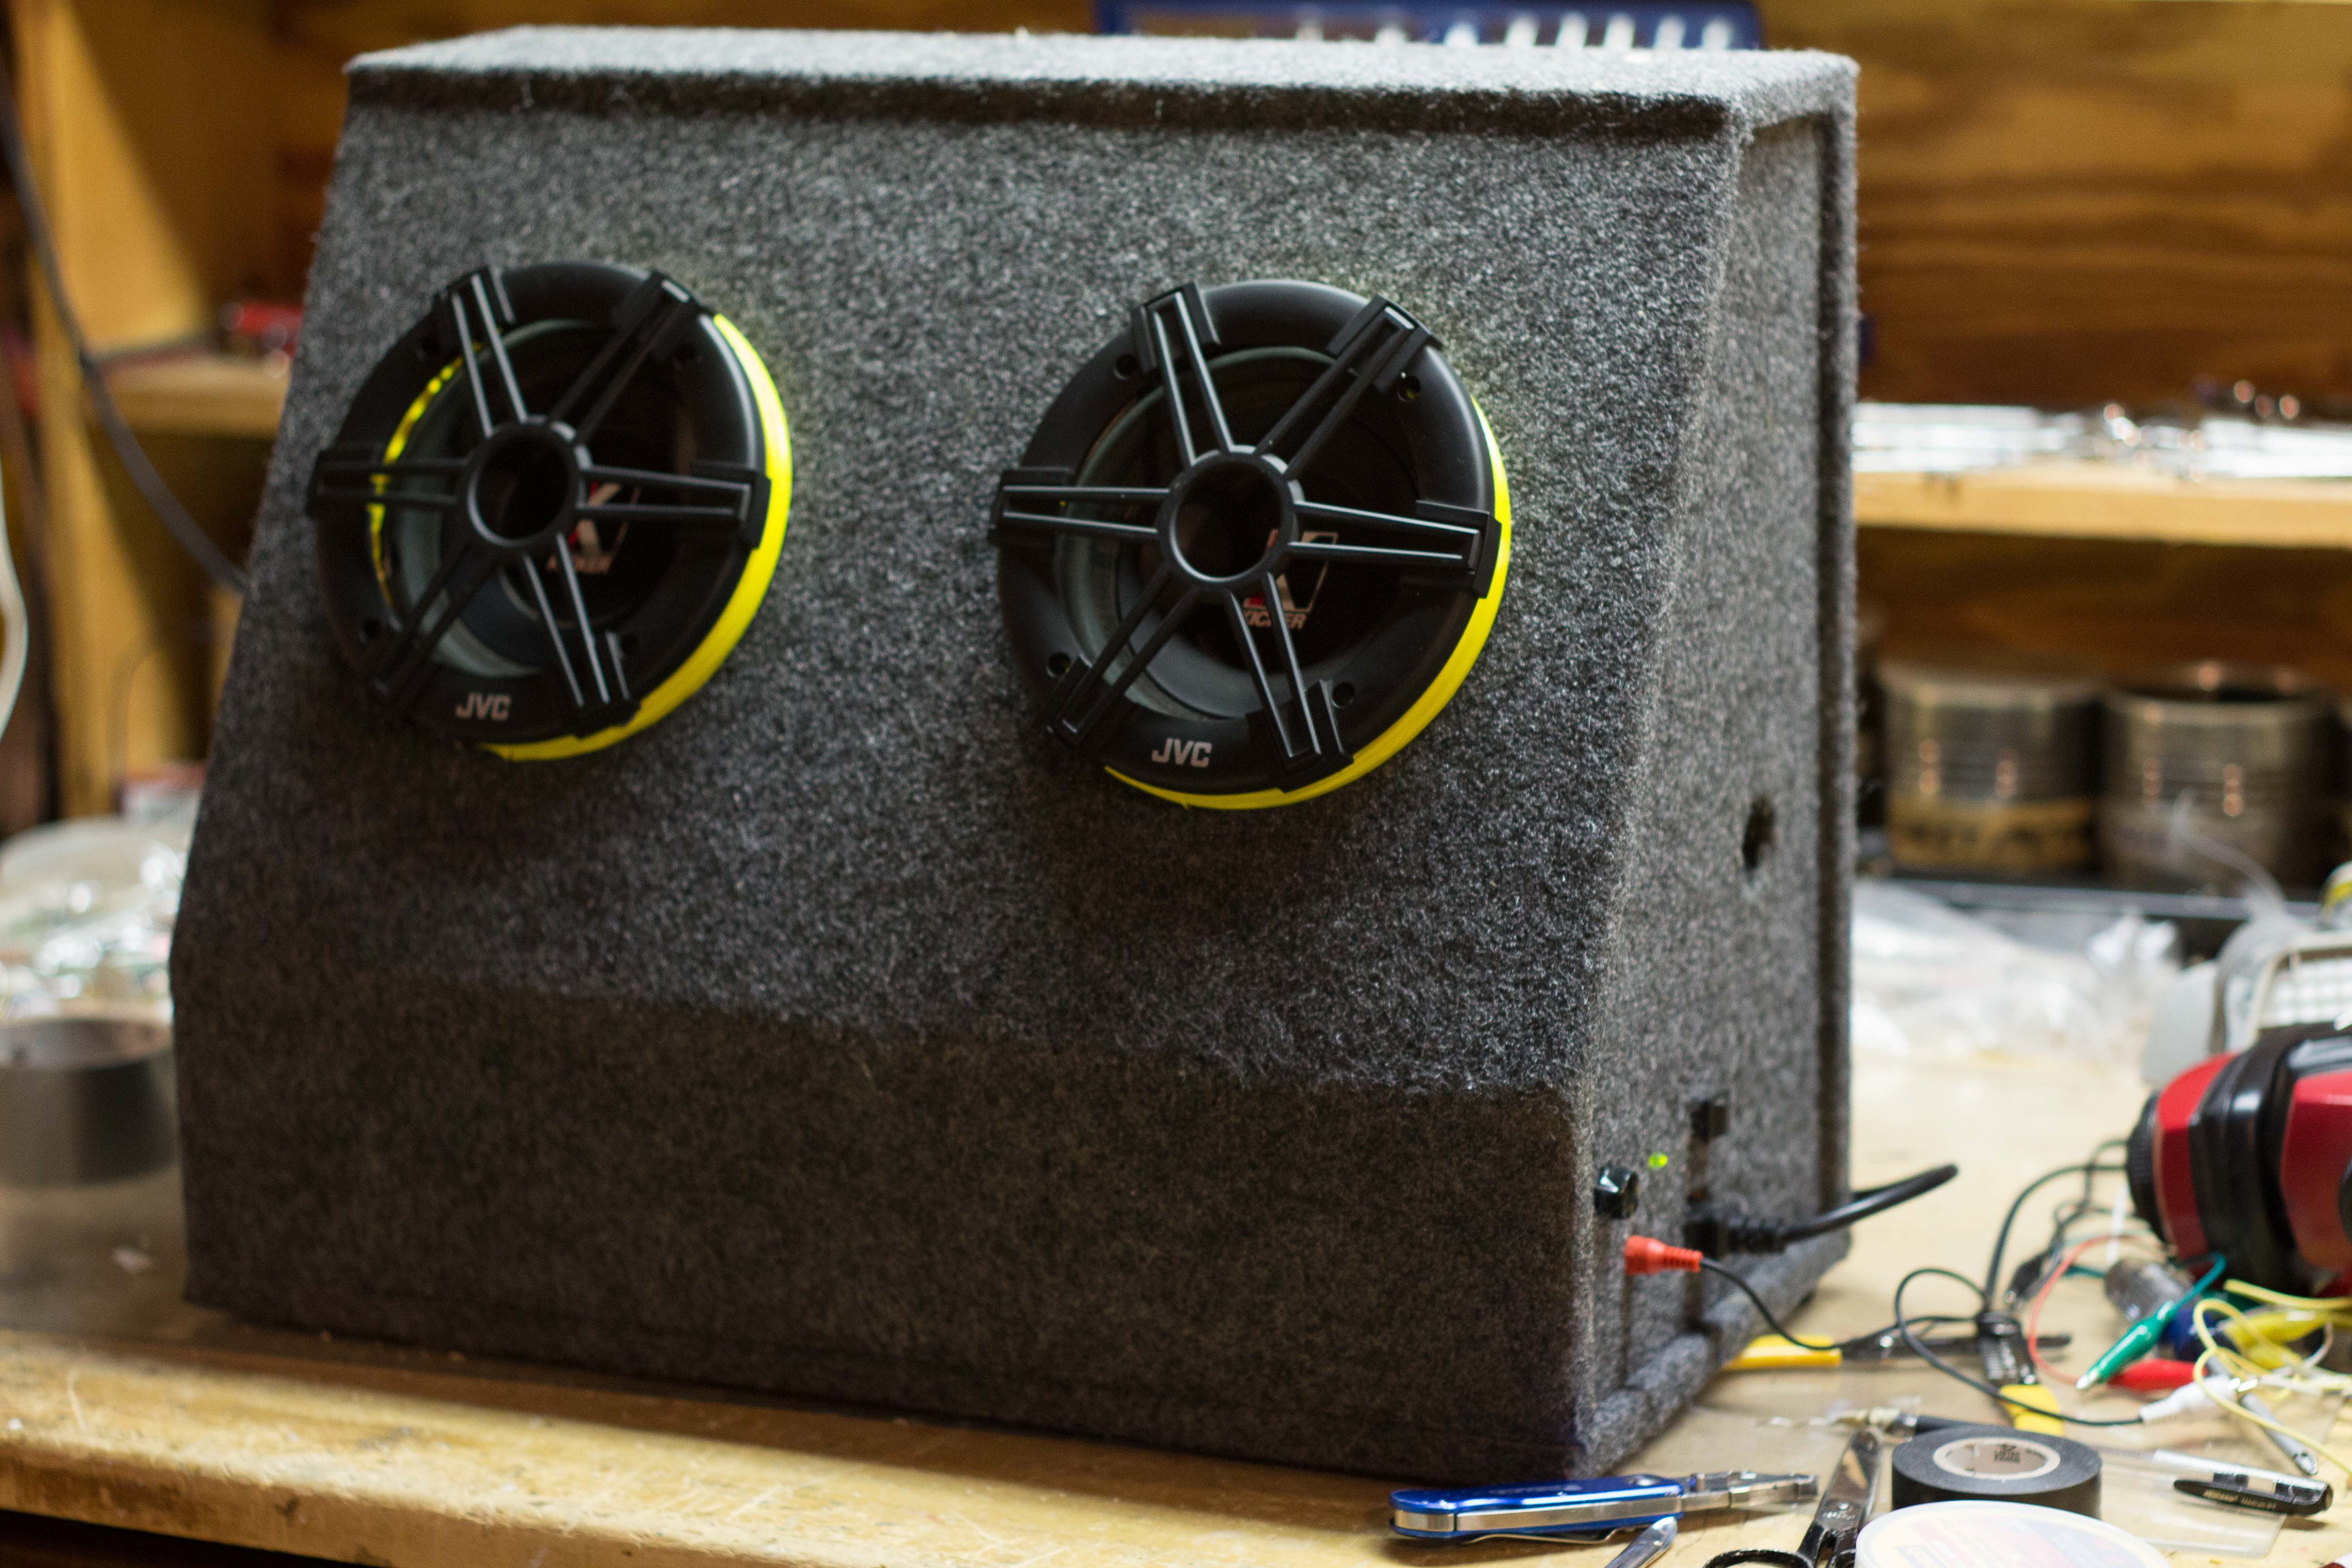
I picked up two used 6.5″ Kicker Free Air subwoofers. “Free Air” is a misnomer, they still need an enclosure. However the enclosure space can be relatively large. The trunk of your car could be considered an enclosure, as long as the space in front of these speakers is sealed off from the space behind these speakers. I don’t plan to put these in a car, they are going to be for a home sound system. I like the early 2000’s sub look that these Kickers have: thickly stitched cones, paint chipped rusting frame, rotting seal, and corroded leads. At one point they were very nice, now they are fair. I can deal with fair speakers if they are free.
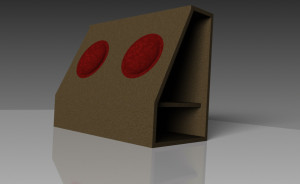
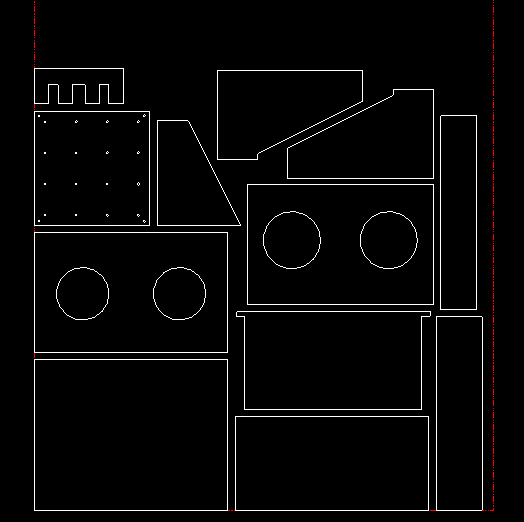
I started by drawing a slanted front prism box. I found a PDF from Kicker that recommended 0.35cu.ft. for each 6.5″ sub and used that to dimension a slanted front prism. I integrated space for the amp and power supply. It became a truncated slanted prism. I drew it up in Inventor, then brought the parts into AutoCAD to get them cut on a CNC machine(not my CNC).
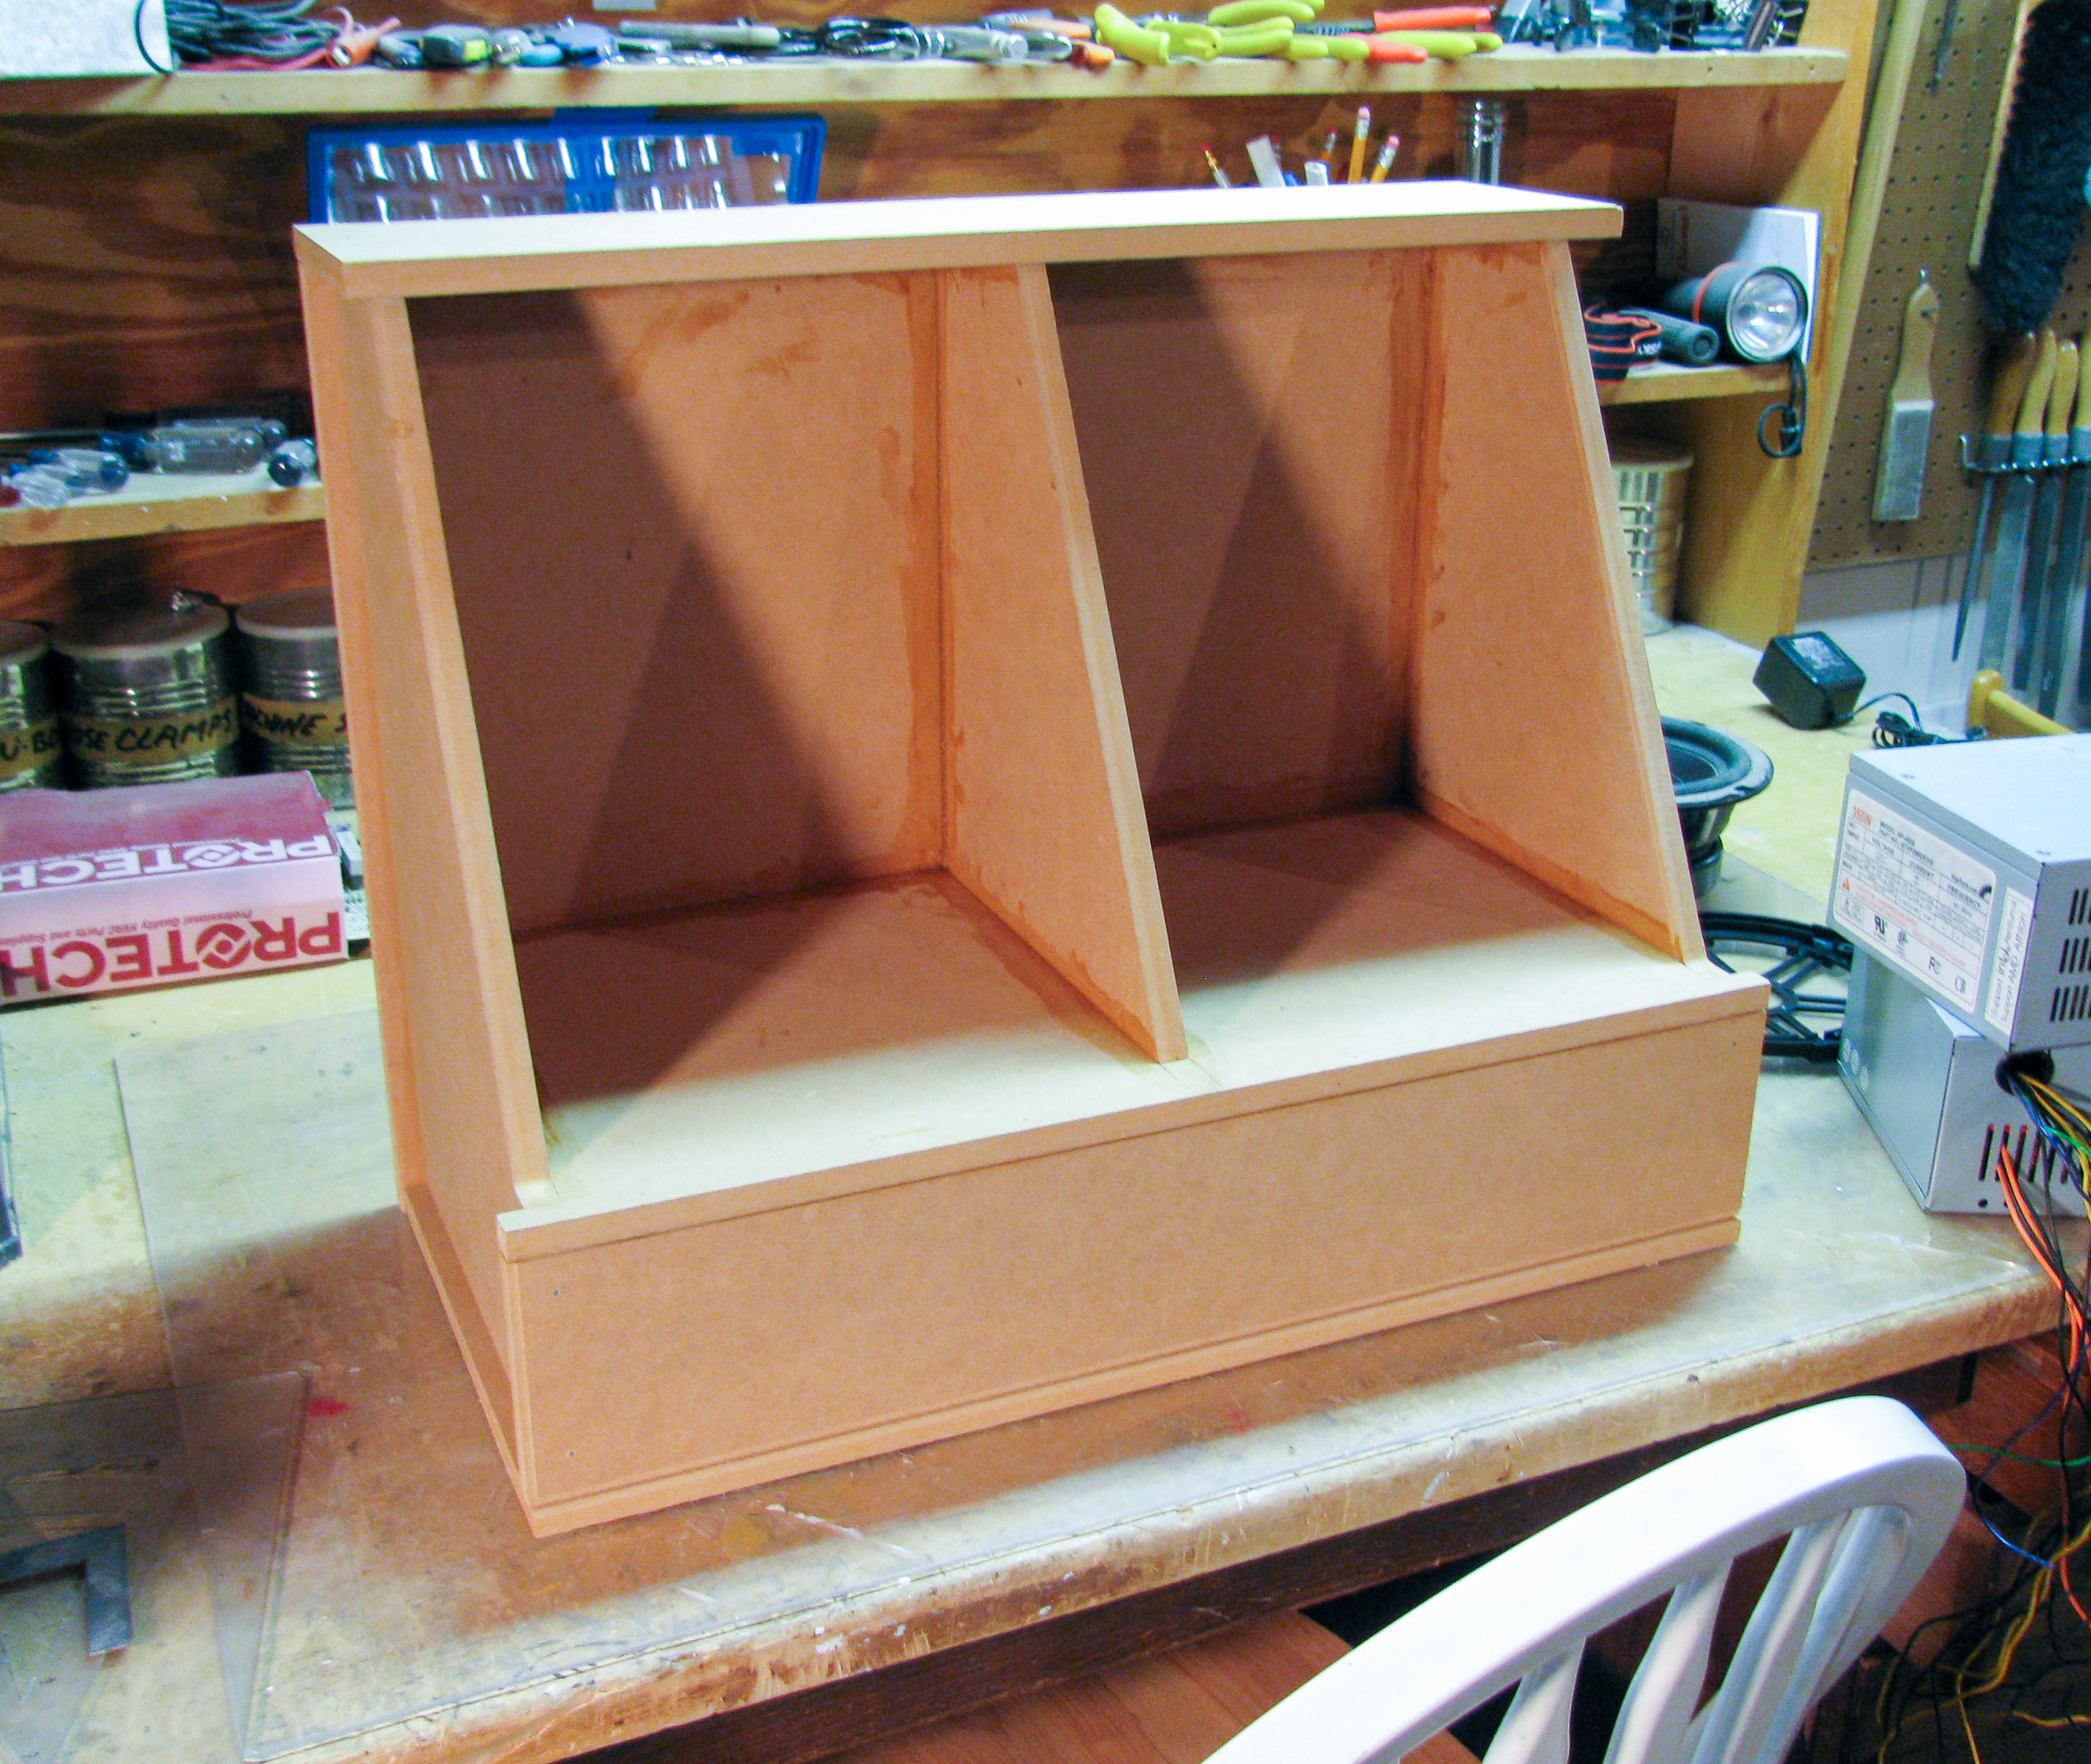
I cut the parts out of a half sheet(4’x4′) of 1/2″ MDF. That cost $15. I used 2 layers of 1/2″ MDF for the front where the speakers mount, for some additional sturdiness. It turned out to be overkill and unnecessary. These little things don’t generate force like 1000 watts into a pair of 15″ subs.
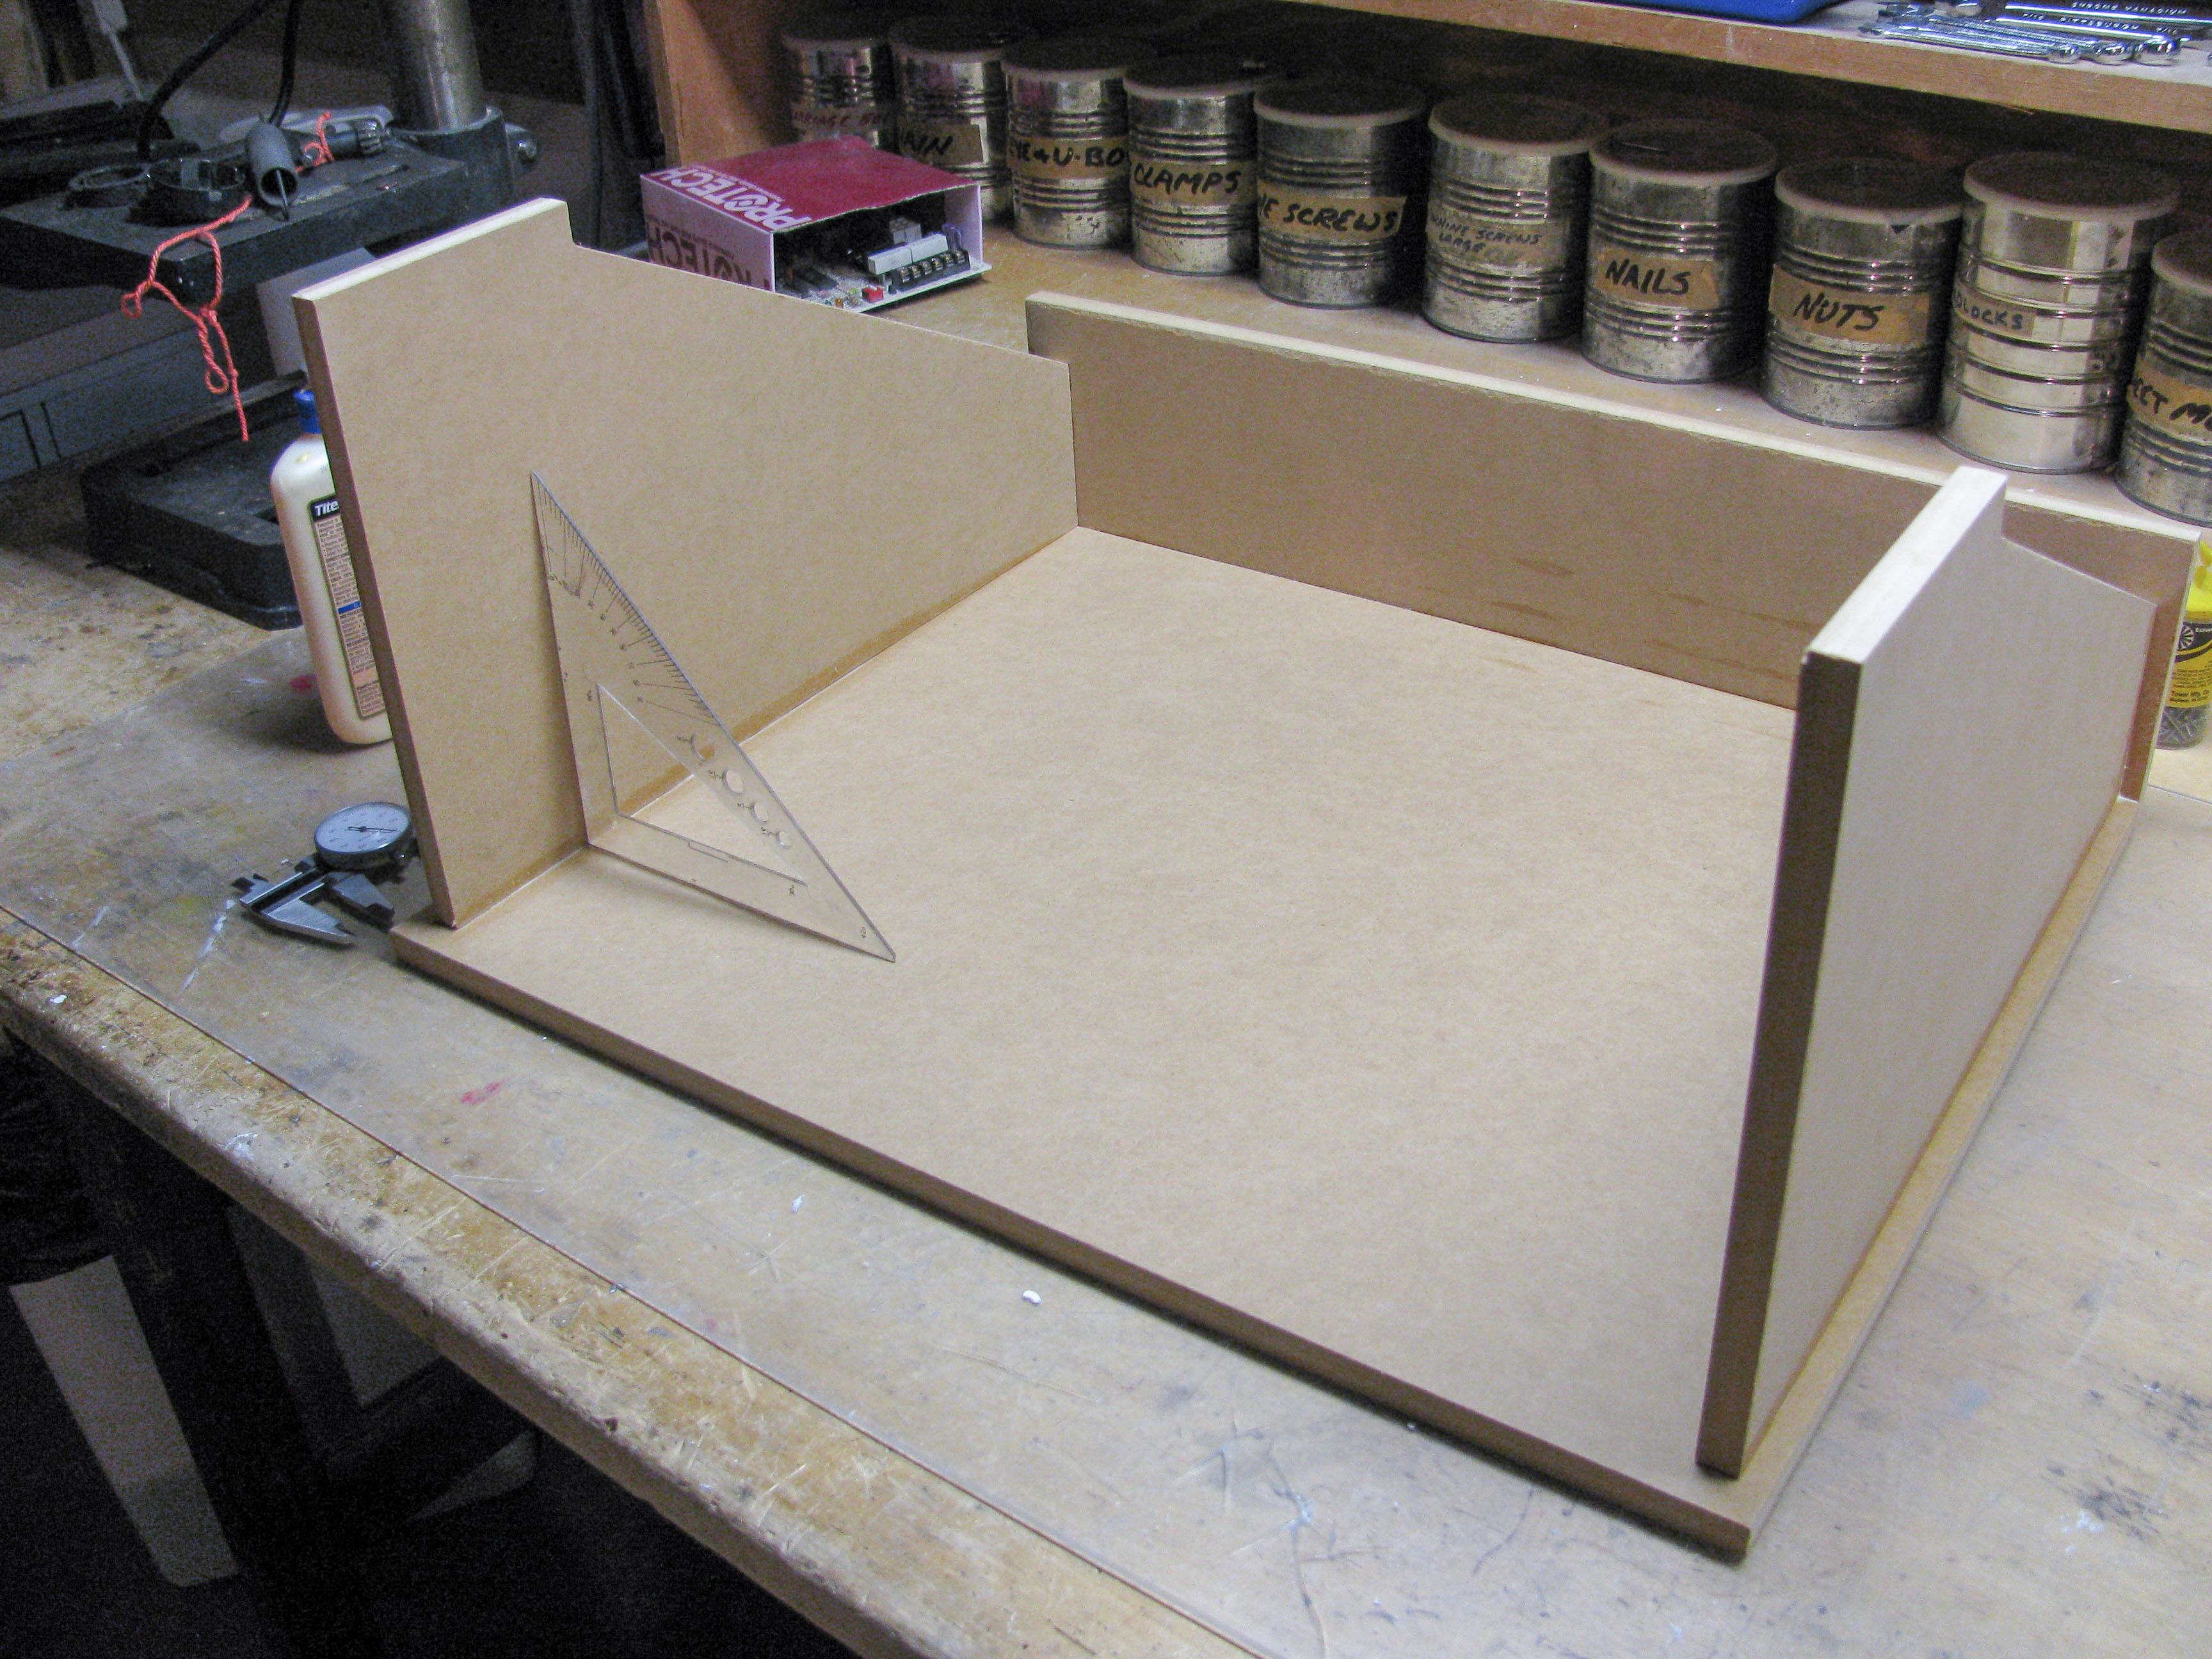
Assembling the box was as easy as assembling a Lego set of a cube. Each part was within 1/64″ of where it belonged (thank you CNC technologies). Since the absence of any leaks is critical, I resealed every seam with a mixture of wood glue and sawdust. The sawdust makes the glue more viscous and reduces how much glue you apply(I put sawdust in any baked goods I make to save $$$). An alternative to wood glue sawdust is silicone caulk, both stick to wood easily and provide a durable seal.
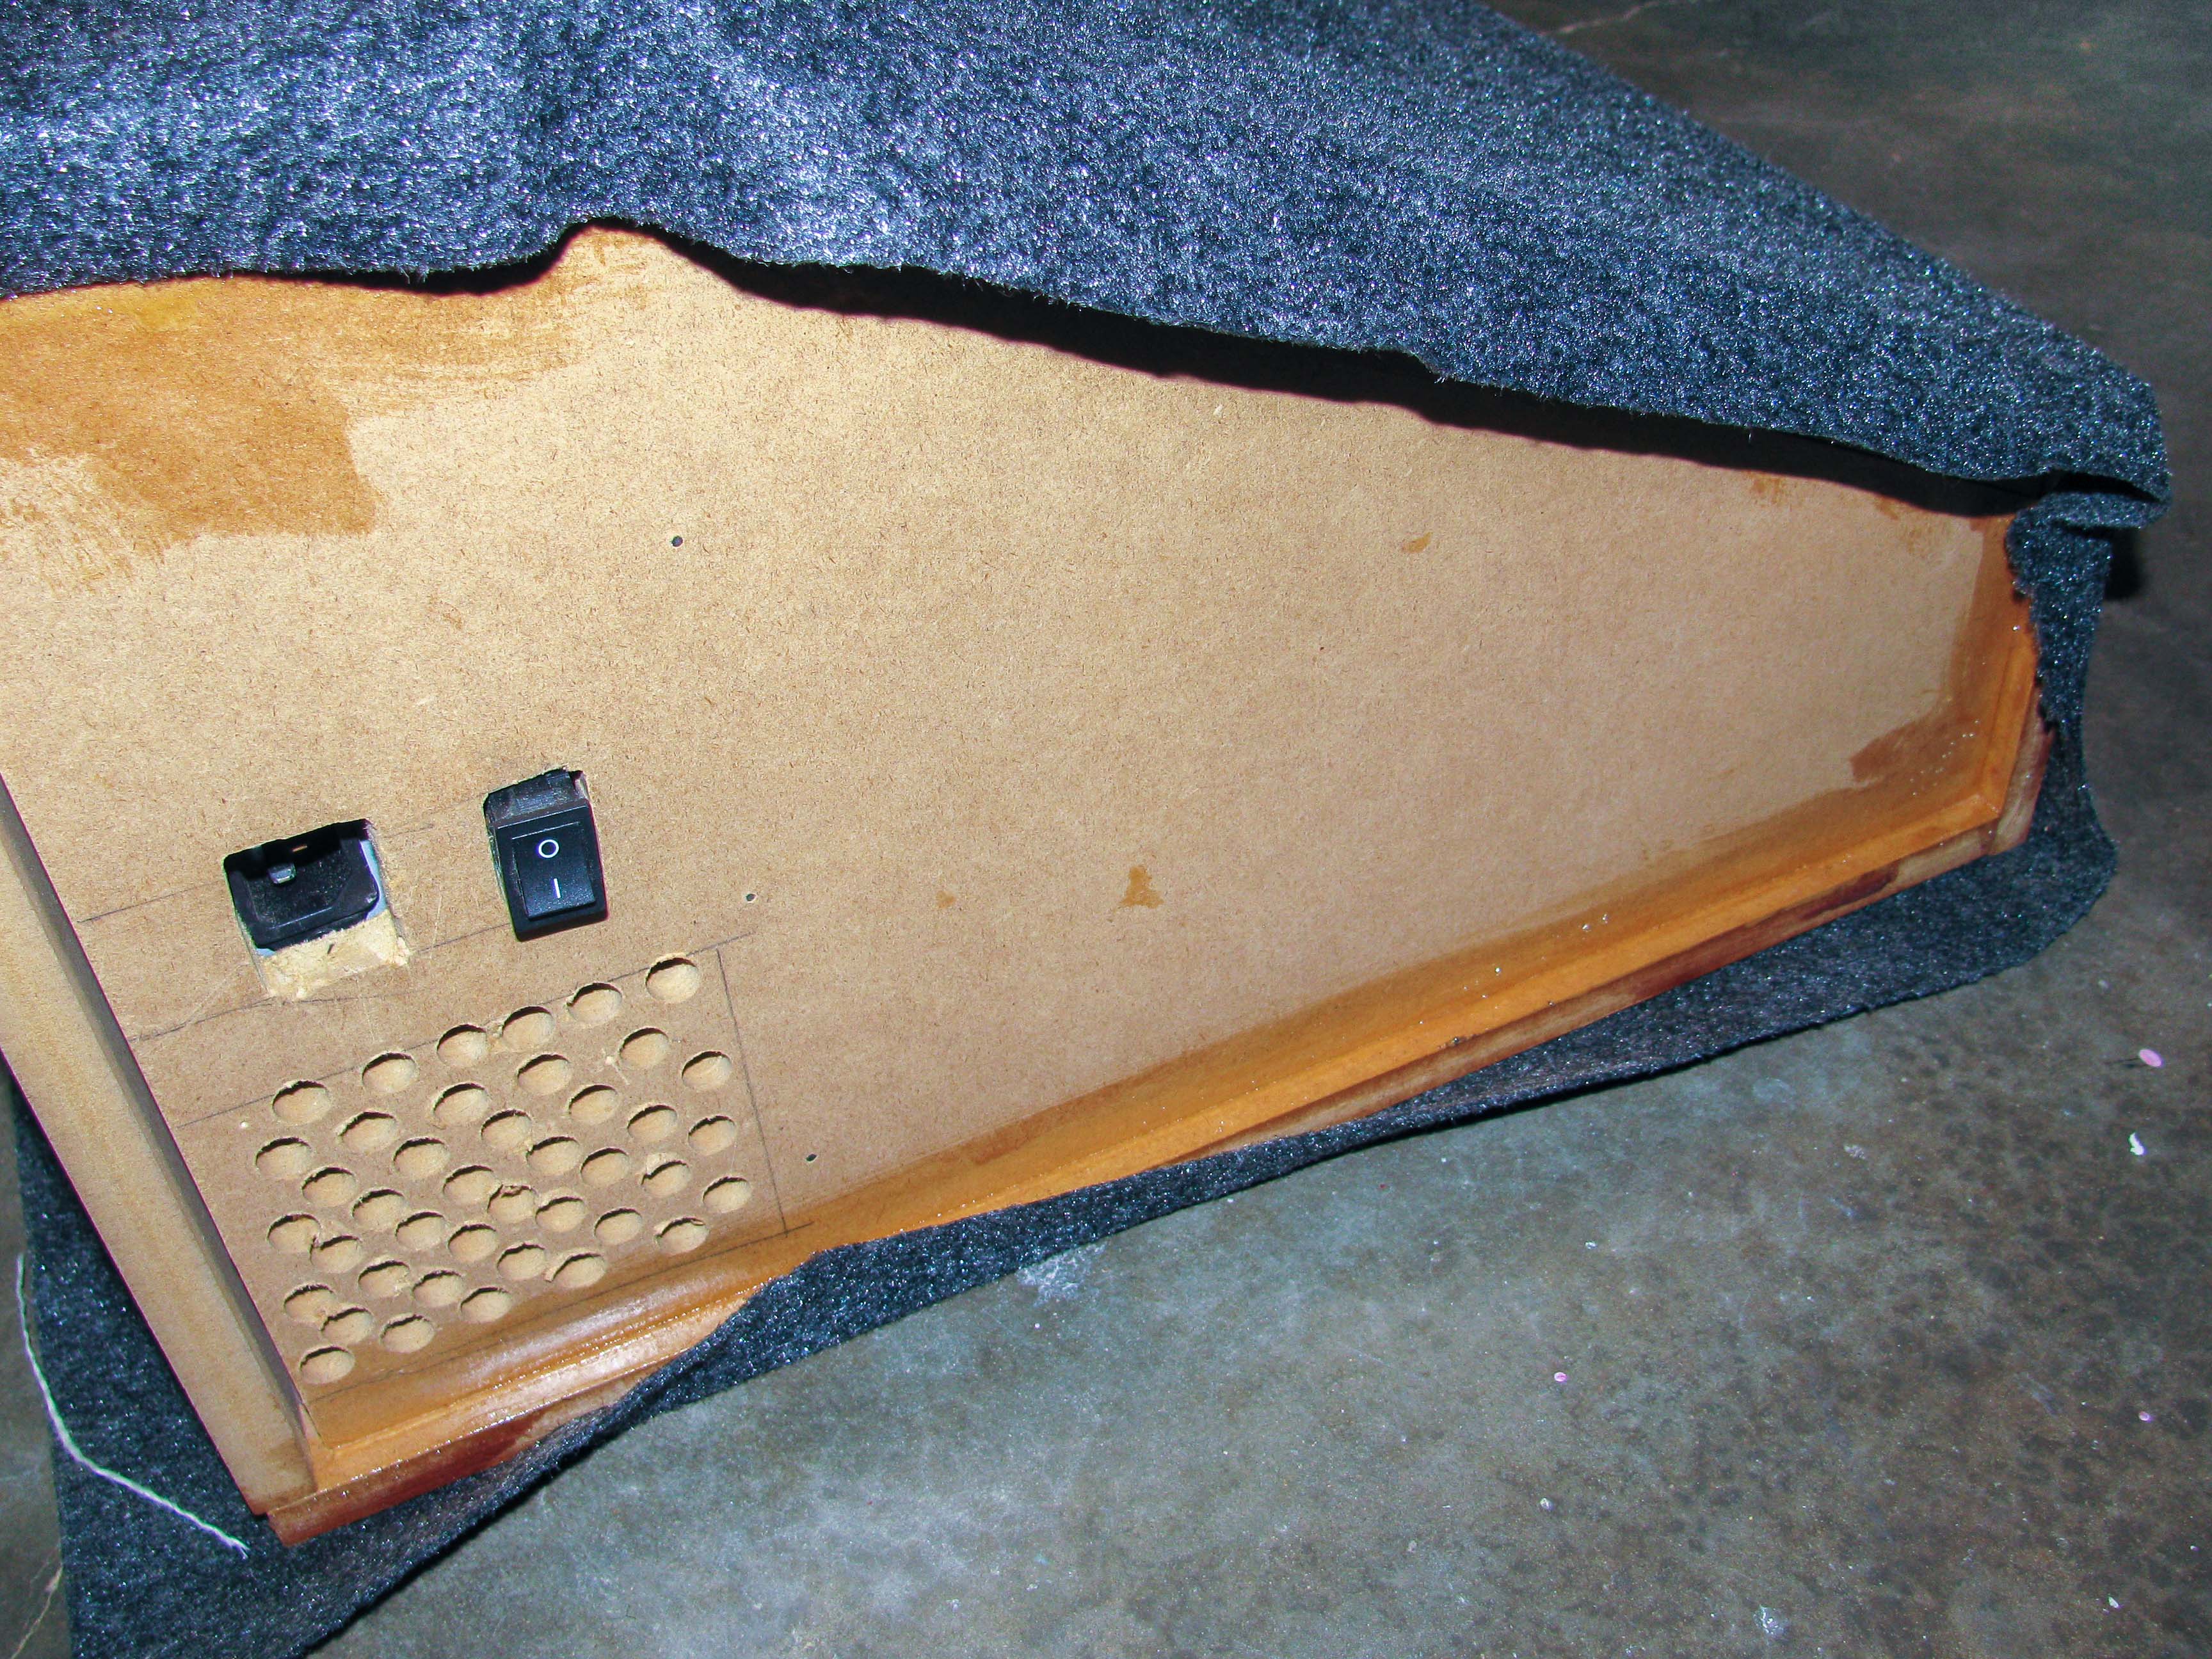
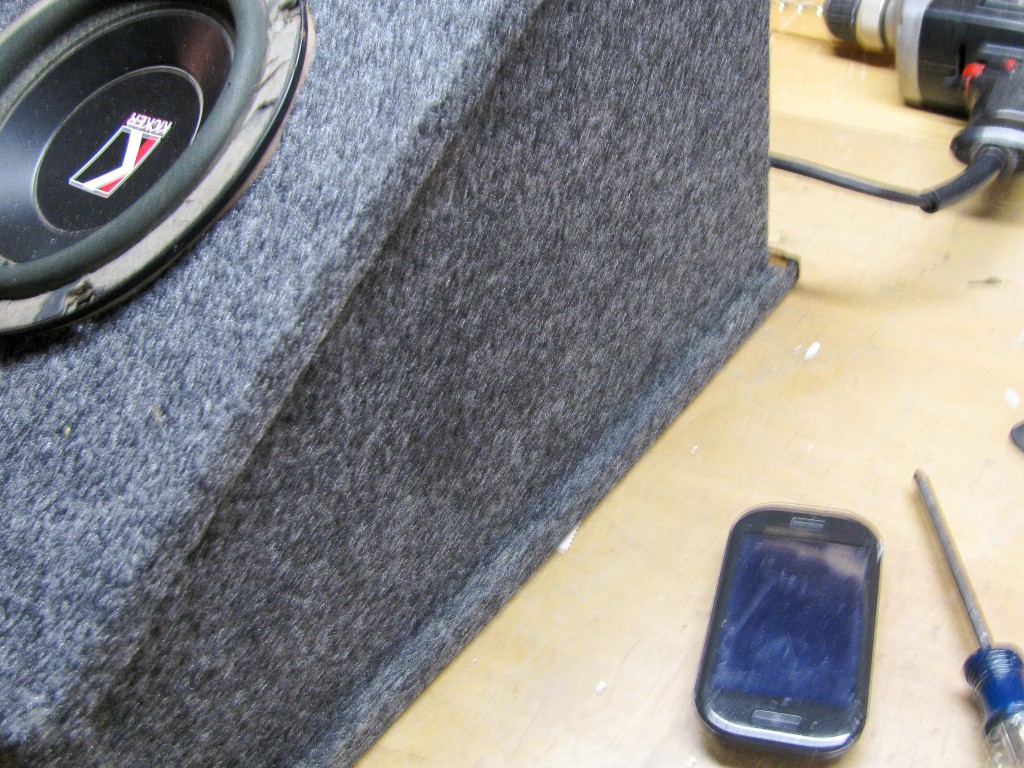
I decided to cover the box in carpet, although that gives it a car trunk look, I don’t like the look of MDF, I don’t want to paint it, and carpet is cheap and easy to apply. I spent $9 on ebay for 3’x4′ of speaker box carpet, which is different than regular carpet. It’s more stretchy, thin, and smoother on one side for gluing. I wrapped one continuous piece around the box, then added the inlayed sides. Contact cement worked great.
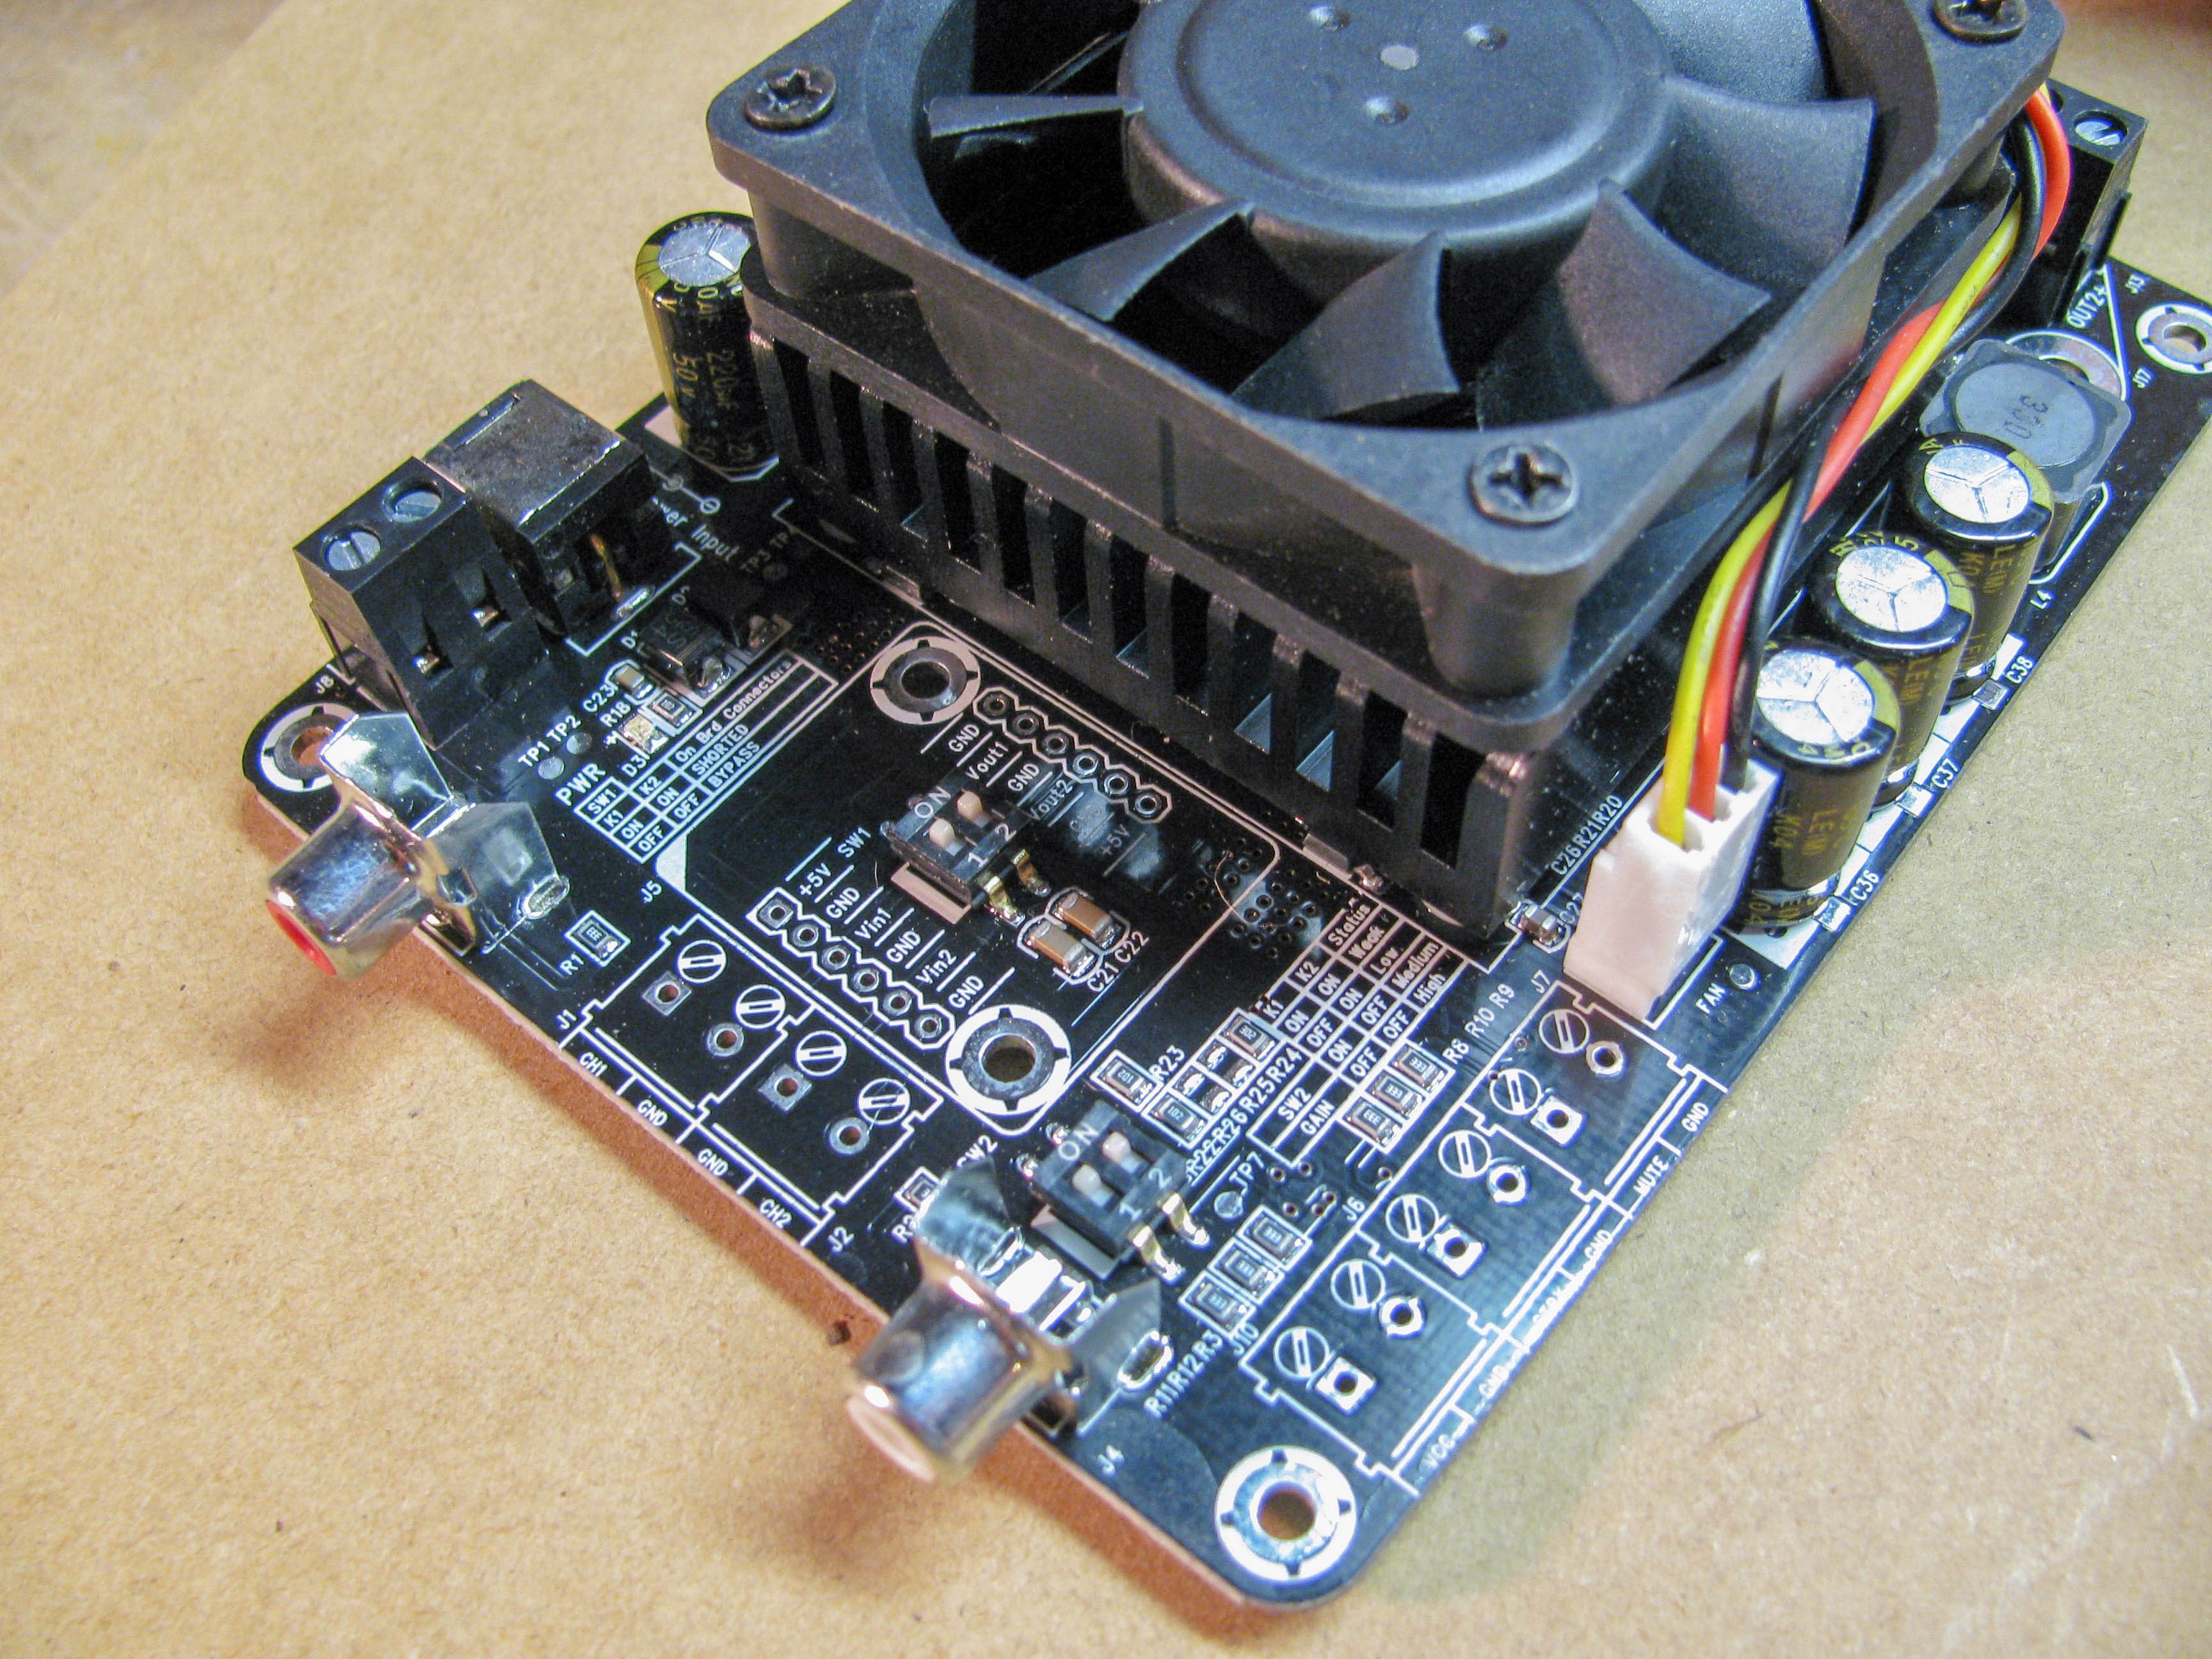
Next up is the electronics. I bought a Sure TDA7498 2x100W(@6 ohms) Class D amp from Parts Express for $35. It is a DIY amp, I could have bought a sub plate amp, but this is about $60 cheaper and gives me more freedom on wiring and set up. This amp has a number of nifty features: accepts 14-39V power input, adjustable gain for line level RCA input, 22-20,000Hz response, OVP, OCP, OTP(temp protection), small size, and integrated fan.
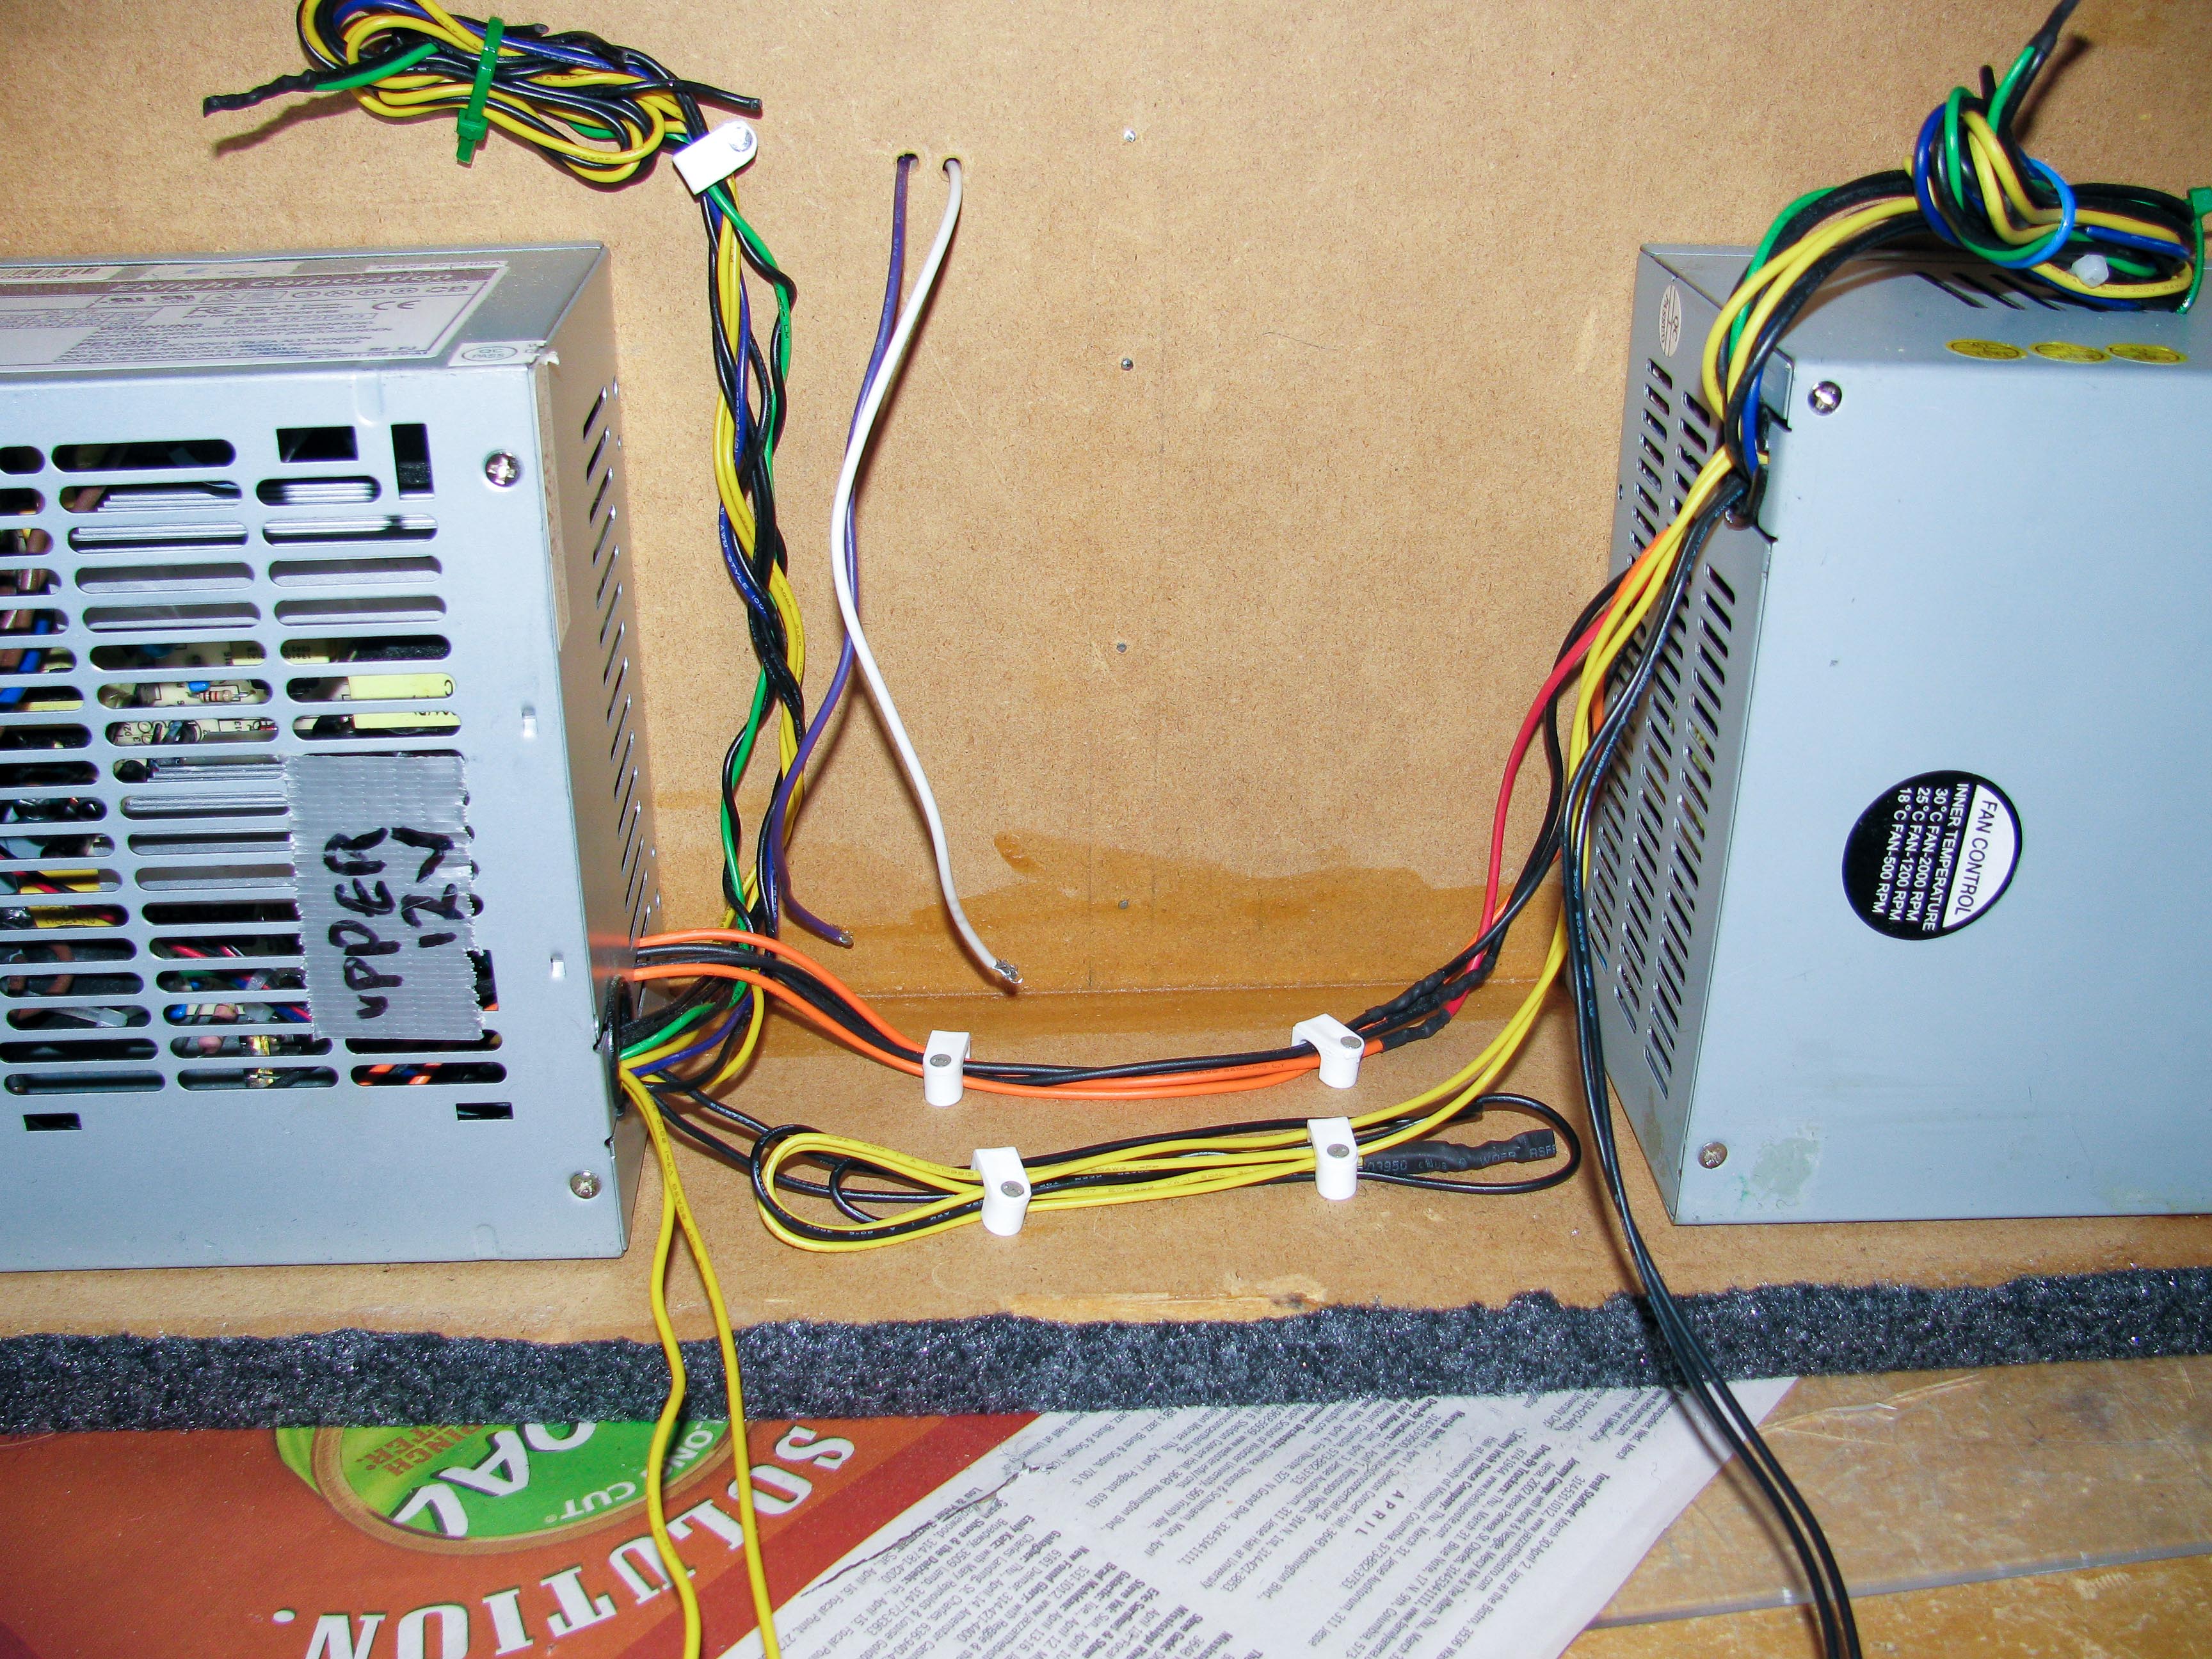
This amp would run at 14V (its minimum voltage), but the more voltage you give it (up to 39V), the more power it can output. It is easy for me to give it 24V, I have room for 2 ATX PSUs, delivering up to 15A (more than enough current). I attached the upper supply to the lower power supply’s input and switch. One plug and one switch control both power supplies.
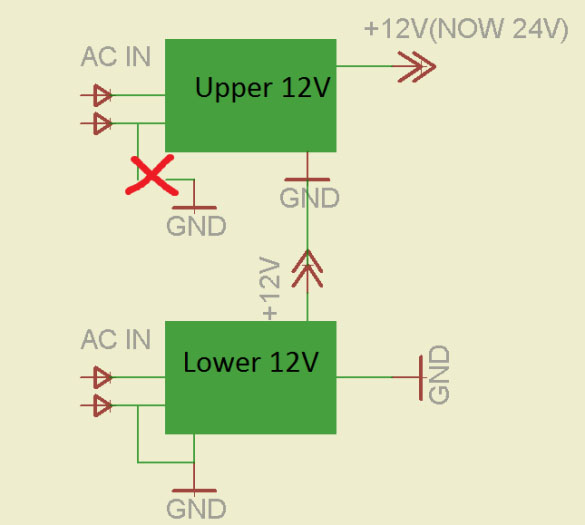
To wire power supplies in series, the ‘upper’ 12 V must not be earth grounded, for that would create a short circuit. I removed the ground connection to the metal chassis of one power supply. The positive 12V end of the lower supply connects to the ground of the upper supply. The positive 12V of the upper supply and the ground of the lower supply go to the amp, providing 24V of power.

This amp has no volume control, so I made an adjustable voltage divider with a potentiometer. It is placed before the audio signal going into the amp.
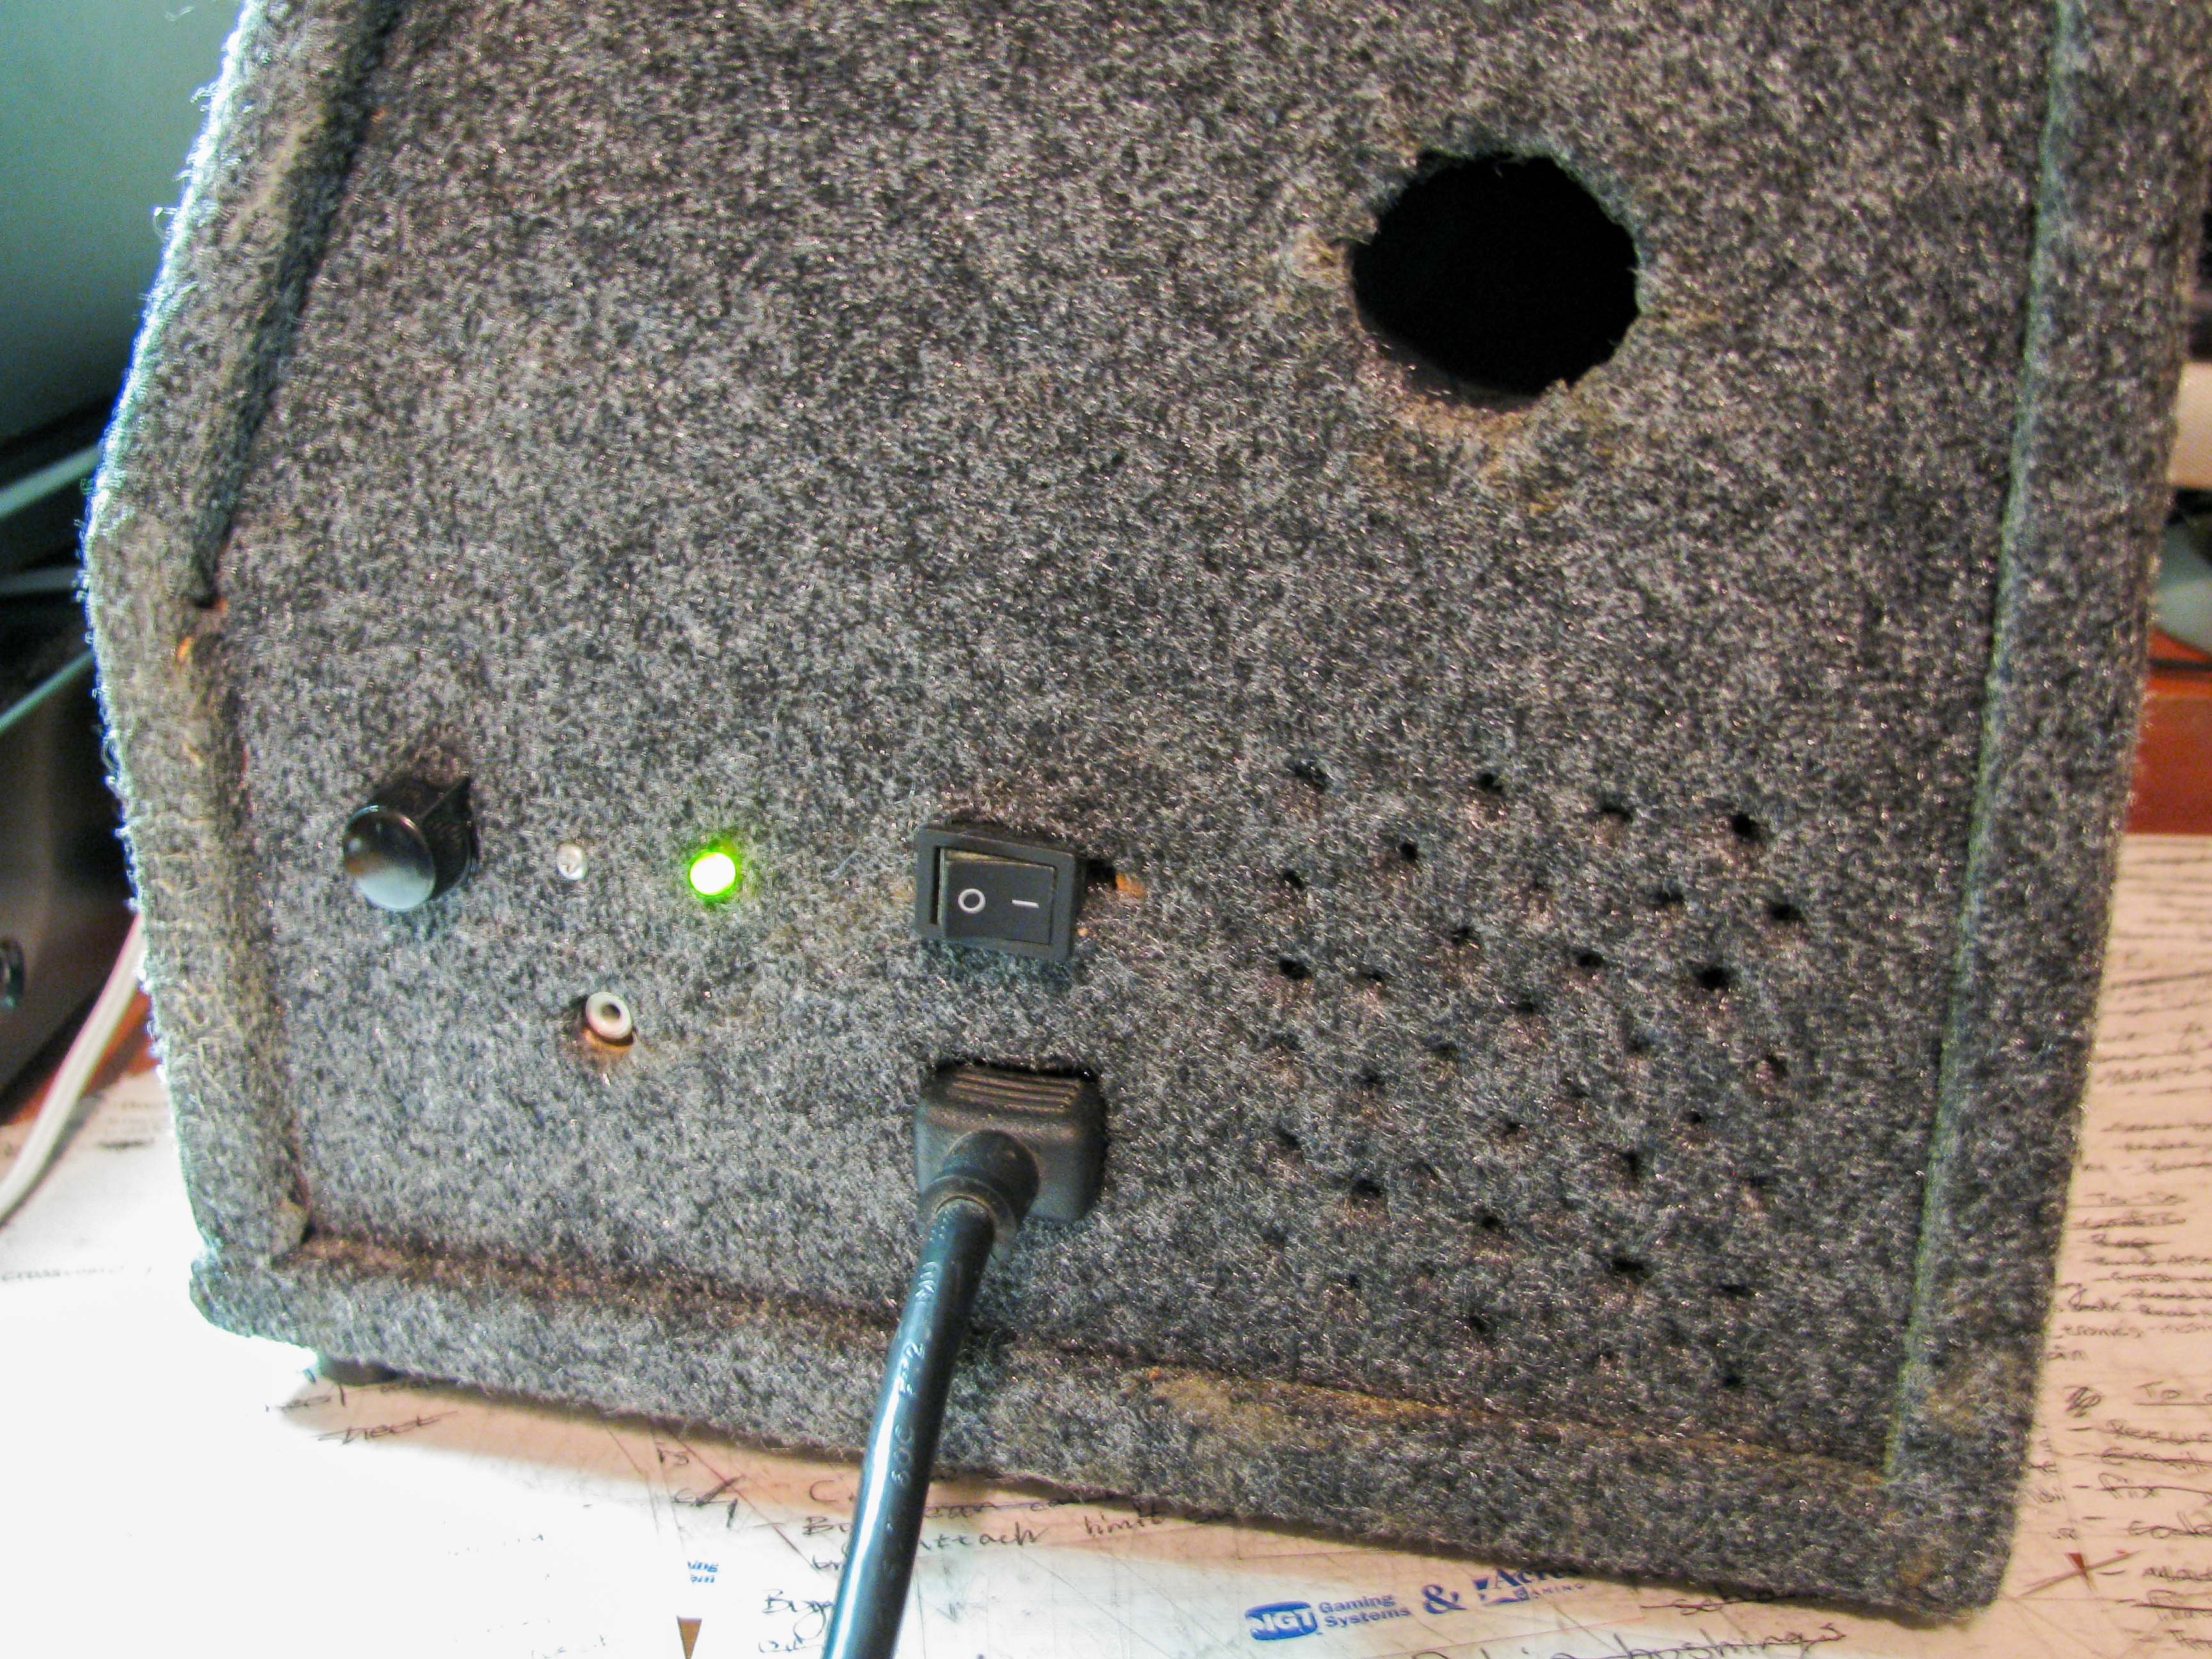
Since these are closely placed subs, mono sound is fine. I added the audio input on the side with an RCA input jack. While I was at it, I added an LED power status light. It is powered by the 5V rail on the lower power supply.
Update - I accidentally destroyed the Sure amp when one of the outputs touched a grounded surface. It isn’t designed for subwoofer frequencies and didn’t match the application. I now have an amp from a Logitech Z340 that is more appropriate.
