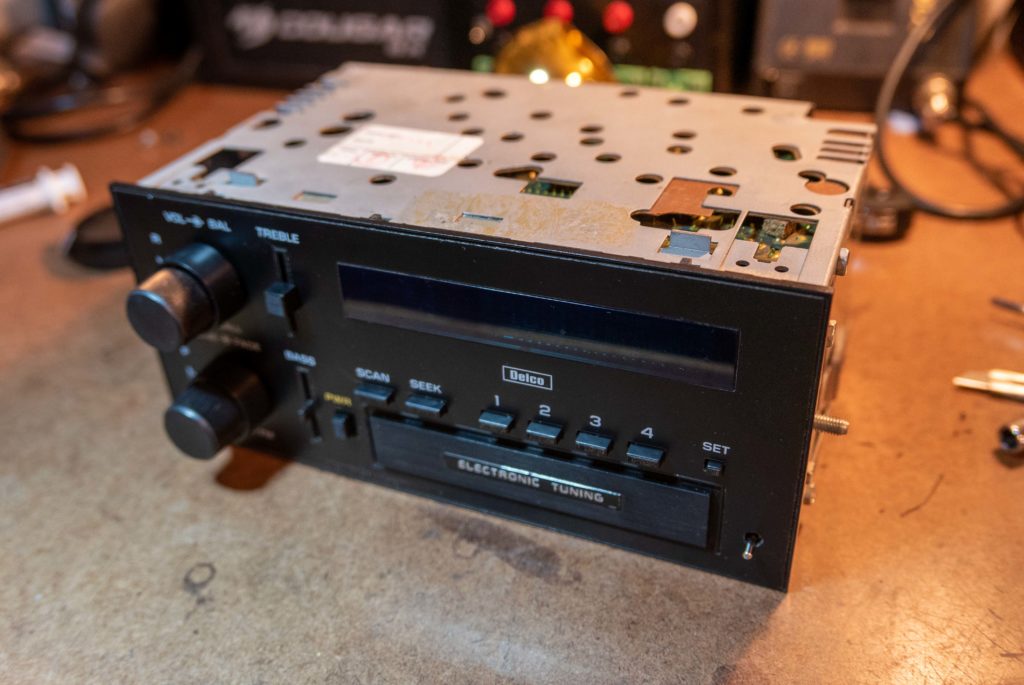
This post details the repair of a early 1991 AC Delco stereo. AC Delco made many variants of this stereo for both Chevrolet and GM cars, trucks, and vans from the early 80’s to the mid-90’s. While many of the stereos have more or less features (cassette players, radio presets, etc), the amplifier section of the radio is fairly standard and unchanged.
Internal Pinout and Schematic
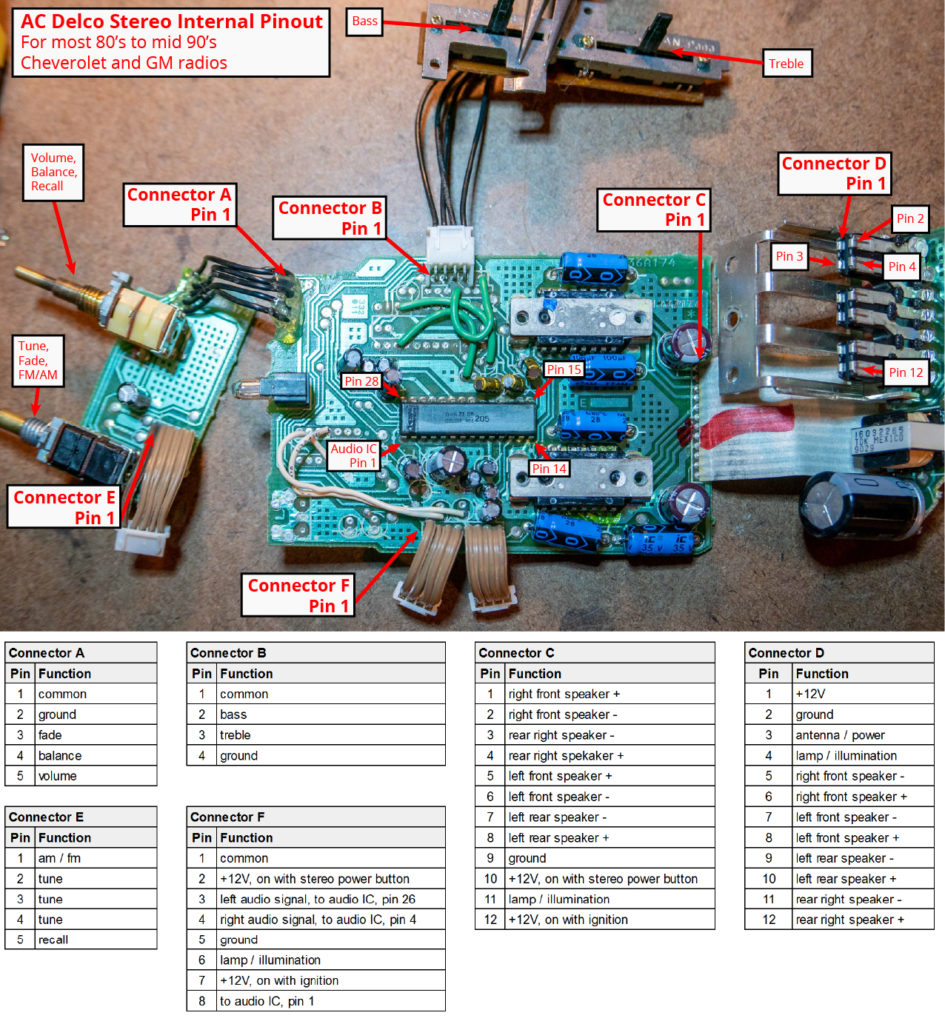
There isn’t much material online about these stereos, so I had to reverse-engineer the boards to determine these pinouts.
Capacitor Replacements


There were three issues with my stereo:
- No left channel output
- Crackling when changing volume or FM/AM tuning
- Fade/balance don’t work correctly
This page has an excellent write up on diagnosing and repairing AC Delco stereos. However, it claims that if you don’t have audio output in a channel, it is likely due to an amplifier IC failure.
For me, it was a capacitor failure. The caps on this board are very close to the amplifier ICs and get hot, accelerating failure rates. Because the caps are much easier to source and replace, I’d recommend replacing them before bothering with the IC’s.
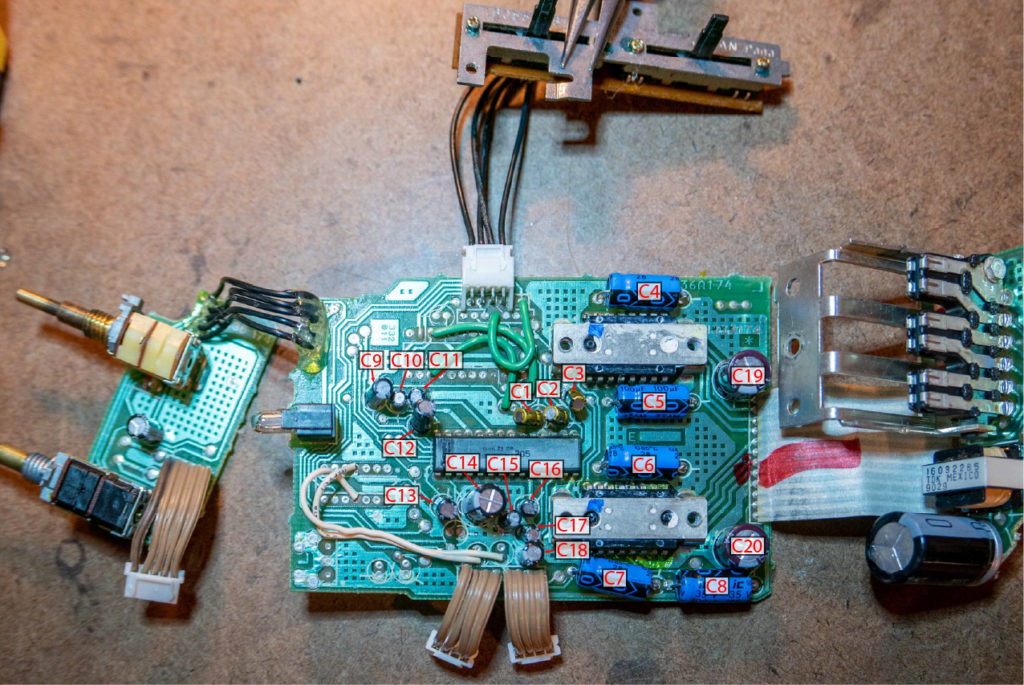
The image above lists the capacitors that I replaced. C1, C2, C3, C4, C5, C6, C7, C8, and C9 are the most likely to fail and cause an issue, but I recommend replacing all of the caps.
The table below lists suitable replacement caps.
| Component (all capacitors are aluminum electrolytic) | Digikey Number | Mfn. Number | Quantity | Reference | Notes |
|---|---|---|---|---|---|
| 1µF 20% 50V Radial | 493-16046-ND | USW1H010MDD | 3 | C1, C2, C3 | Must be audio grade capacitors |
| 100µF 20% 25V Axial | 1572-1048-ND | 107TTA025M | 5 | C4, C5, C6, C7, C8 | Must have co-axial leads |
| 4.7µF 20% 50V Radial | 493-6100-1-ND | UVR1H4R7MDD1TA | 3 | C9, C12, C13 | |
| 1µF 20% 50V Radial | 493-6031-ND | USR1H010MDD | 5 | C10, C11, C15, C16, C17 | |
| 470µF 20% 16V Radial | 493-1043-ND | UVR1C471MPD | 1 | C14 | |
| 22µF 20% 50V Radial | 4493-12572-1-ND | UVK1H220MDD1TD | 1 | C18 | |
| 270µF 20% 16V Radial | 493-5020-1-ND | UPJ1C271MPD6TD | 2 | C19, C20 |
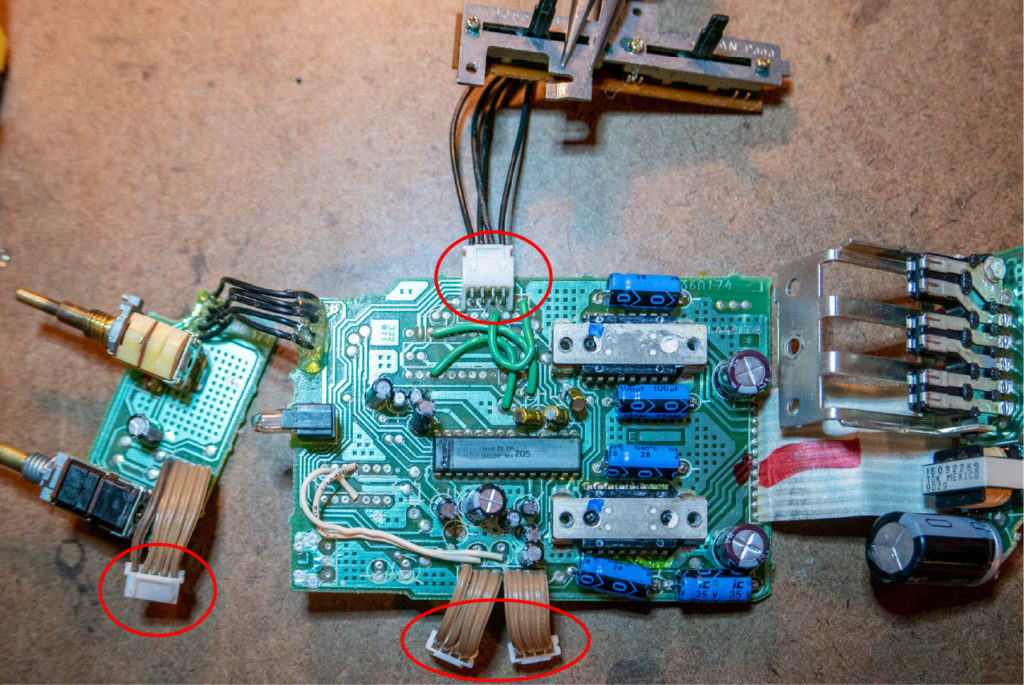
Board-to-Board Connections
(I later re-did these connections on the backs of the PCBs)
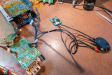
These stereos are a real bastard to assemble and disassemble. The PCBs are part of the structure of radio. All the parts have to come together at once when assembling, which is challenging.
All the boards are hard-wired to each other, which makes it impossible to lay them all flat on a table. Additionally, the connecting wires are short, stiff, and lack stress relief, which puts a lot of stress on the solder joints. A few of the joints broke while I was reassembling the stereo, requiring me to resolder every connection wire.
I added JST-XH connectors and a few extra inches of wire to all the board-to-board connections. This made debugging and determining pinouts much easier. It also allows me to easily inject a bluetooth audio signal into the radio.
Adding Bluetooth
I wanted to add bluetooth to this stereo without losing any functionality of the stereo and without adding a completely second amplifier.
I bought this TP Link bluetooth audio receiver. I like this adapter for automotive applications because it doesn’t require you to press reset/pairing buttons, so it can be hidden and never be seen by the user. Also, it doesn’t have any bright LEDs on it.

To power the bluetooth receiver, I made a simple 12V to 5V adapter with a LM7805 that outputs to a micro USB connector. This lives in a little 3D printed box to keep it from shorting out.


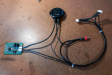
The bluetooth outputs line-level audio into the audio IC’s input on the amplifier board. This is where the AM/FM audio signal is normally received. I had to add a DPDT switch to switch between AM/FM and bluetooth.
This chain of bluetooth components sneaks in between the main stereo board and the amplifier board, at connector F.
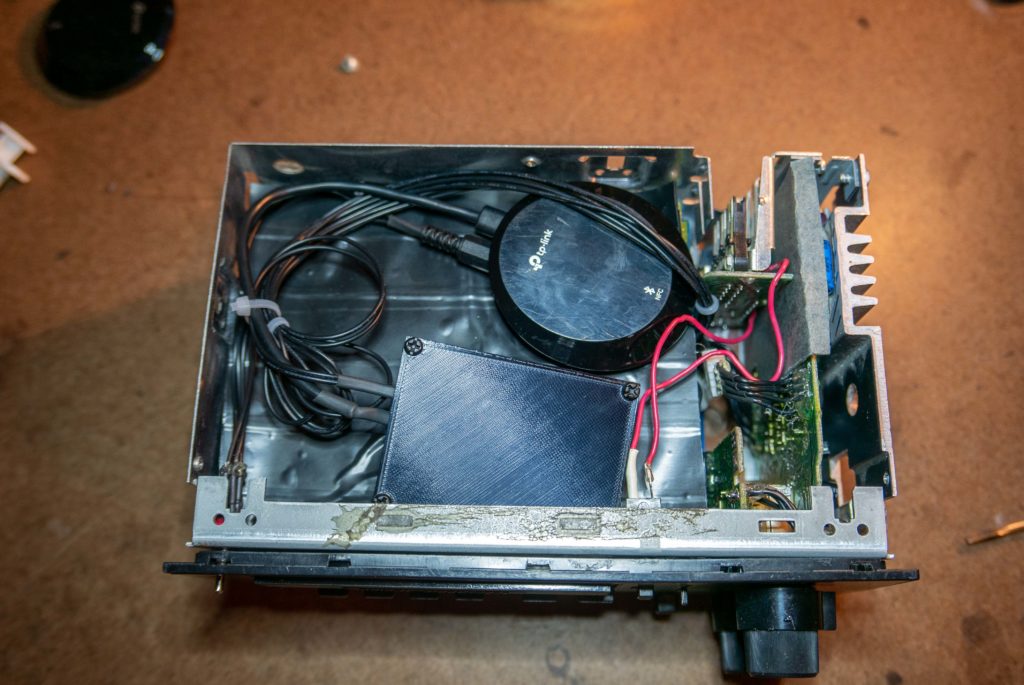
This stereo lacks a cassette player, so there is a cavity of open space. The bluetooth parts sit comfortably here. It makes it’s easy to install the stereo, since all the components are self-contained.
I couldn’t think of an easy solution that wouldn’t require a switch on the front of the stereo to switch between AM/FM and bluetooth. I tried to make this switch as discrete as possible. You can see it in the image above, in the bottom right corner.
Conclusion
This was an enjoyable and successful project. Most of the work was reverse-engineering and adding JST-XH connectors. It’s fun to work on older equipment, because the failures are easy to troubleshoot and the components are spread out.
The stereo works great – it has the look and sound of an old stereo, the convenience of bluetooth, and no loss of functionality.
You are cool cool
can you link us to that discreet DPDT switch you used? im having touble finding one that discreet.
TE Connectivity TMD1T3B1M1QE – 28VDC 3A ON-ON DPDT
Digikey link: https://www.digikey.com/en/products/detail/te-connectivity-alcoswitch-switches/TMD1T3B1M1QE/5125717
Can you post a detailed parts list for the bluetooth system
i drive a 1988 nova with the same radio. it has a short and is draining the battery. I would like to keep the radio. delco model #16131355.i think it may be one of the capacitors. what are your thoughts?
I agree, a faulty capacitor would be a likely culprit. If the battery is draining even when the radio is switched off, then it is likely one of the capacitors connected to the 12V input has failed and has shorted.
I can’t quite remember which capacitors are connected to the 12V input. I think it is C19, C20, and the large capacitor on the circuit board with Connector D. Those would be good caps to replace first.
You could test by hooking up your stereo to a 12V source on your workbench. Hook up a multimeter in series and measure the amps. Then remove those capacitors and see if the current draw has dropped to an acceptable level (less than ~10mA).
I wouldn’t run the stereo in your nova with those 3 missing caps, but it’s fine on the bench with a stable power source.
Hello looking to do this to my 1985 gmc s15 cassette unit. My cassette player works and wanting to keep the cassette player and radio.I’m looking at picking up a pretty good Bluetooth board from eBay. Is there any circuit diagrams out there and parts list I could use to build this and make this work? Where if my Bluetooth is connected to my phone that it will automatically go into Bluetooth mode, and if I disconnected my phone it would go back to cassette mode?
Would you be able help out on how and what is needed? Really trying to keep it all stock without drilling anything as the AC Delco unit is in perfect condition. I know I will most likely need to put a button somewhere to pair the Bluetooth.
Let me know I really appreciate it
-Tayler
Switching automatically between cassette and bluetooth is a tough problem. I’m not sure of a good way to do that. Perhaps, you could just tie in the Bluetooth’s audio output to the cassette’s audio output.
If the cassette and bluetooth were playing at the same time, then you would hear both at once. So, you’d just have to pause one before playing the other.
Also, you can use that TP-Link bluetooth receiver without needing access to a pairing butoon. In fact, I don’t think it has a button. I have that model hidden away in 2 of my cars. Multiple phones can connect to it fine.
If all the other components on the radio are the same but with the cassette module, can you give any advice which pin would be the audio output to split into?
If you have good pictures of the circuit boards (birds eye view of front and back of each board), I could try to help.
In an ideal world, you’d splice into the same AM/FM audio lines, but I can’t give better advice without pictures.
Can you build one of these for me…. 1987 Chevy…. just a plain am/fm…. no tape?
Sorry Enrico, but for now I won’t be adding bluetooth to other people’s stereos.
Primarily, it’s because I don’t have replacement parts on hand. I’m talking about the specialty parts, like the ICs, knobs, faders, etc.
The chances that a specialty part would need to be replaced is low. It’s fine to take the risk on my own stereo, but I’m not comfortable taking the risk of having no replacement parts when someone is paying money and expecting good service.
I bought a UX-1 radio Delco model 16073576 for my 88 trans am and when I got it the volume knob (potentiometer shaft bent/broke) was broken from shipping. I have looked everywhere for one online do you know where I could get one? part number I can read is 16027388 and 9026r looked on newark couldn’t find anything.
I have a Delco 16080575 in my 89 suburban that needs tending to. I’m curious about how much it would cost me to have you go over it. I can provide symptoms if interested.
The AC Delco radio that appeared in your blue tooth explanation is the same radio that is in my 1991 chevy S10 pickup truck. Do you repair radios? Presently, mine does not work. I checked the fuse and connections. All were good. When I power the radio I do hear crackling sounds out of the speaker.
old thread but any tips on no clock or display working? no fuses popped, shorted my cigarette lighter and it’s been off ever since
Hard to say what’s wrong. I’d recommend opening it up and doing a visual inspection. If you’re lucky, you may see a burnt or damaged component or a loose wire.
Is there way to get sound out to speakers from the radio and keep the functionality if DM165’s are broken? I was thinking if there is a way to replace these with some new amp? I just don’t know how I would go about connecting them. Like using two of these?
Some polish guy on youtube replaced DM165’s with TDA7297 ic.https://www.ebay.com/itm/225777724464?_skw=TDA7297+Audio+Amplifier+Module&itmmeta=01K0WVRD6JPNSTF2NVXGRMVT7N&hash=item349166ac30:g:KF4AAOSwI25lB3D~&itmprp=enc%3AAQAKAAAA4FkggFvd1GGDu0w3yXCmi1eXlhcfJkwTy17HqnthSbFJ2JC8hQxQKPbqFP5ZLXuj1Gq1BEsEFpJ0vnkFuOxBjjof13XKUKhvjrX8Nx9VULgb9vk%2F8cWHM8Fu4yMlad7v8WgMPkIRwybc8a3kdt0w%2BHSypZ%2FabpvTIGQpcYqY5l1HPdK5T1S7aga7Su%2BihvCARVDSFu8WhaCaruTaJeCNtm1unDrLq4%2F%2BhoEWfBiU4EOnXVu9%2Fp2RRjwH80nvwY8fZzI%2BG8xAX%2Bk0oEsDtKHl4gu8YE3Ppps1CeG8ZFA9UW9q%7Ctkp%3ABk9SR7rT4ZuHZg