Most dedicated film scanners don’t scan negatives as well as your camera. If you spend anywhere between $50-$200, you’ll first spend a few hours reading polarized Amazon reviews and end up with a cheap plastic scanner with a little sensor and quite average resolution. For better quality you have to jump up to $500+ to get a professional quality scanner. They are usually quite slow and designed for scanning just a few pictures then bringing them to Photoshop to touch them up.
I have a lot of negatives to scan. Thousands. Probably around 10,000.
Here’s my process.
Parts Required
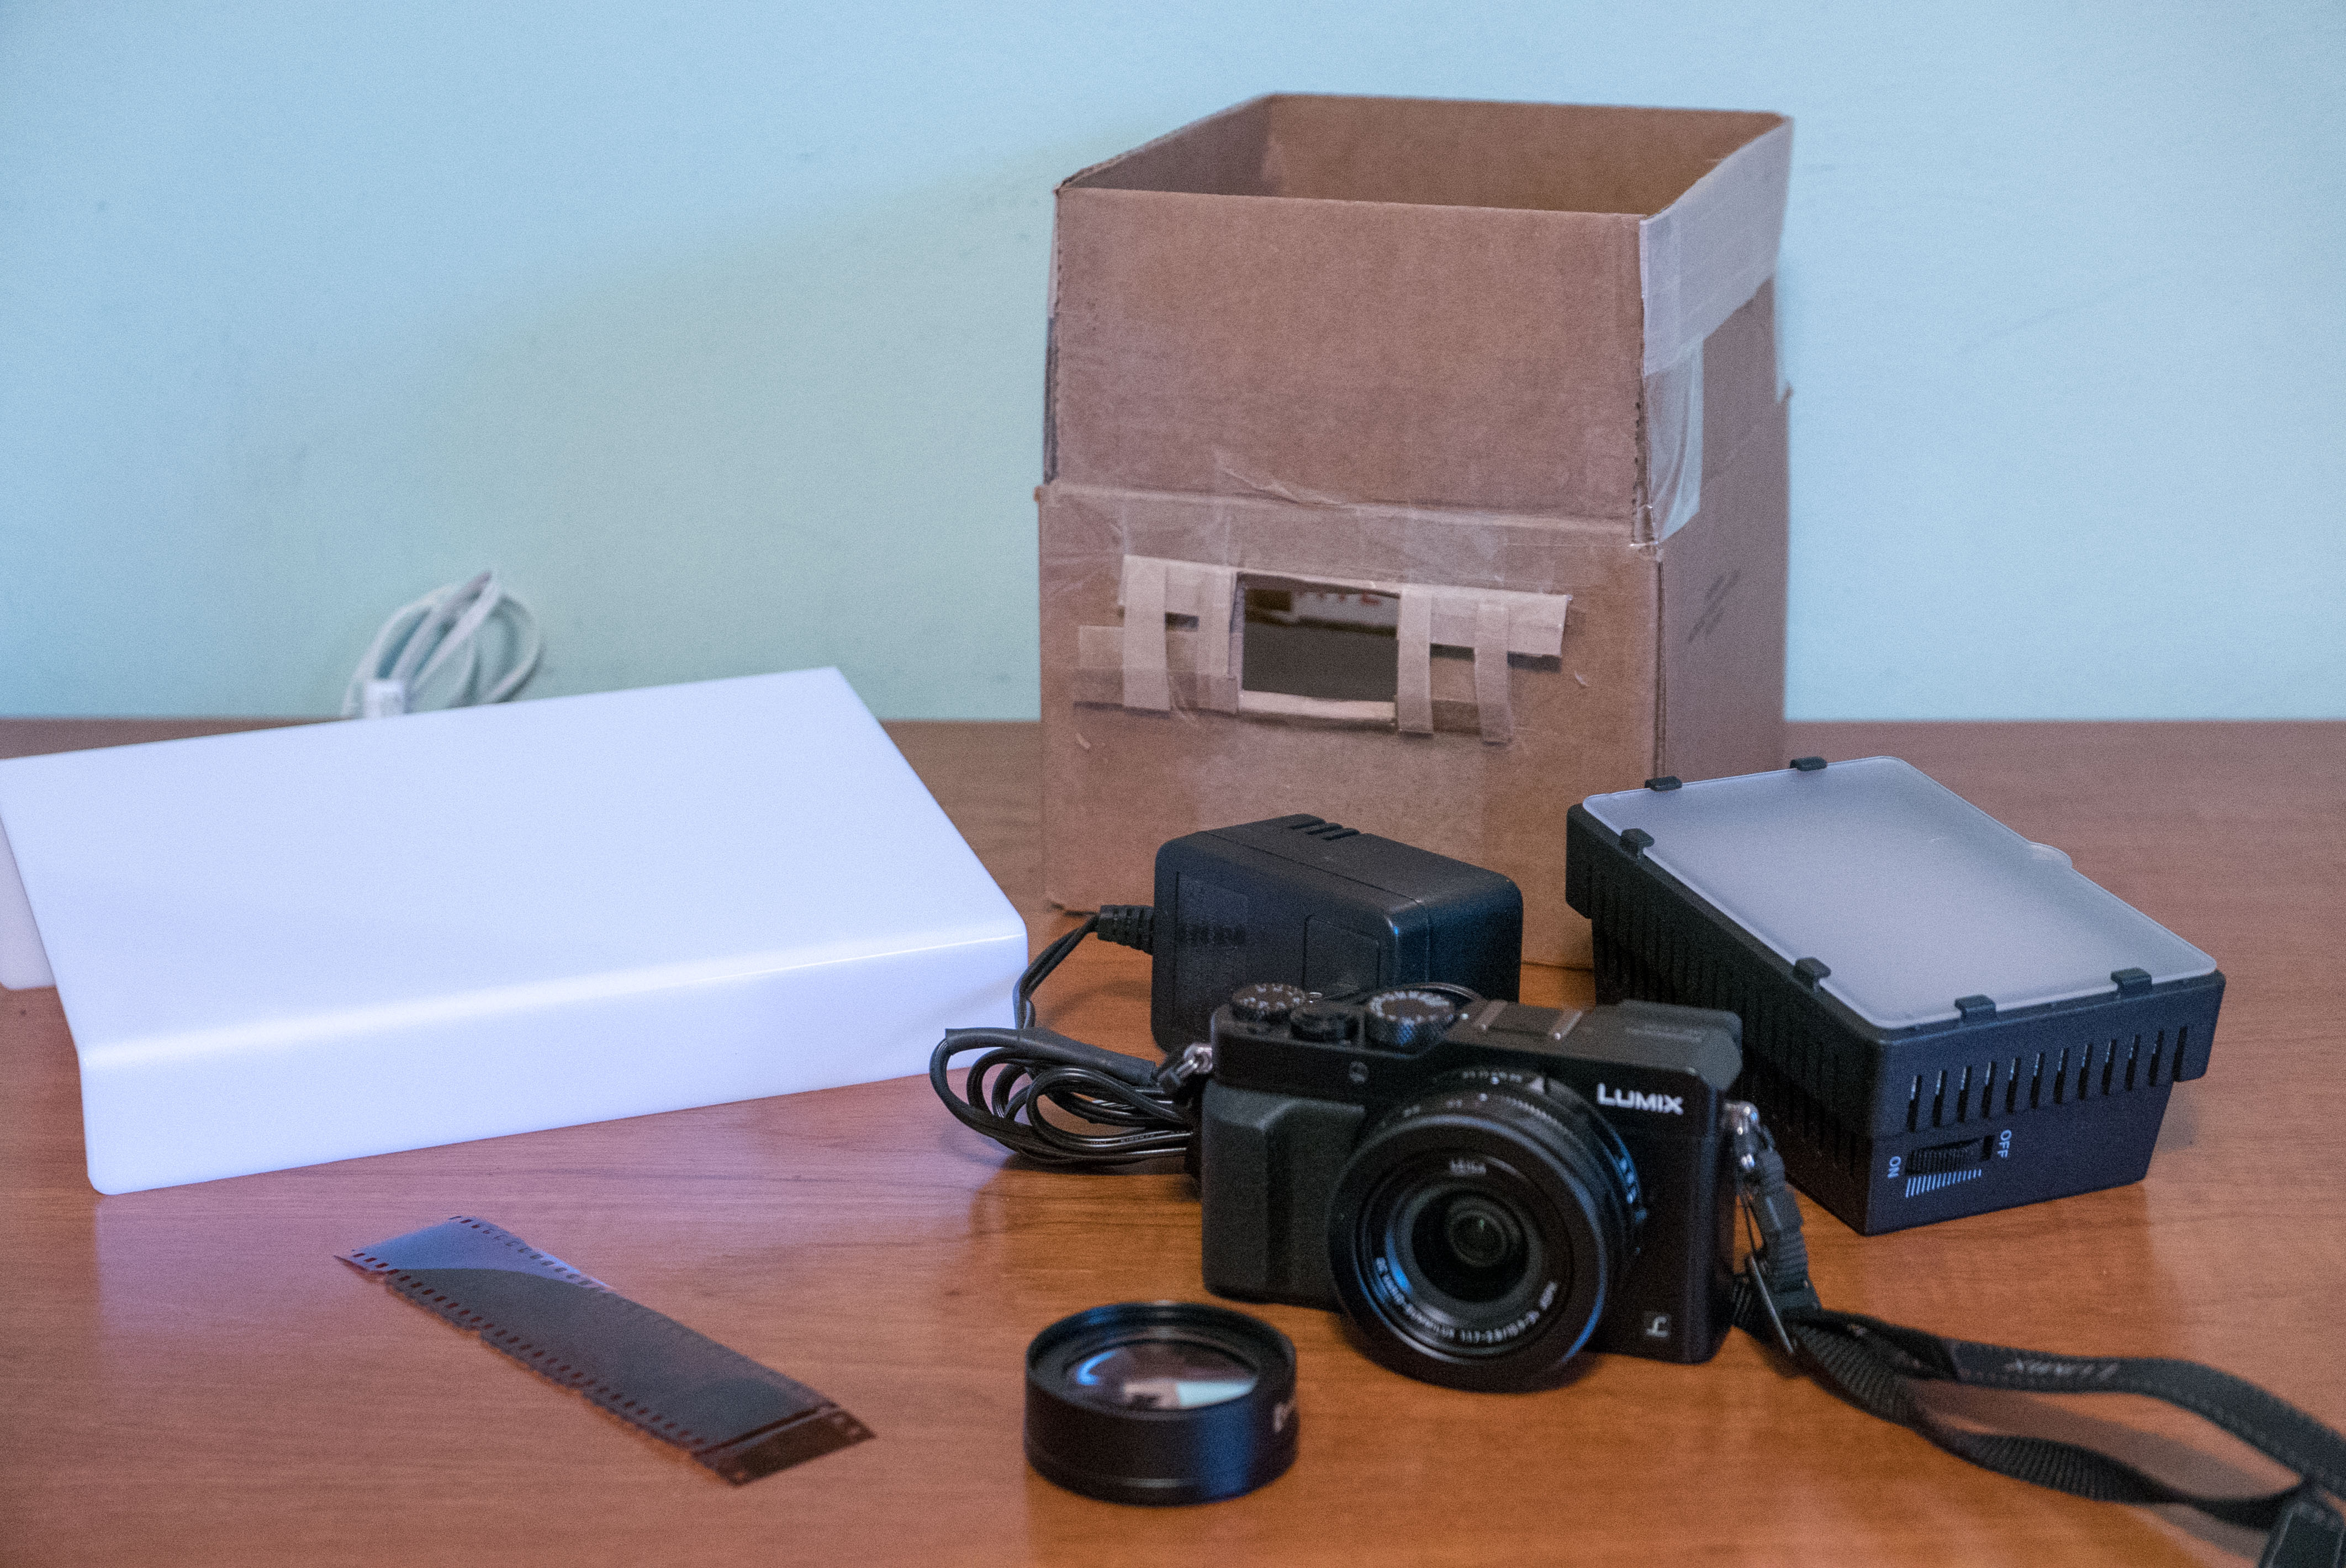
- Tracing Light Box
- On Camera Video Light (or a wireless flash)
- Cardboard Box
- Digital Camera
- Macro Lens or Macro Lens Attachment
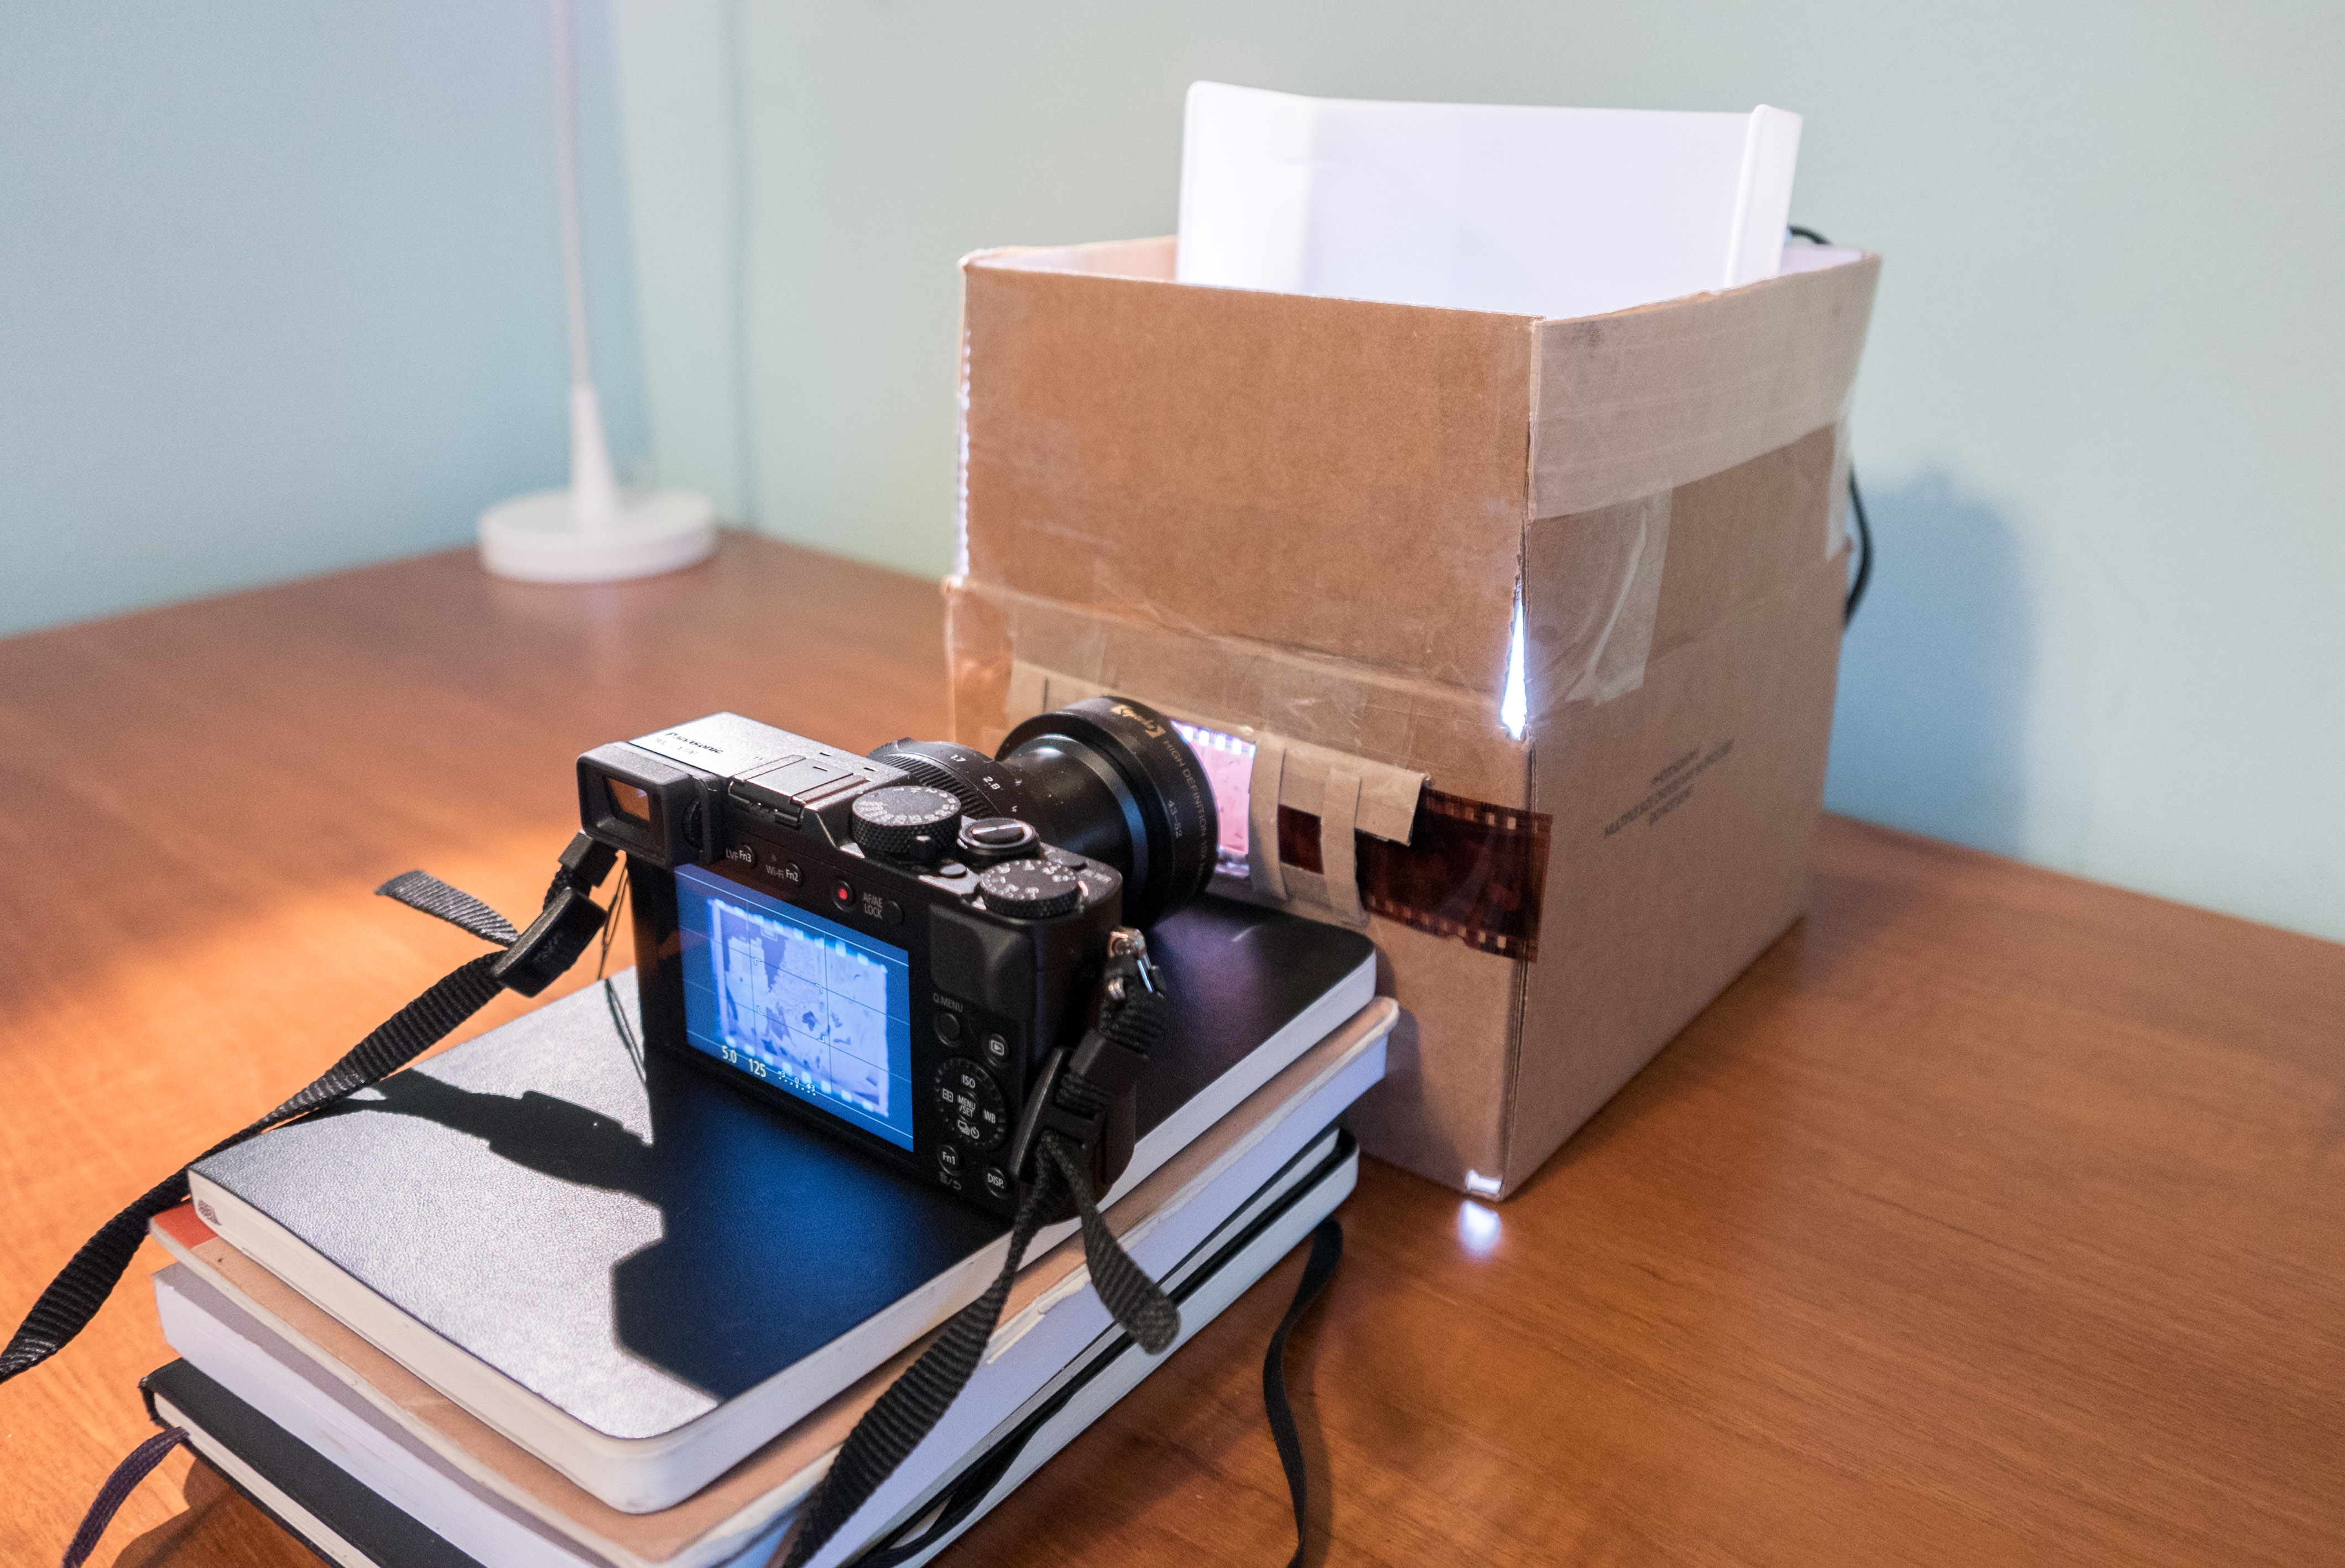
Assembly
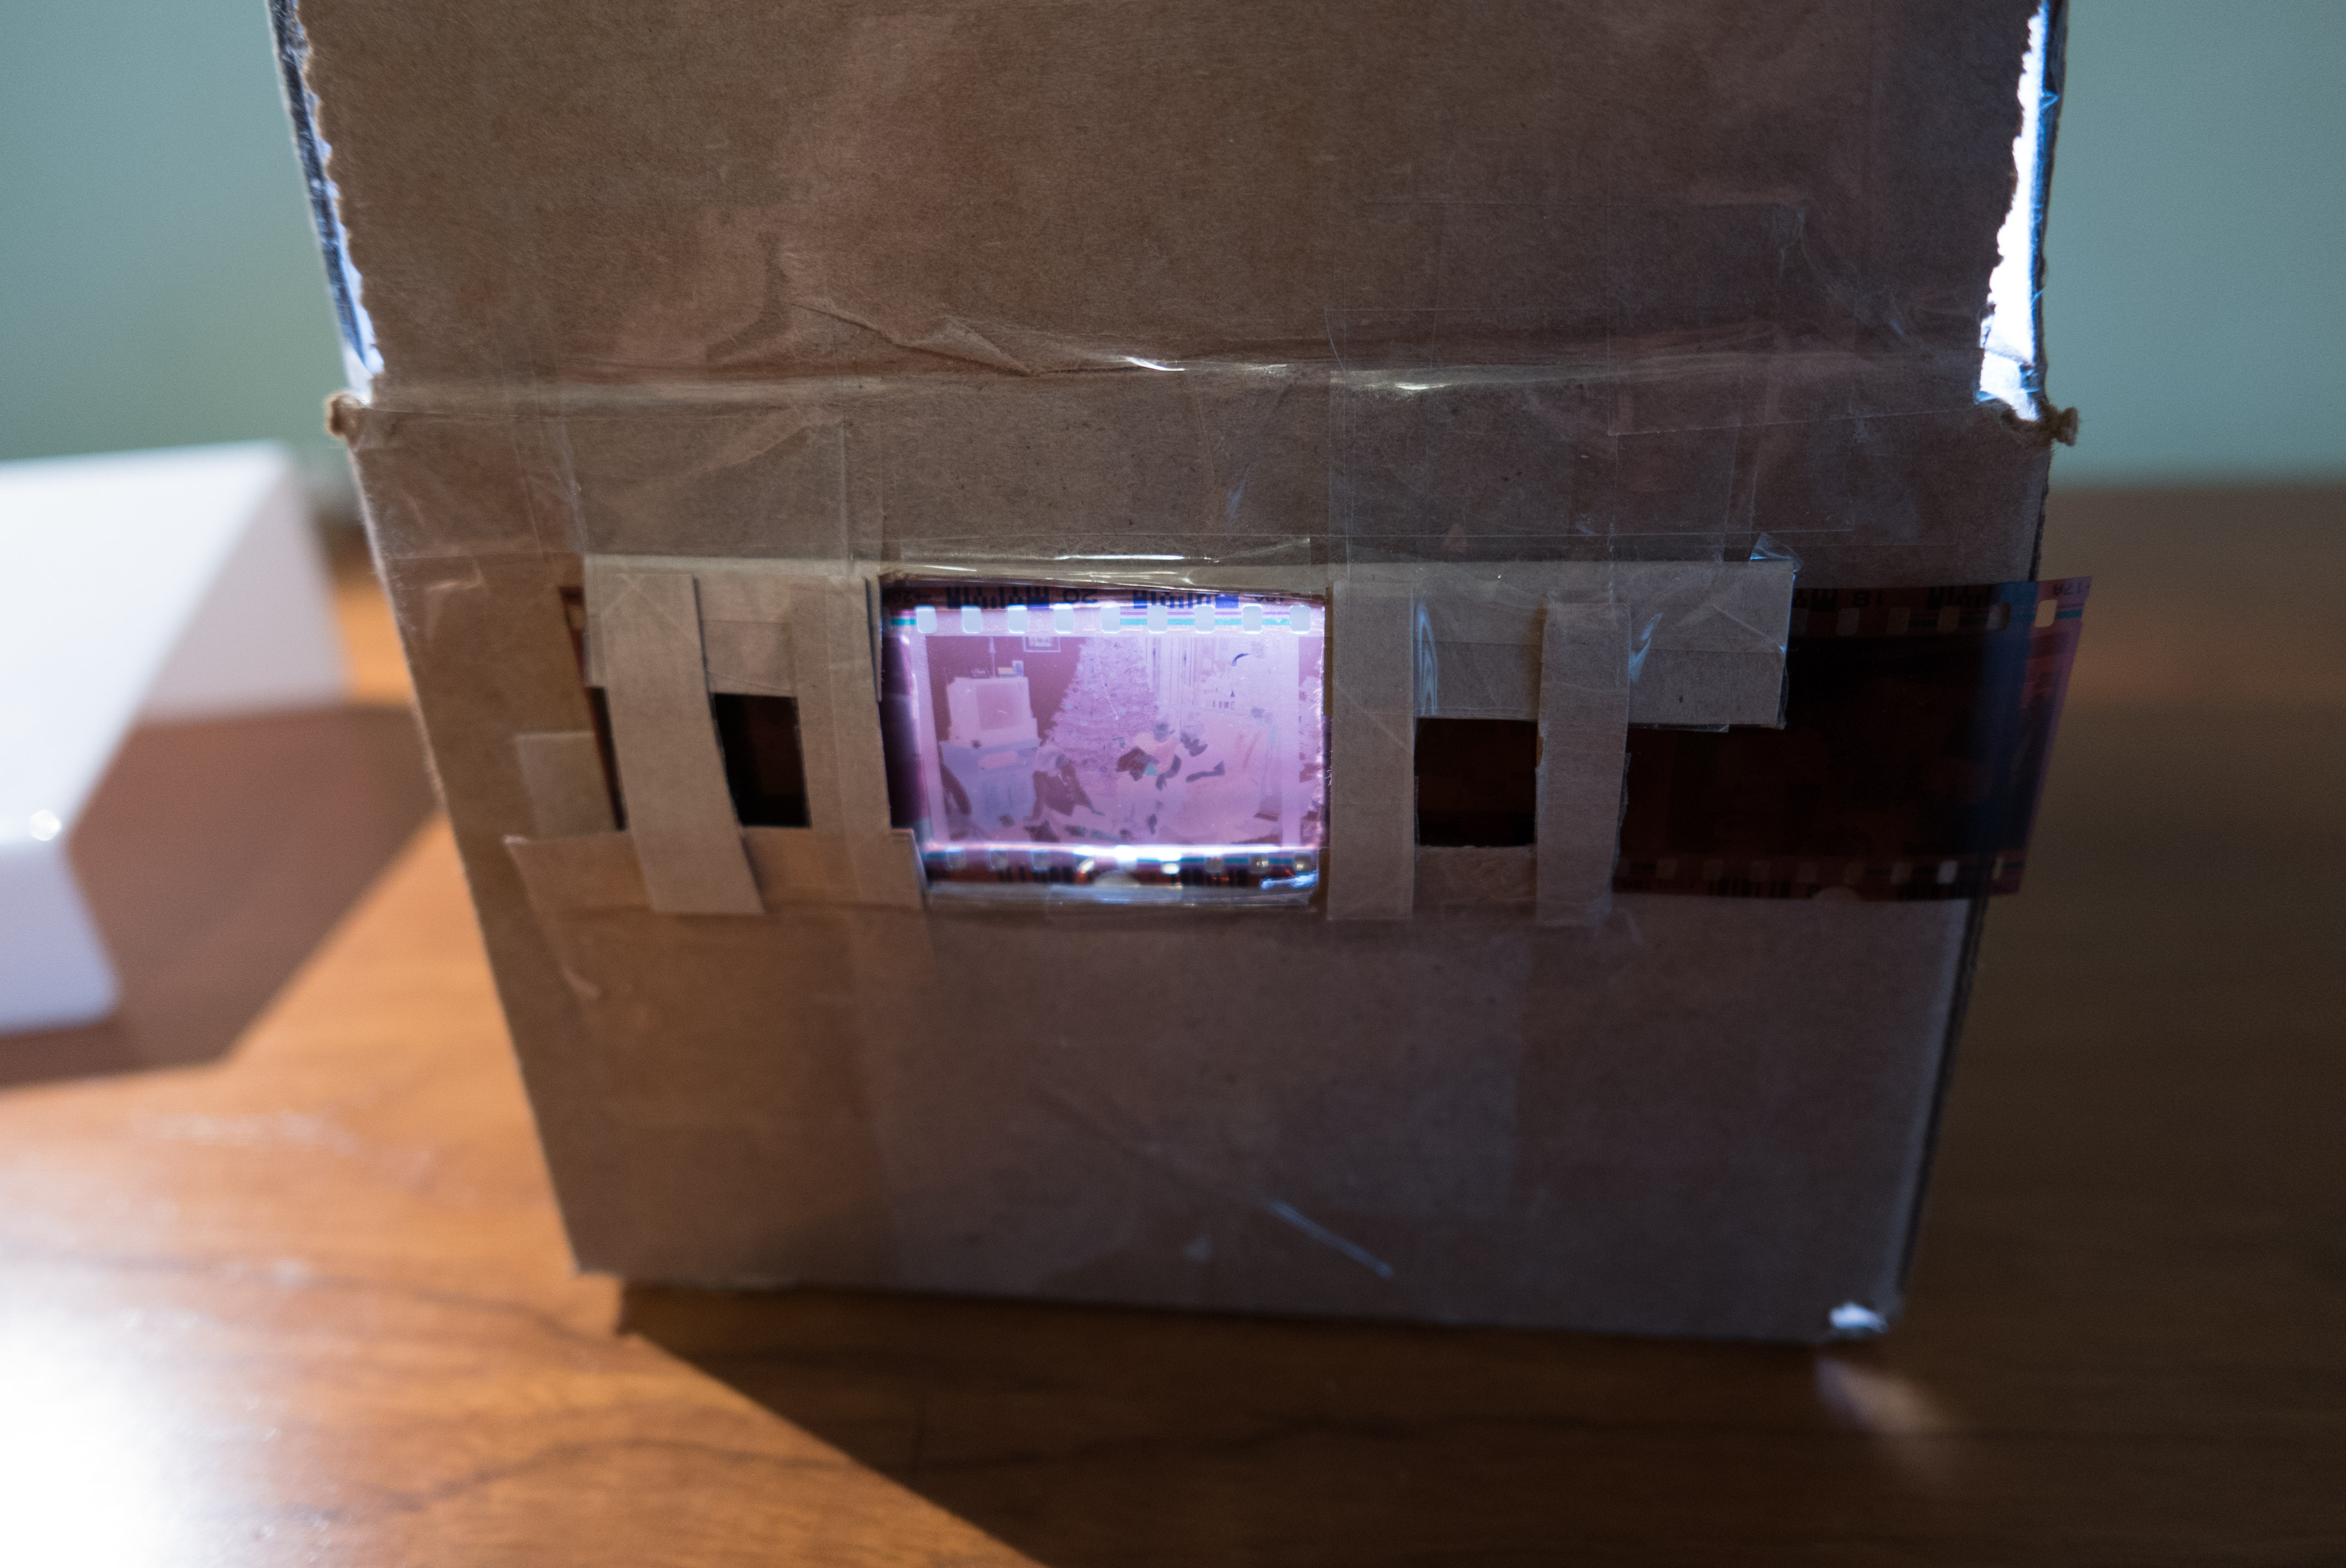
Take a shoebox-sized box and make a negative holder. I used thin pieces of cardboard and a lot of packaging tape. It is easy to slide the negatives through the holder. One downside, my holder doesn’t flatten a curved roll of film as well as a plastic negative holder. You can buy plastic negative holders online.
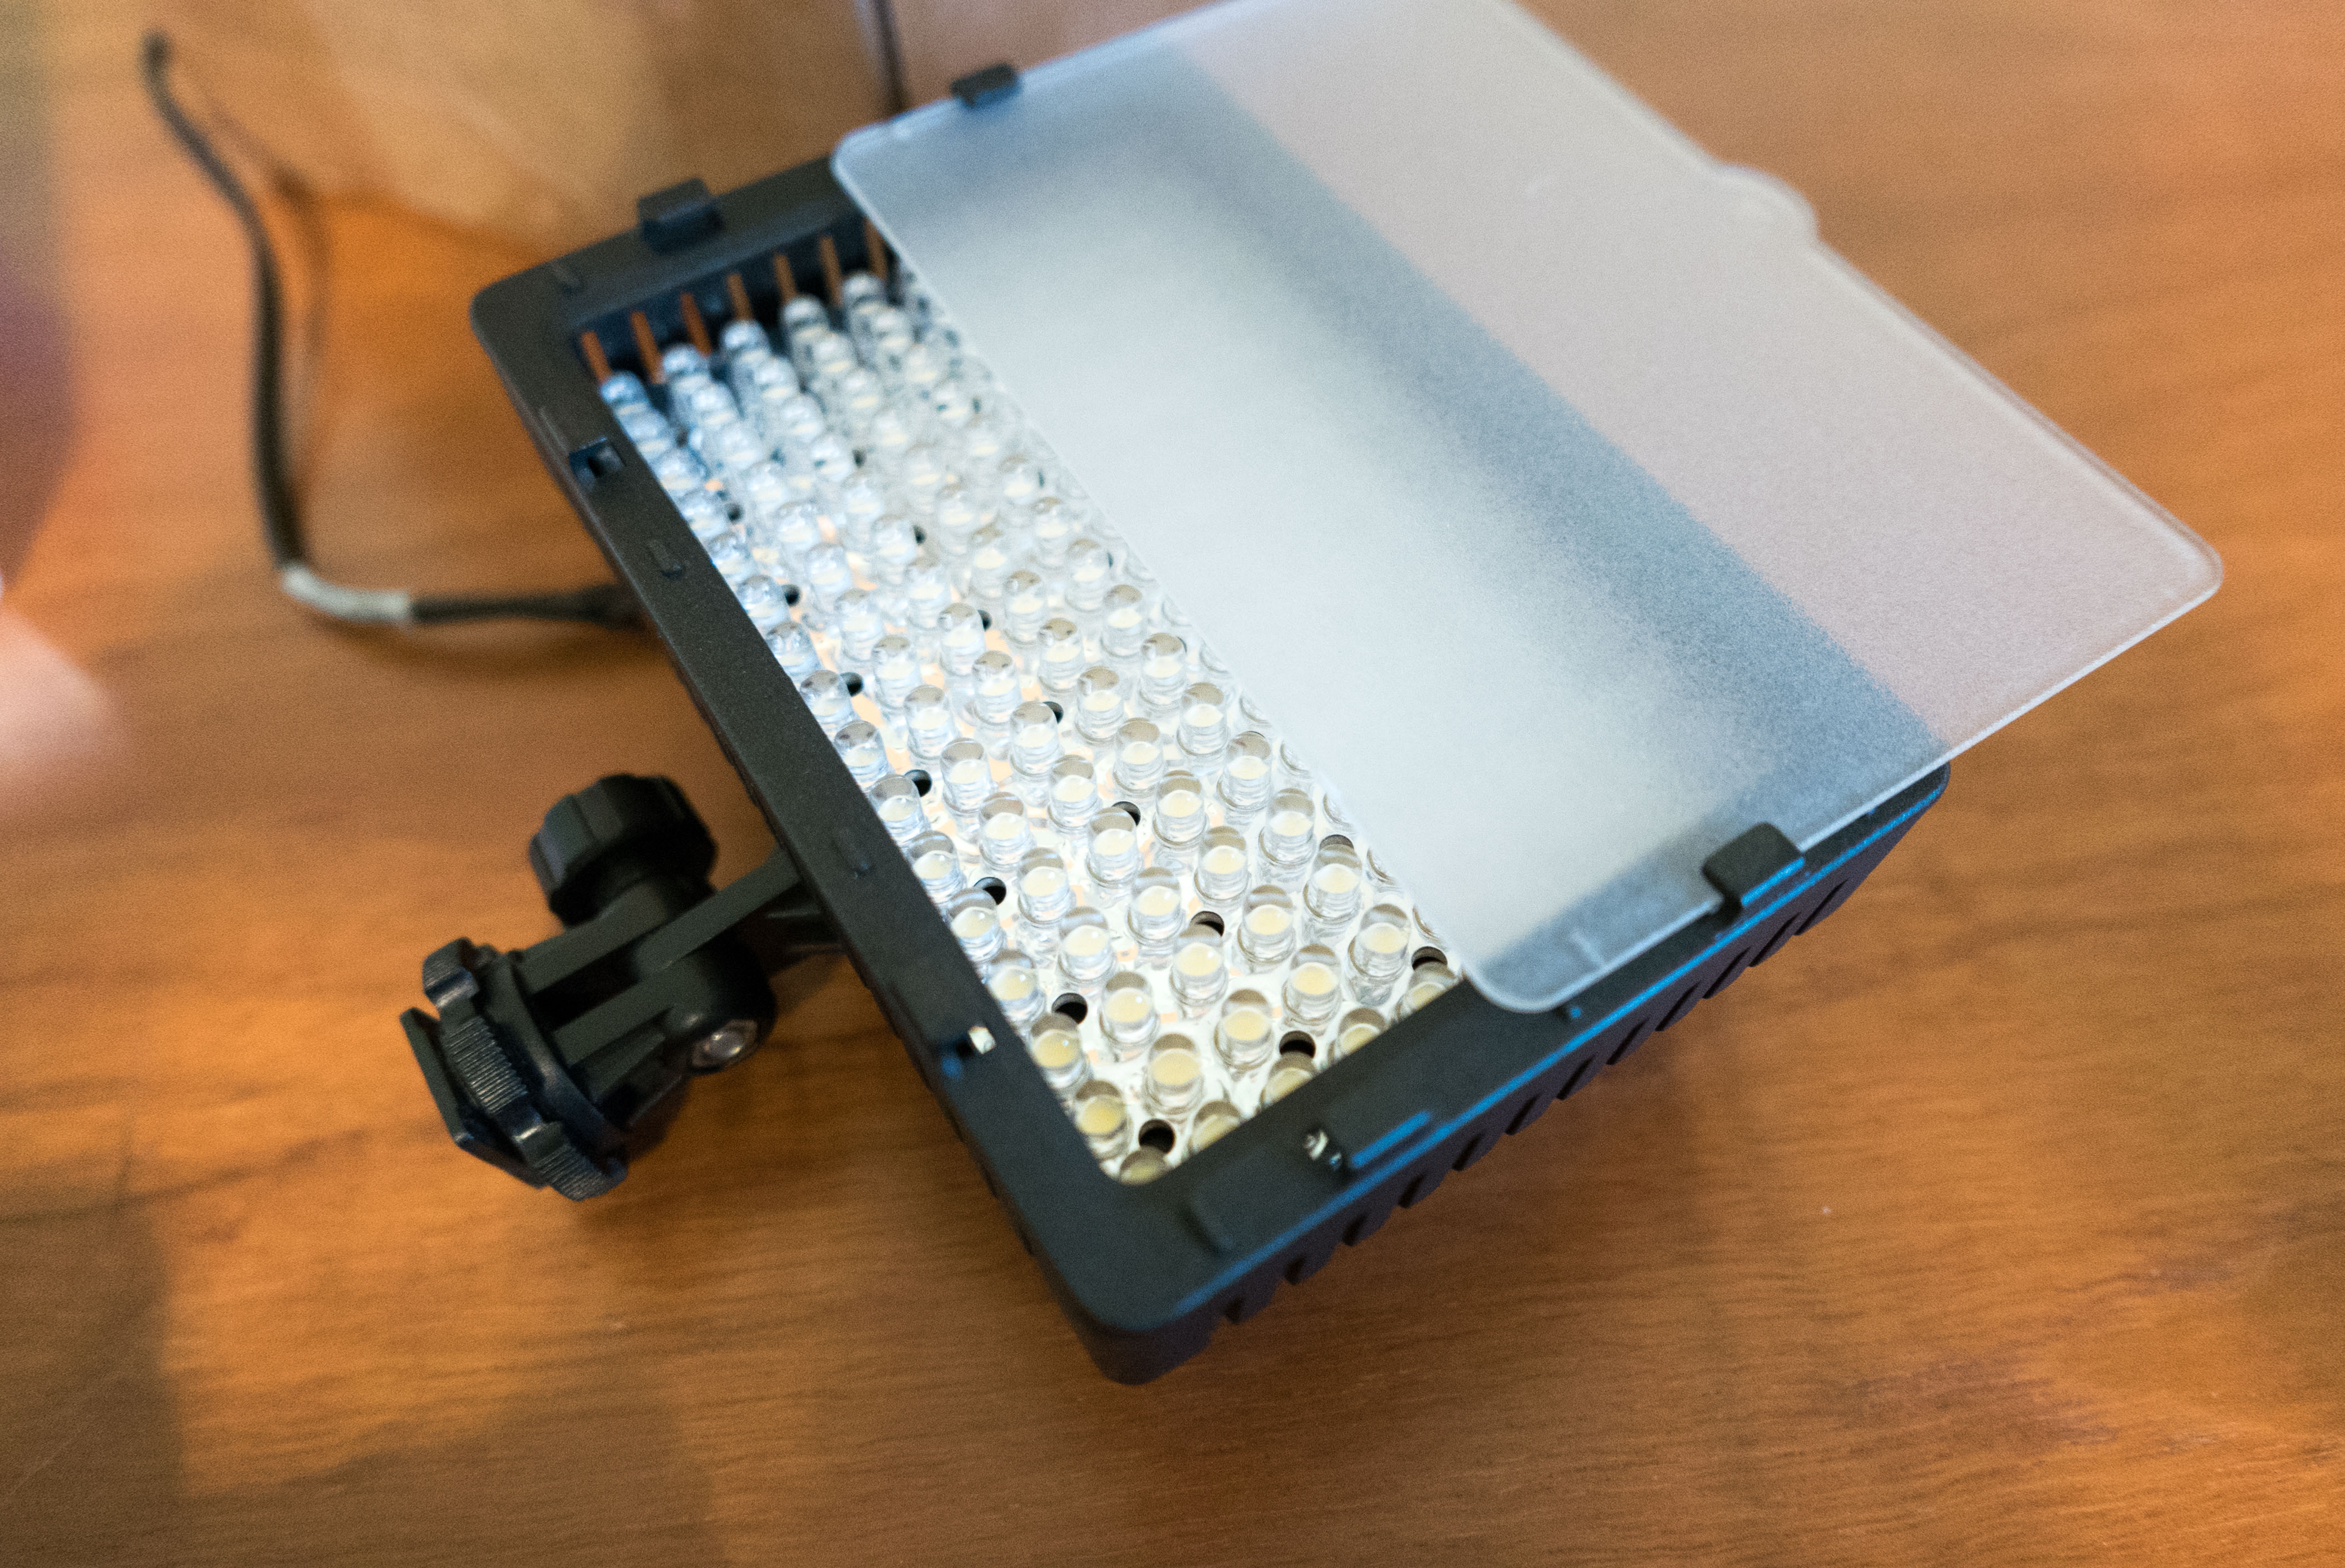
These camera hot shoe video lights are great for producing an ultra bright, wide light source. They are designed to be battery powered, but you can modify it to be powered from the wall. Details on that in a later post.
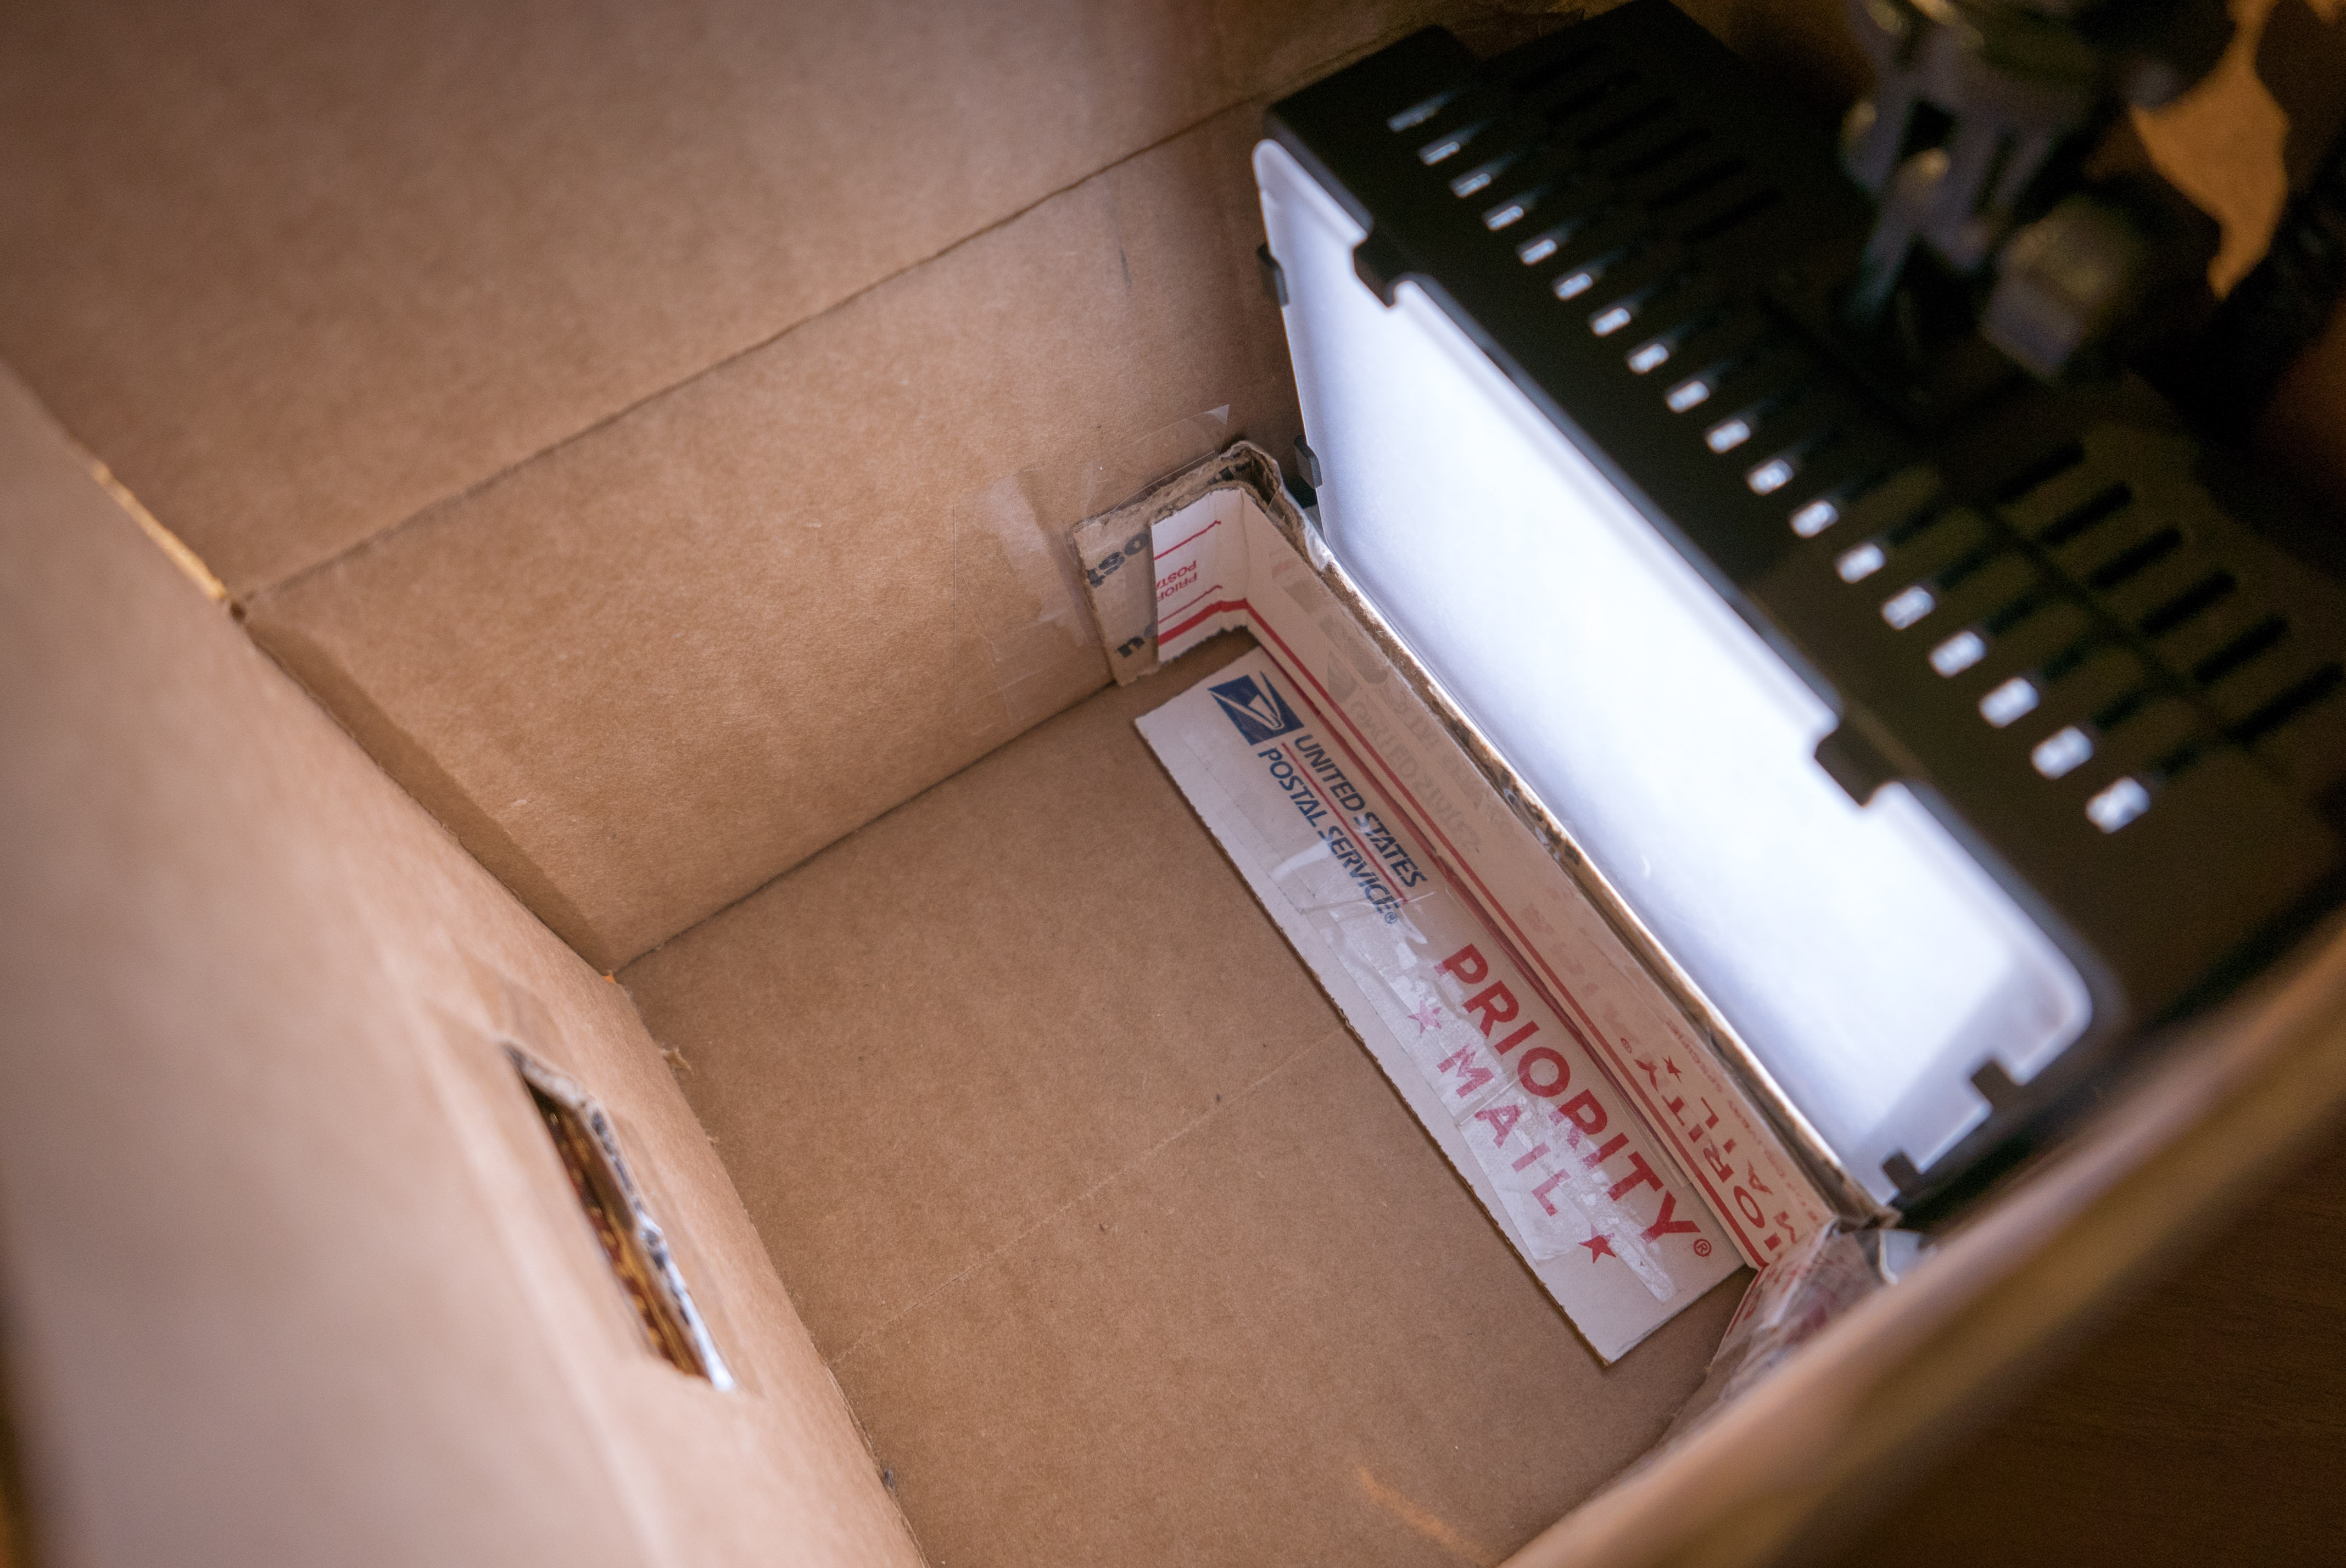
Place the light in the box. This is about 8″ away from the negative, which seemed to be a good distance. I think 6″ would have been brighter and better.
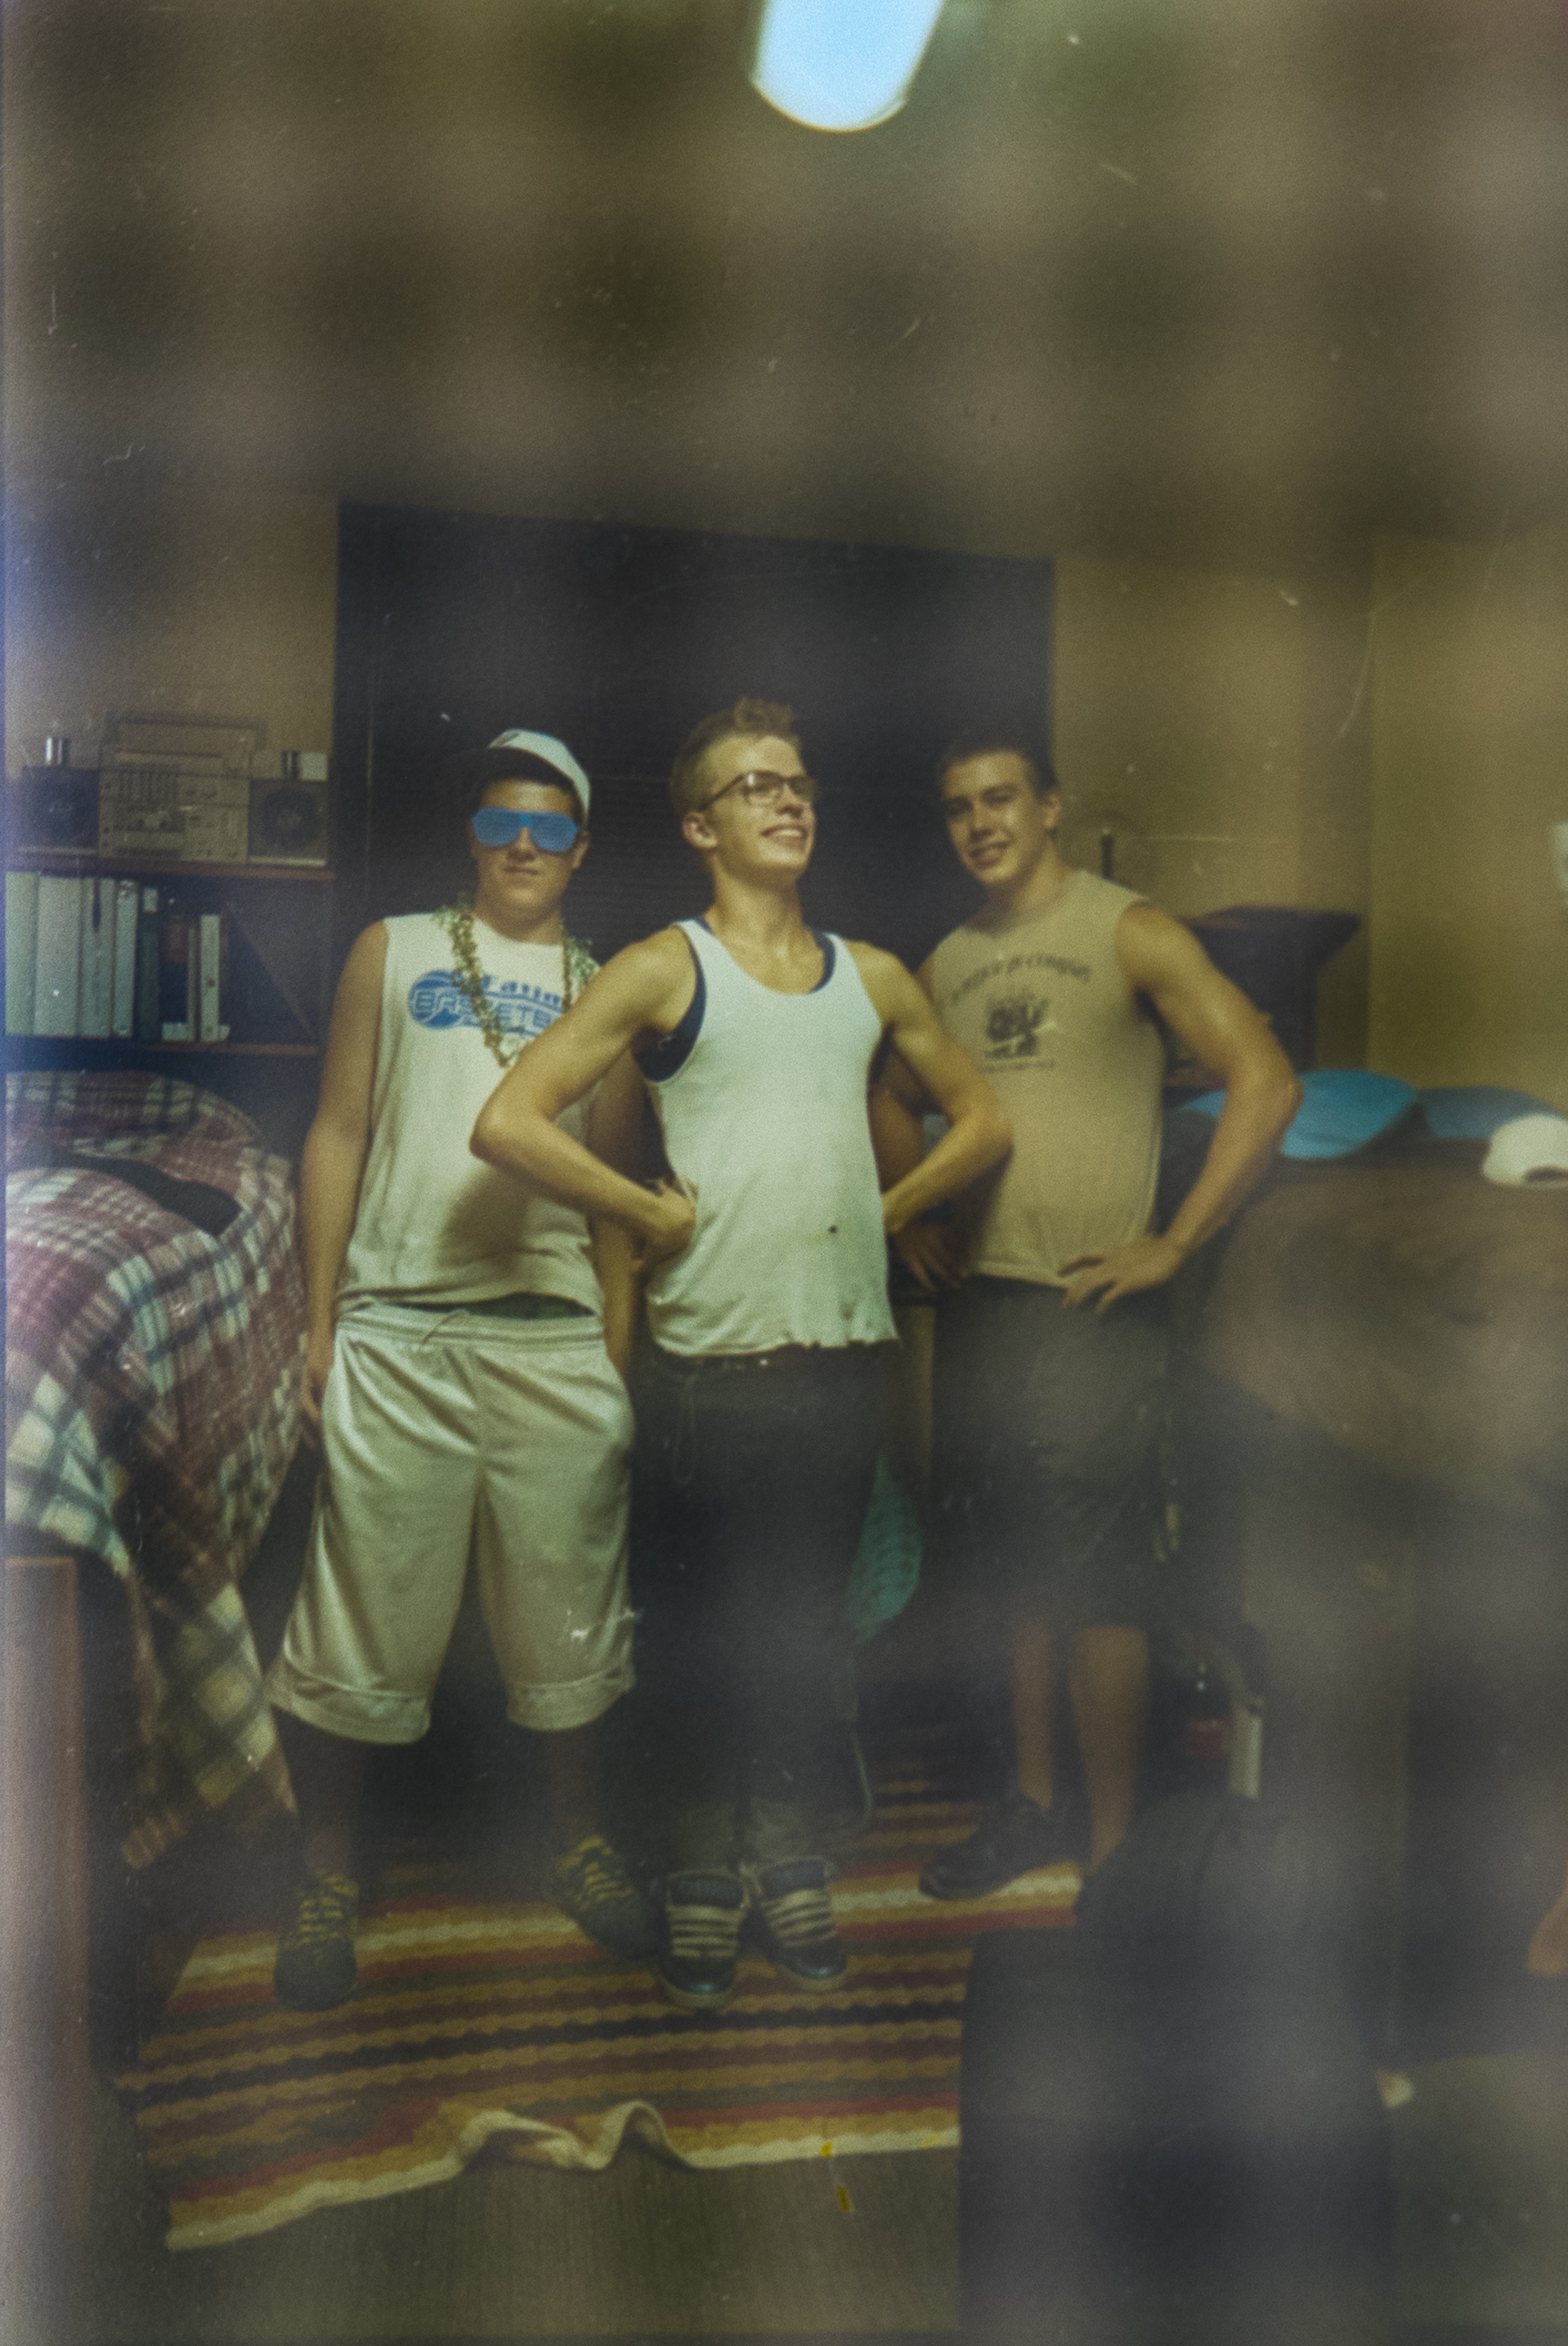
One big problem, the diffuser that comes with the light is not diffuse enough. You will be able to see the individual LEDs in the background of the scanned negative. Notice this in the image below:
To solve this, we add a more uniform, translucent diffuser. The cheapest and most accessible option - a tracing light box. Translucent white acrylic will work too (and it can be found on Amazon with Prime shipping).
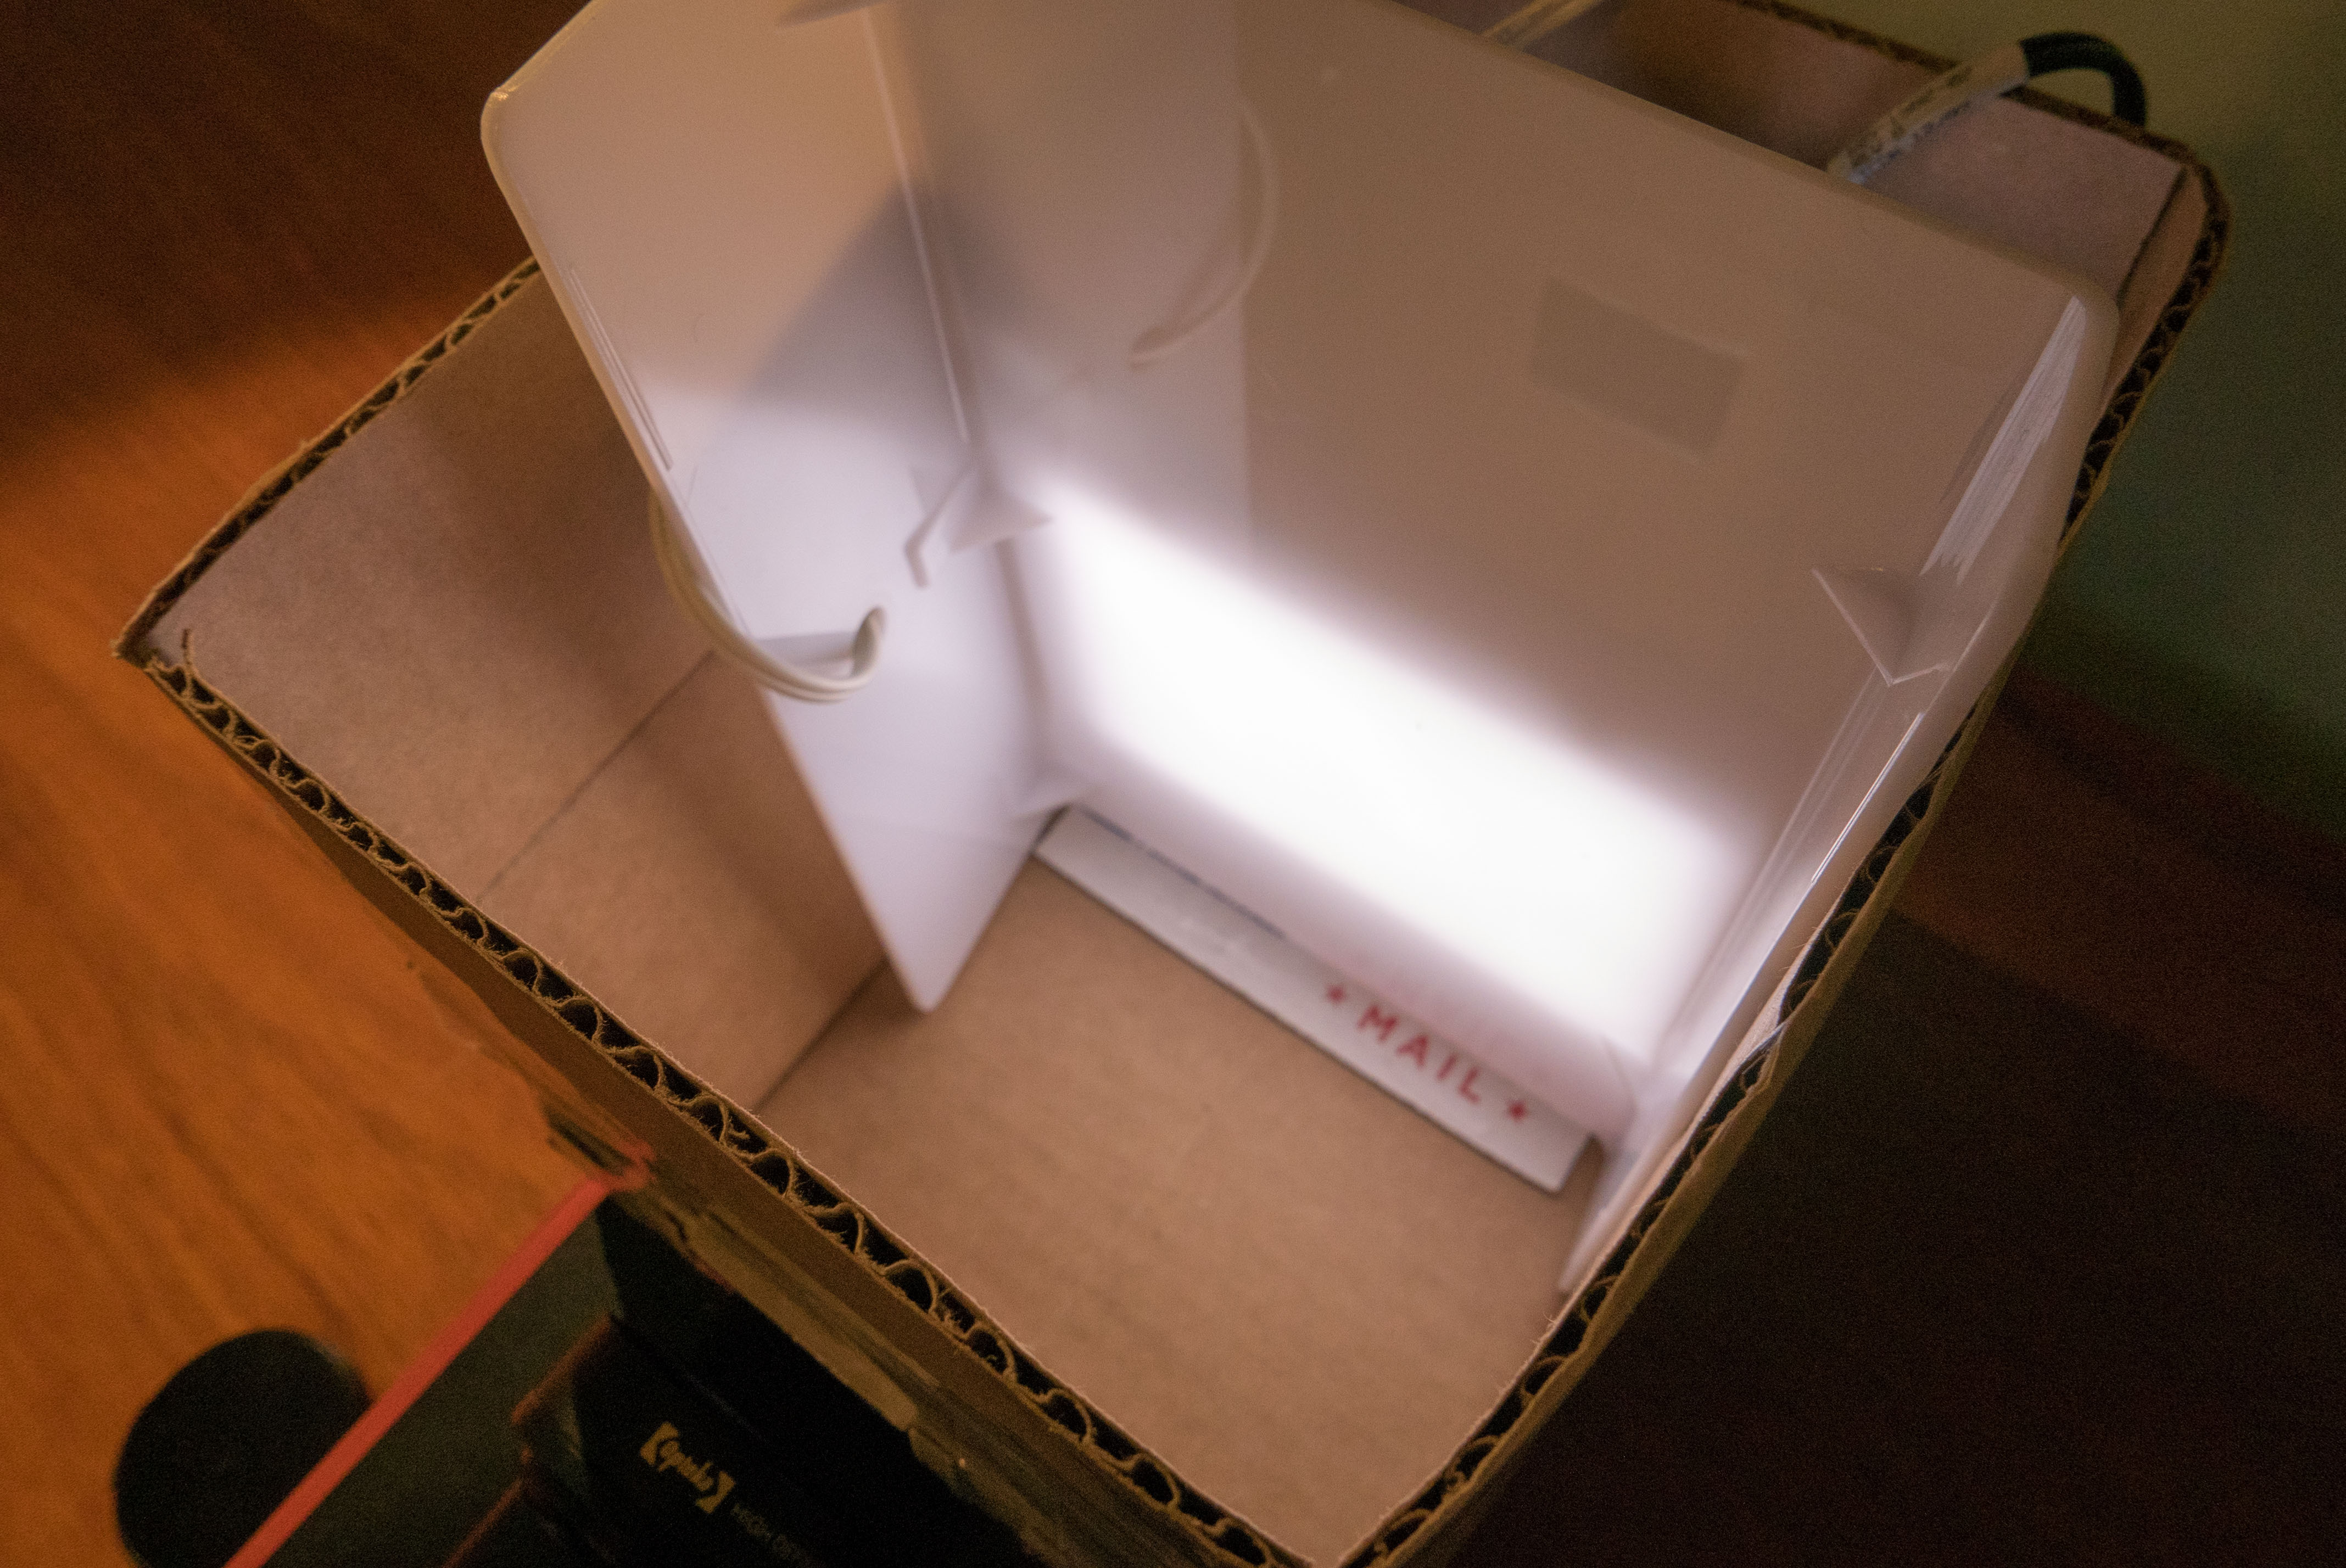
Note, we aren’t using the little bulb that is normally attached to the tracing light box. I unscrewed the bulb and bulb mount. All we want is the acrylic material.
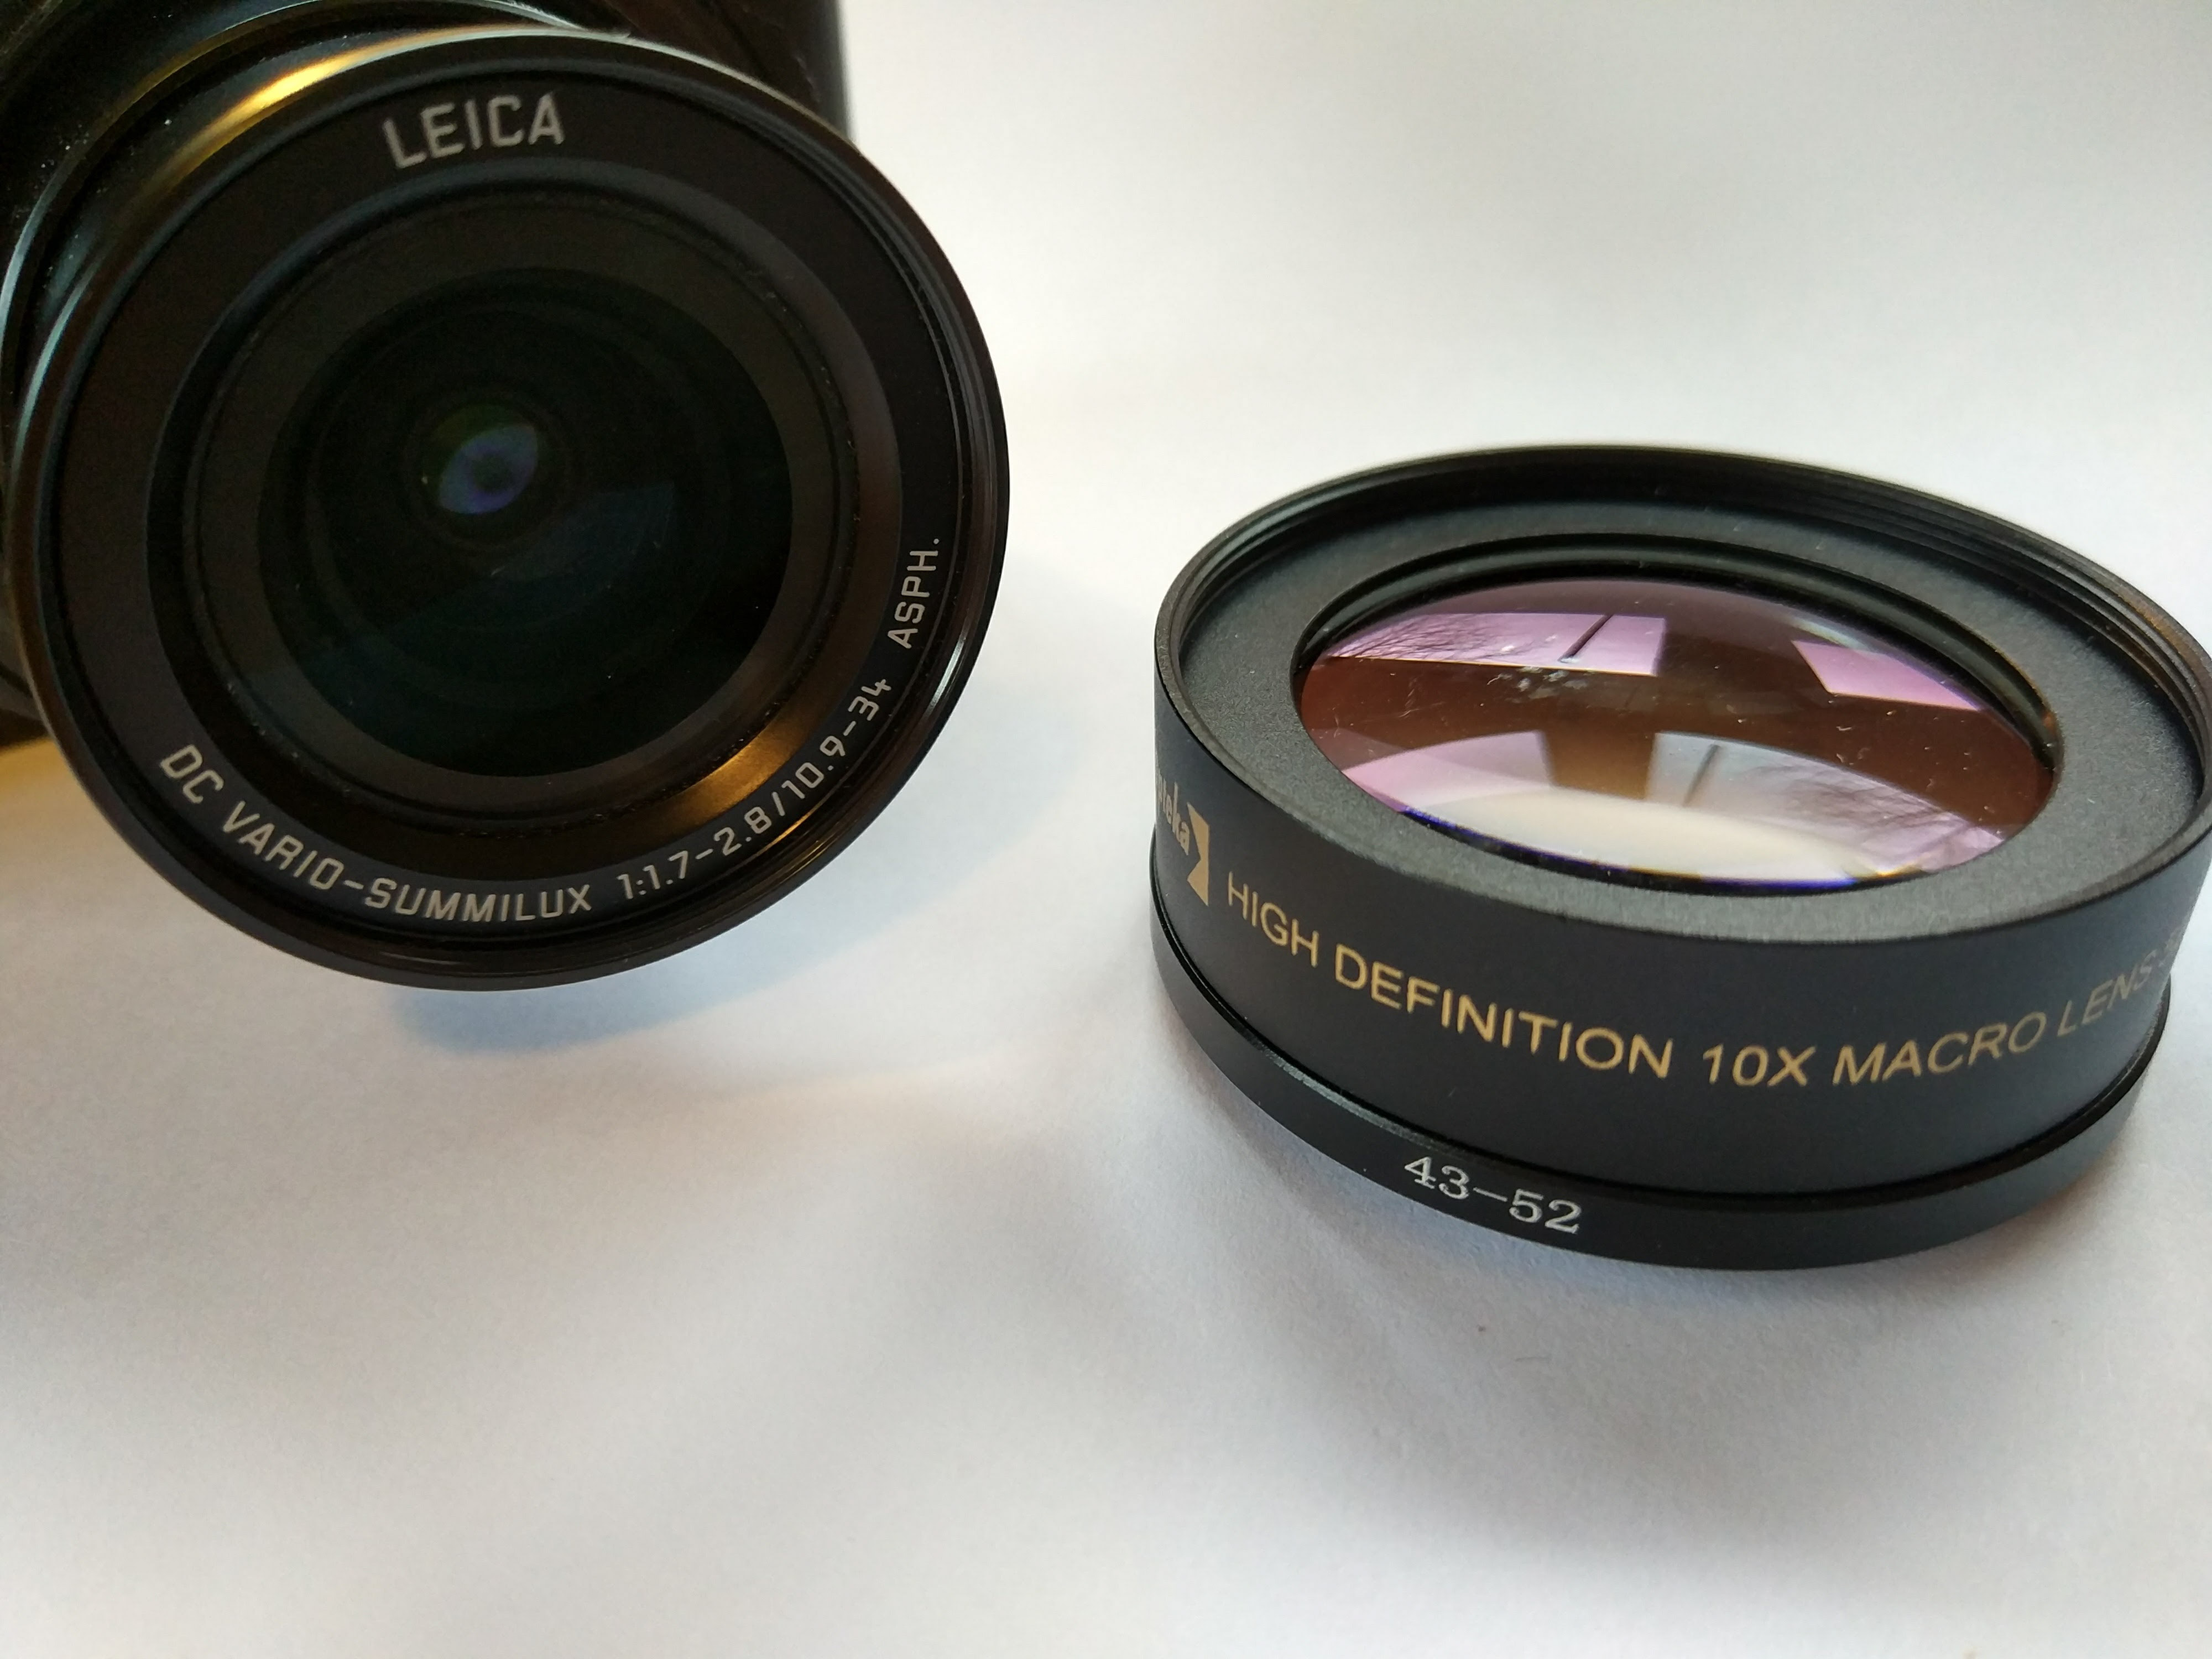
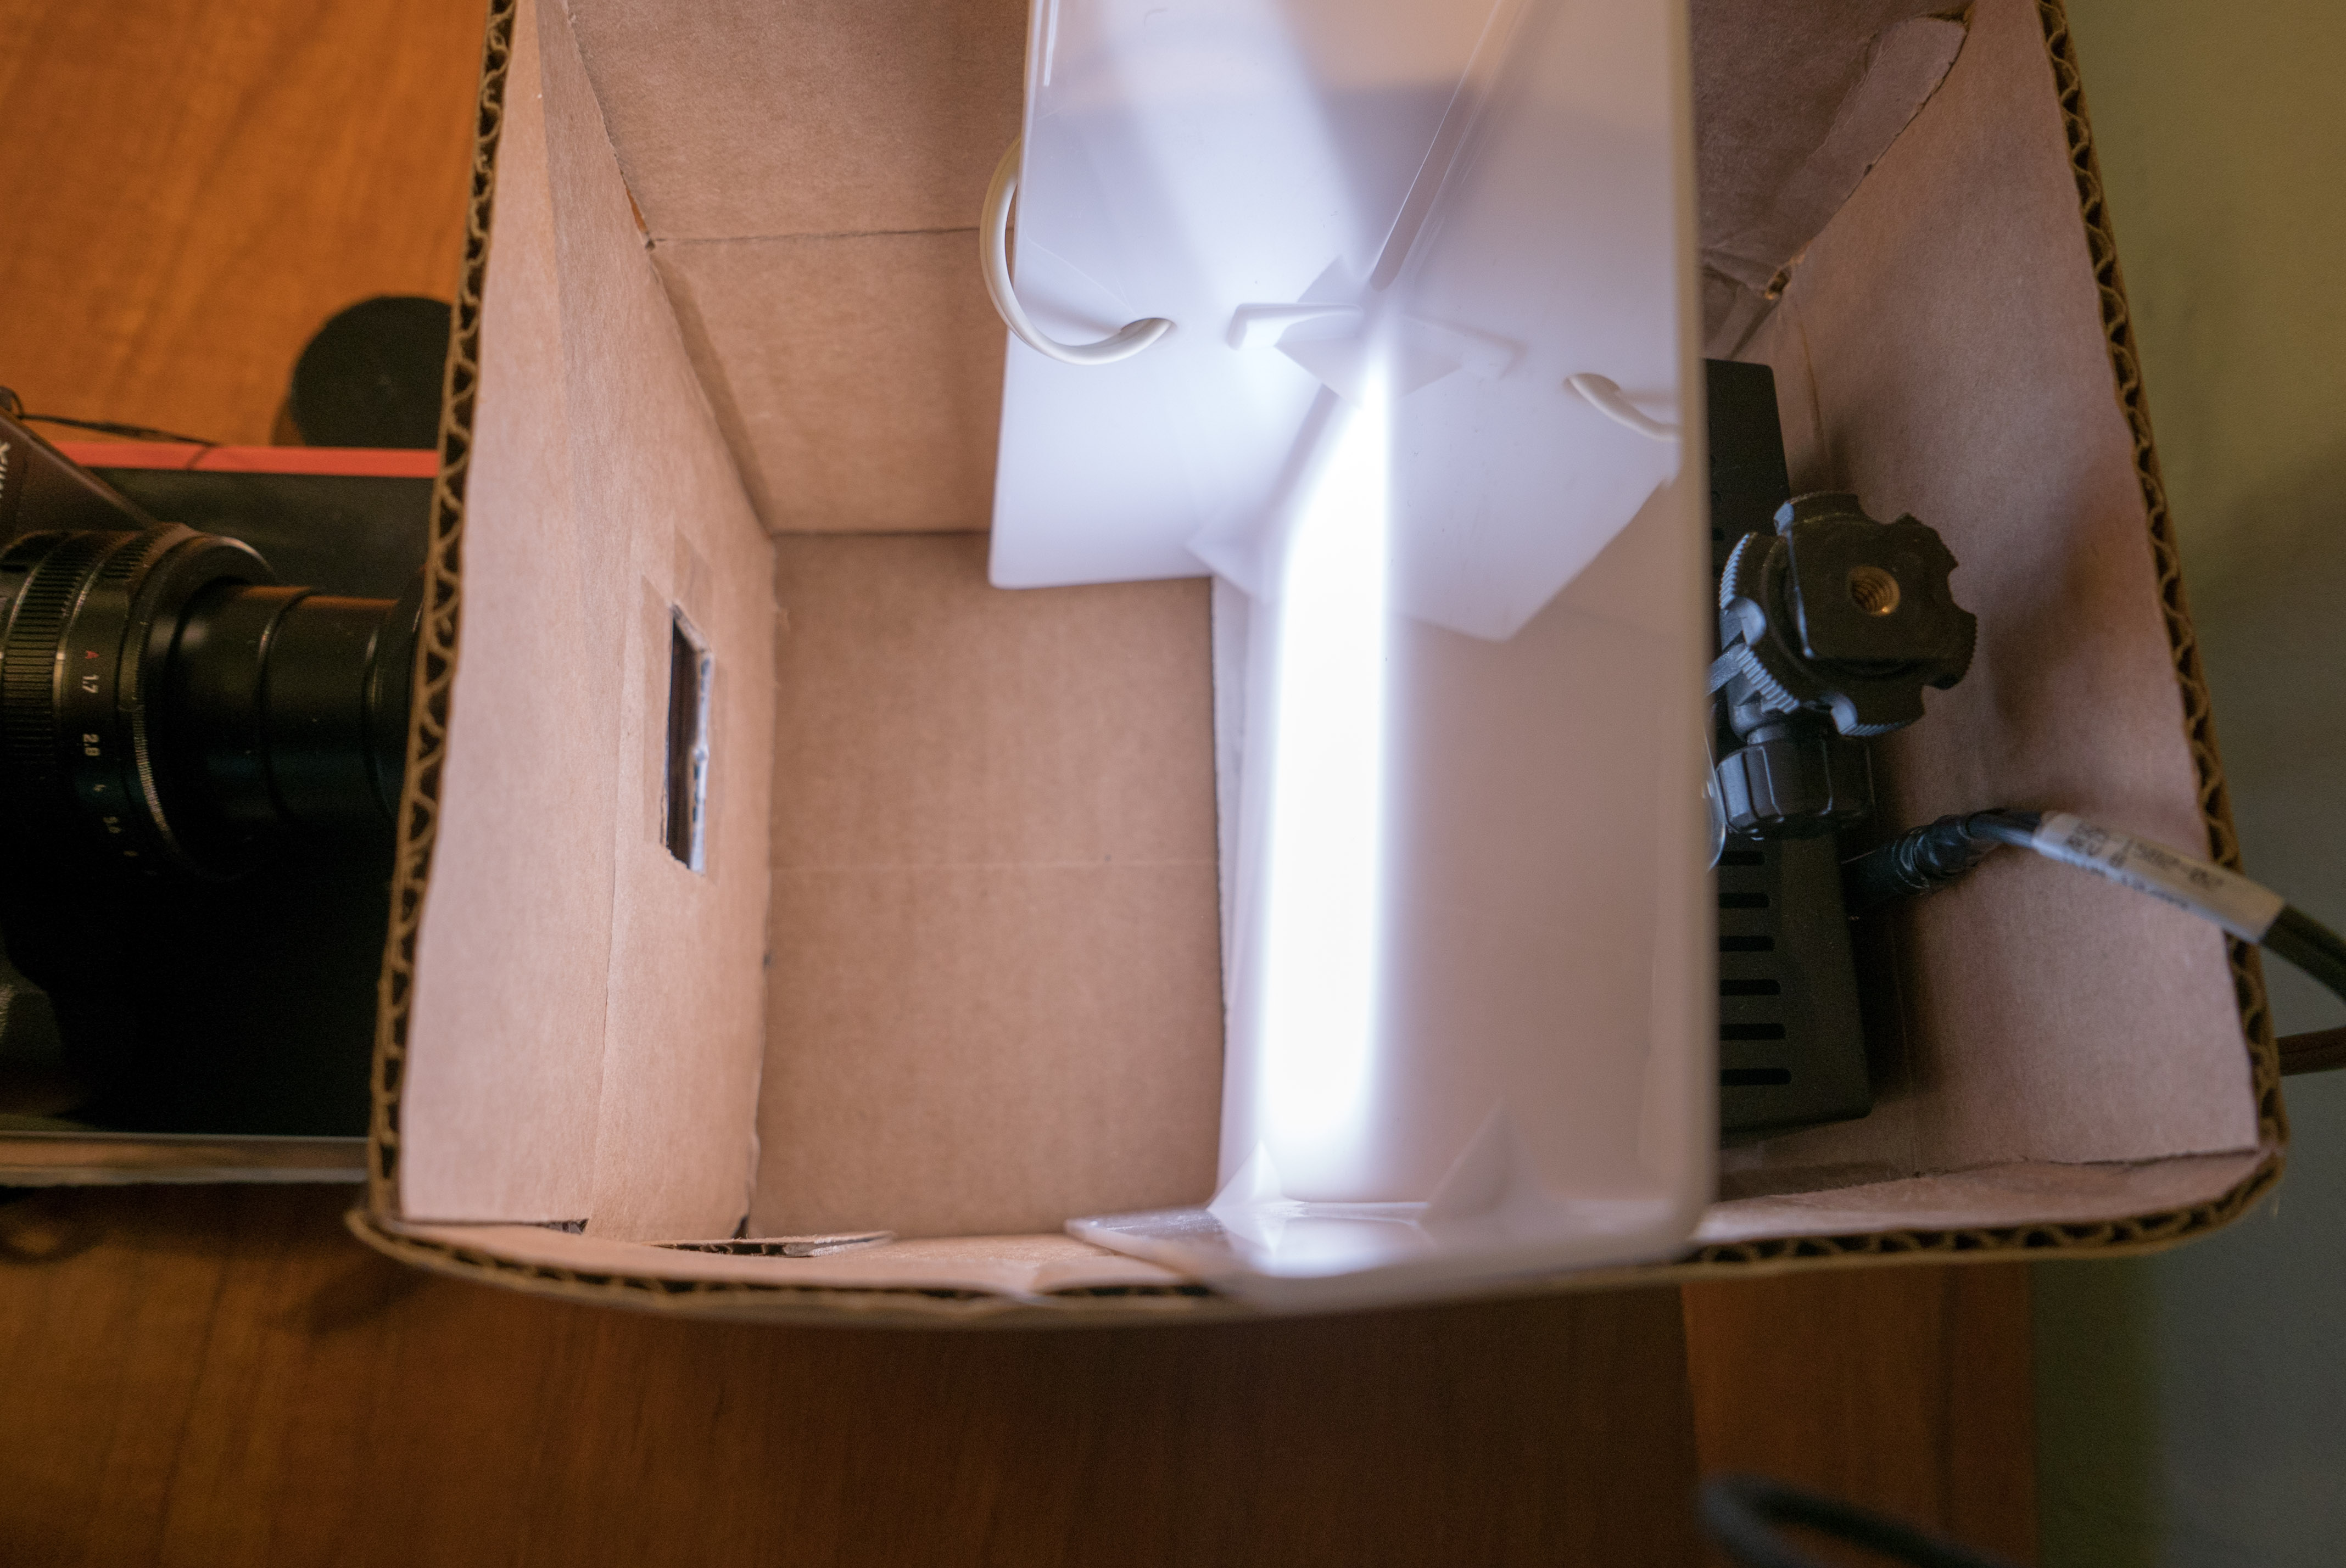
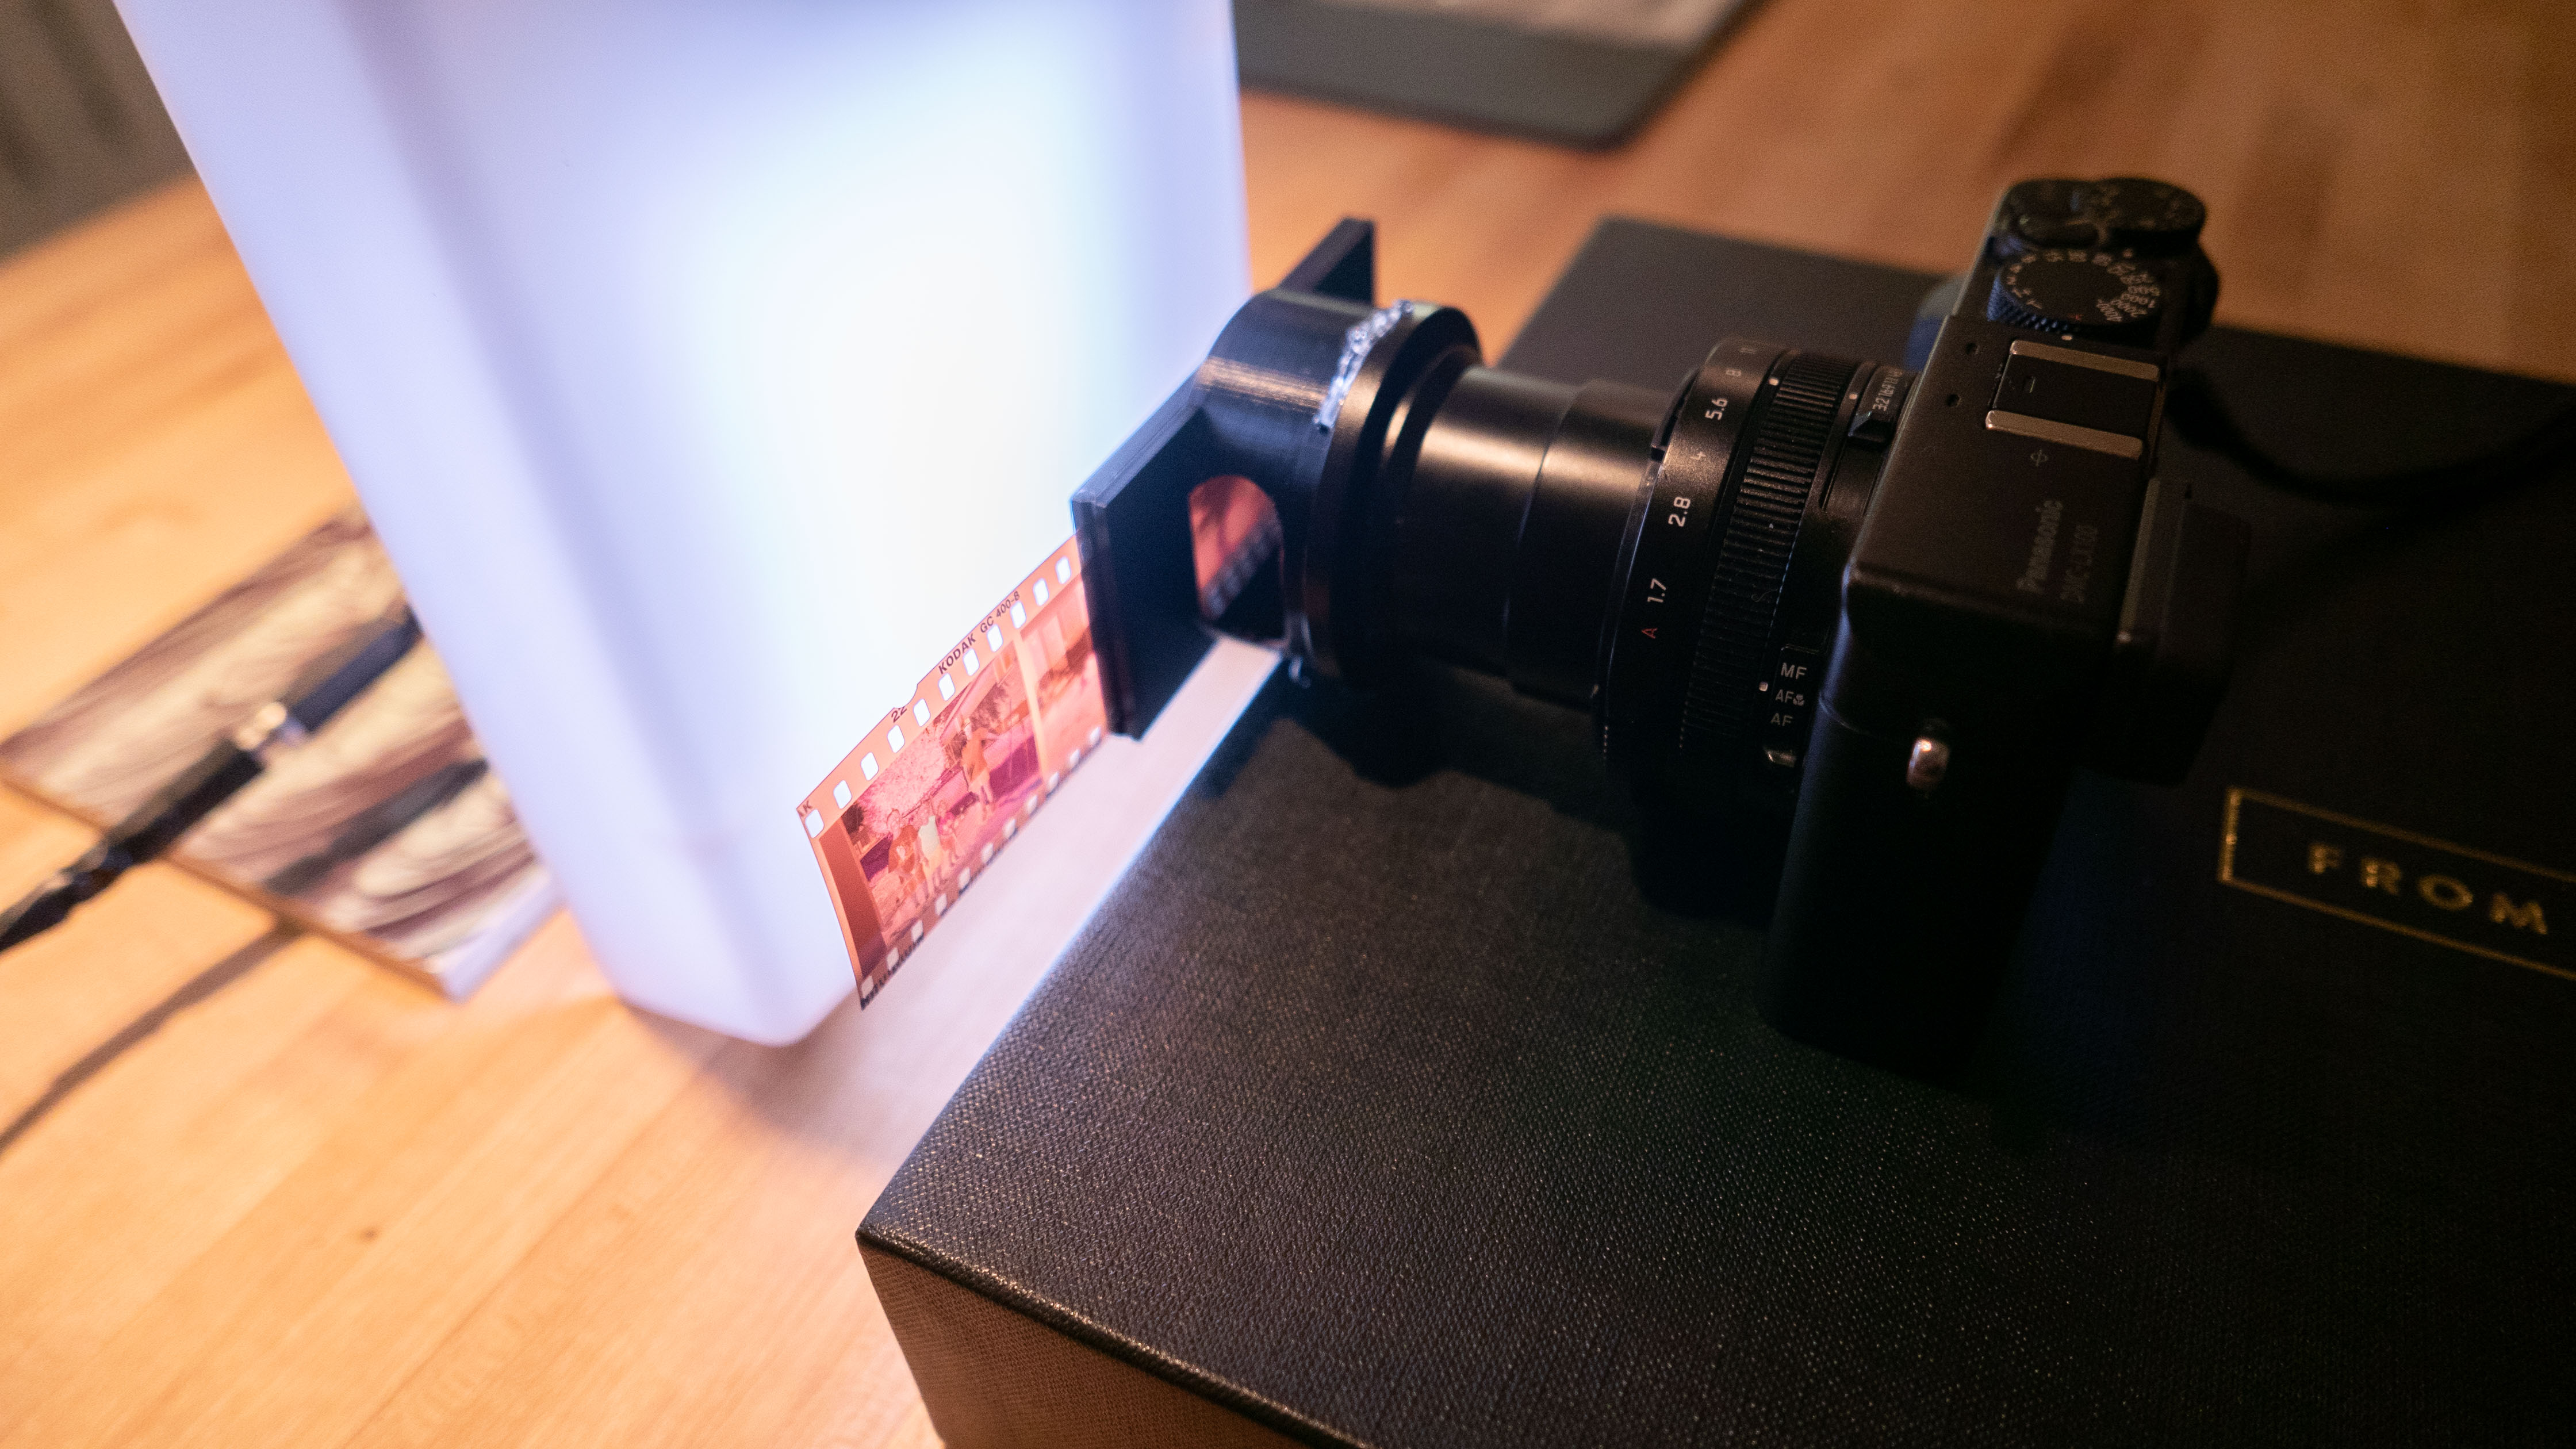
I have a point and shoot, so I used an Opteka Macro Lens Attachment. To get great resolution, you want to fill as much of the sensor as possible with the image of the negative. Using a point and shoot without a macro attachment will produce lower quality, lower resolution, distorted results.
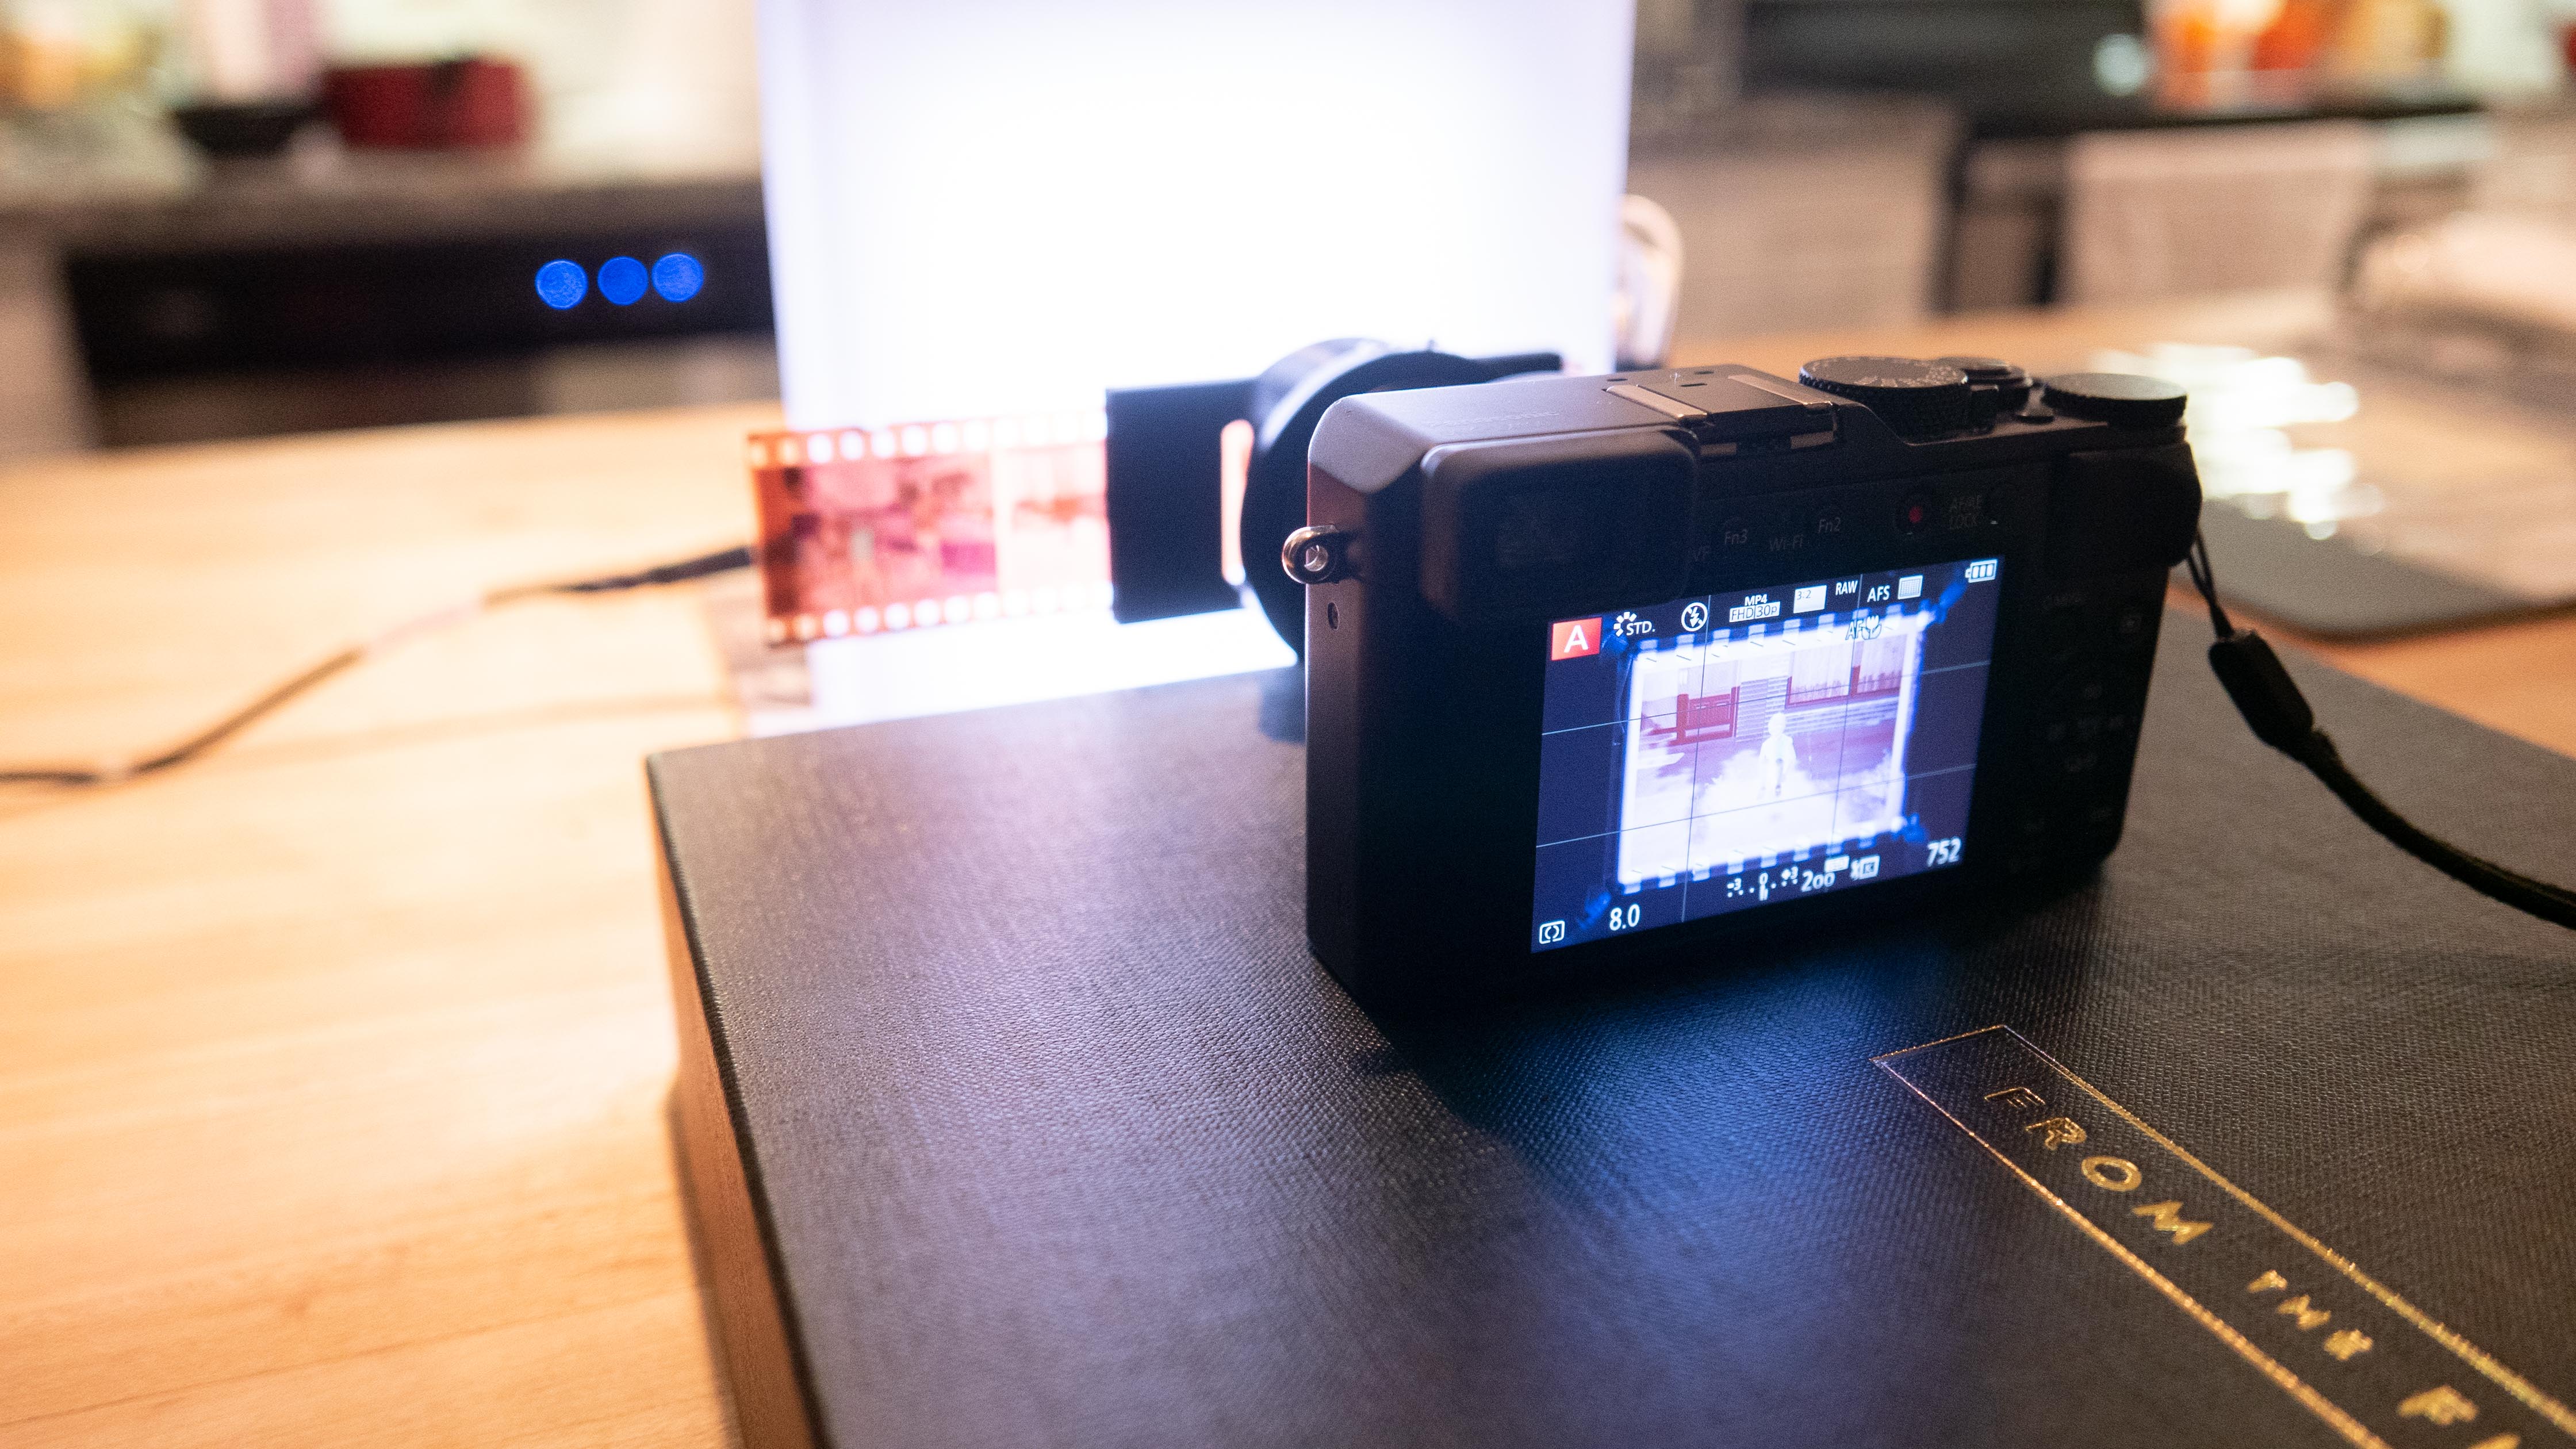
I put the camera on manual focus, ISO 200 (low noise), f/8 (for sharpness), white balance as cold as possible, variable shutter speed, and RAW capture.
I slide the camera back and forth a bit between every shot to get the best focus. This whole process is much faster with two people. One person focuses and slides negatives through and the other boxes and unboxes the negatives.
Most of the pictures are between 1/40 and 1/125 of a second. Since the camera is firmly resting on the books, I don’t have any issues with camera shake.
I am able to scan 300-400 slides an hour using this method.
Post Processing
I use Lightroomto manage and edit photos. This process is best done with a physical print of the image for reference.
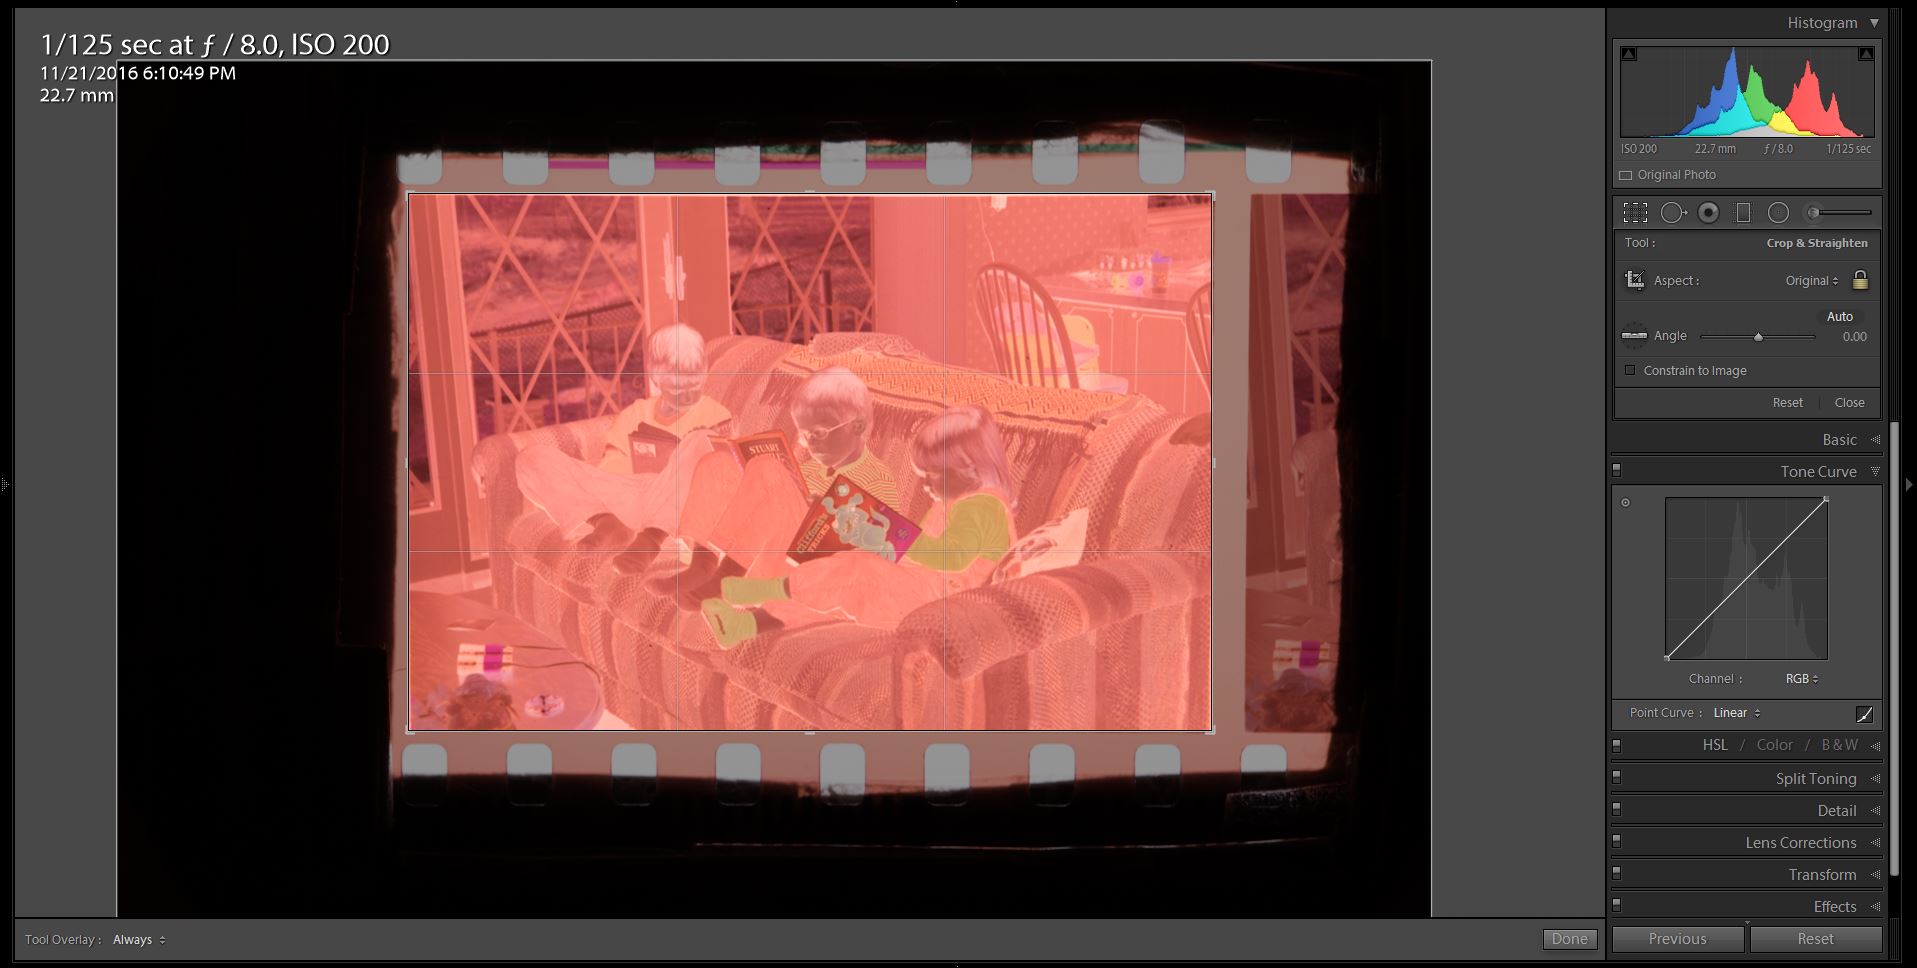
After importing, go to the Develop tab with one negative selected. Crop, straighten, adjust the vignette, and distortion.
Invert the Tone Curve. Holding Shift while moving a point makes this easy.
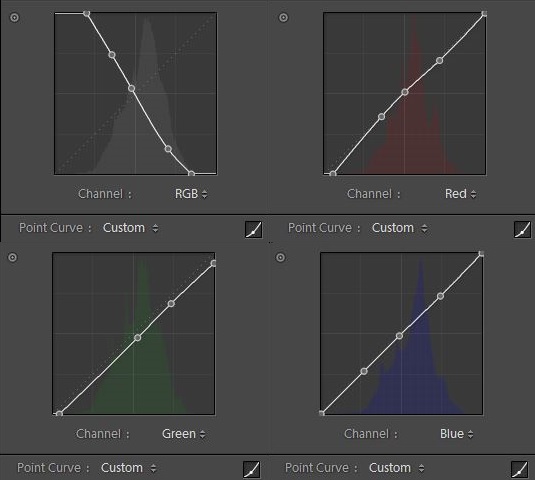
Here are my final tone curves. It’s difficult to adjust, because once the image is inverted, every adjustment does exactly the opposite of what you expect. If you have a better set of curves or method, let me know in the comments below.
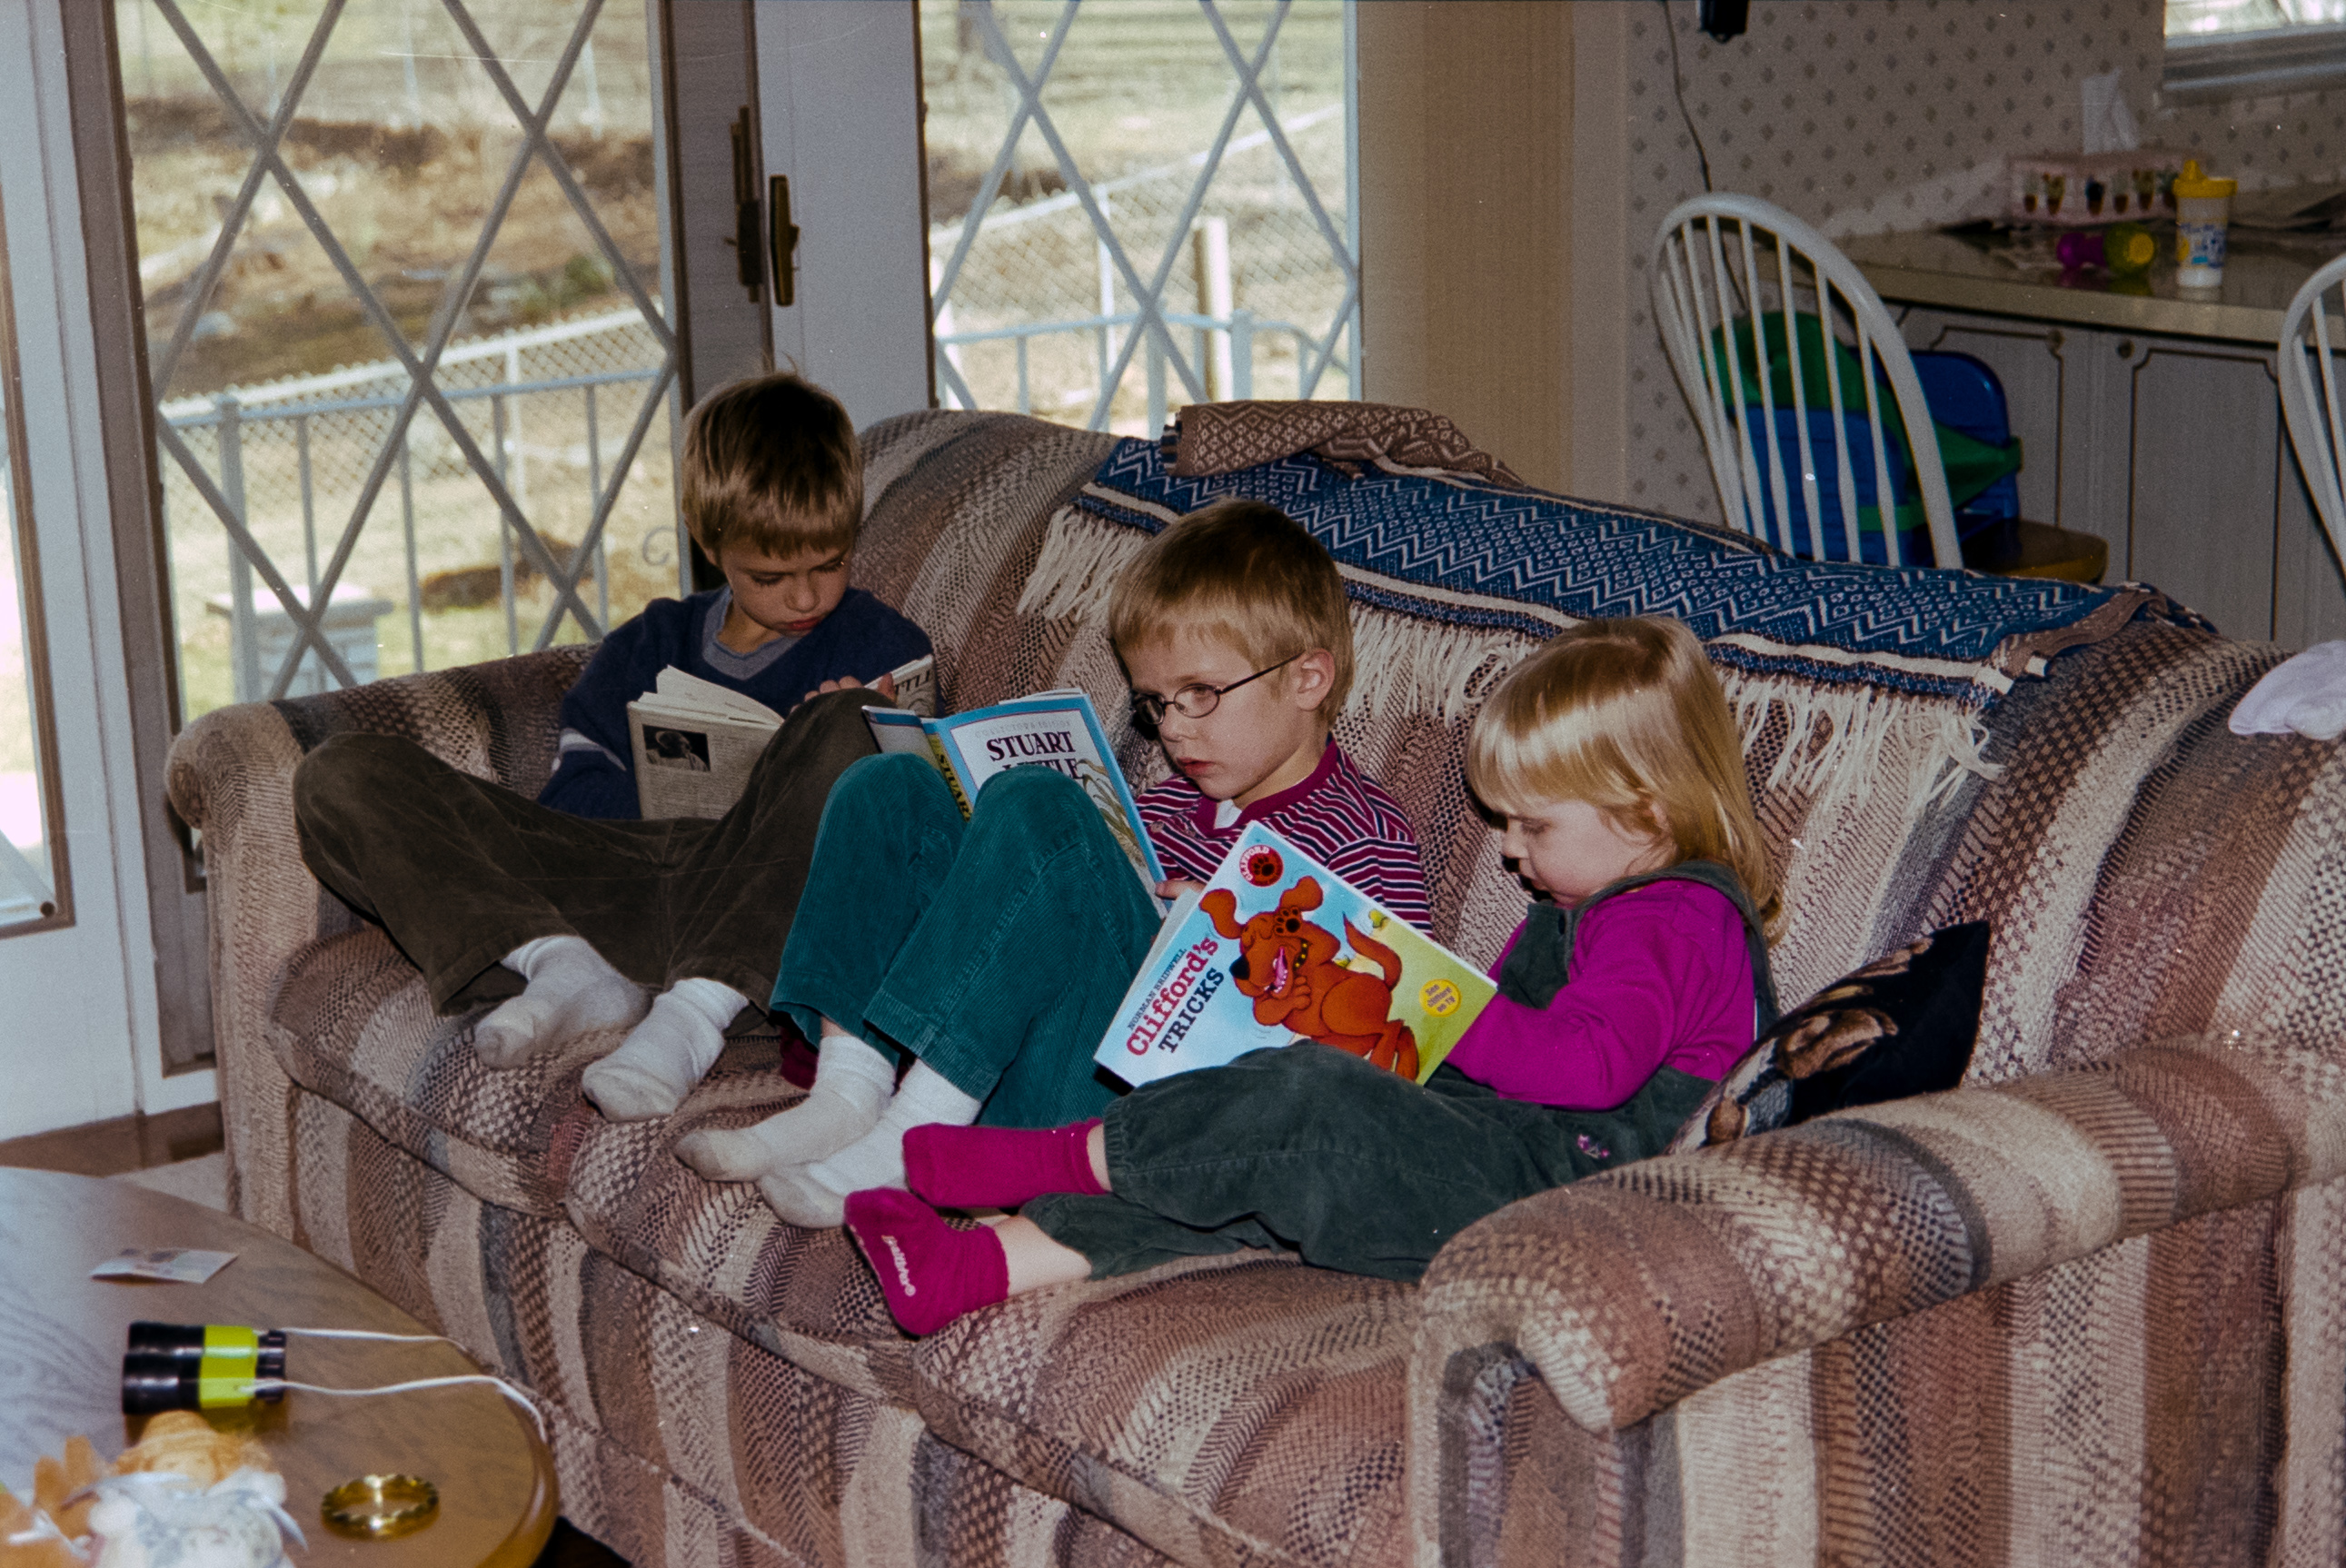
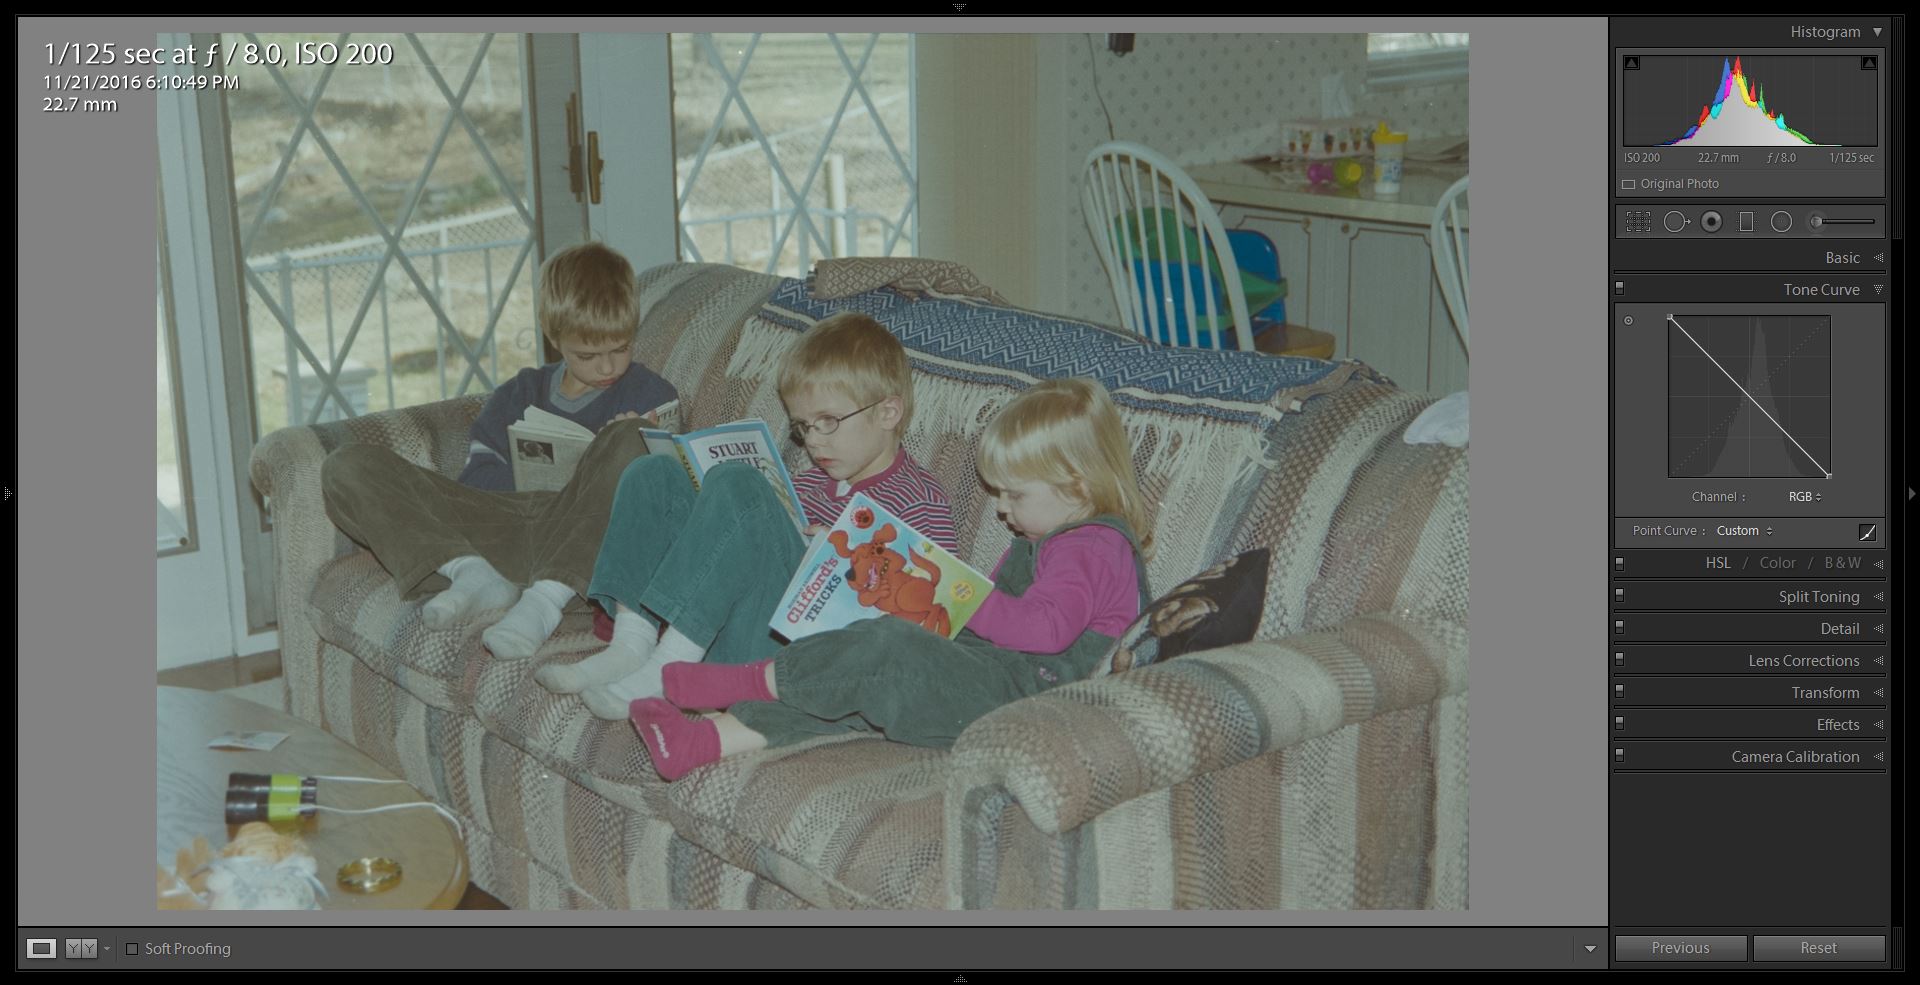
After the tone curve and some exposure adjustments, I found this image looks very similar to the original 4’x6′ print. The colors are slightly off, but it is more than adequate for my purposes. The resolution, while not amazing, is great and would print well.
Now let’s copy these settings to the rest of the images.
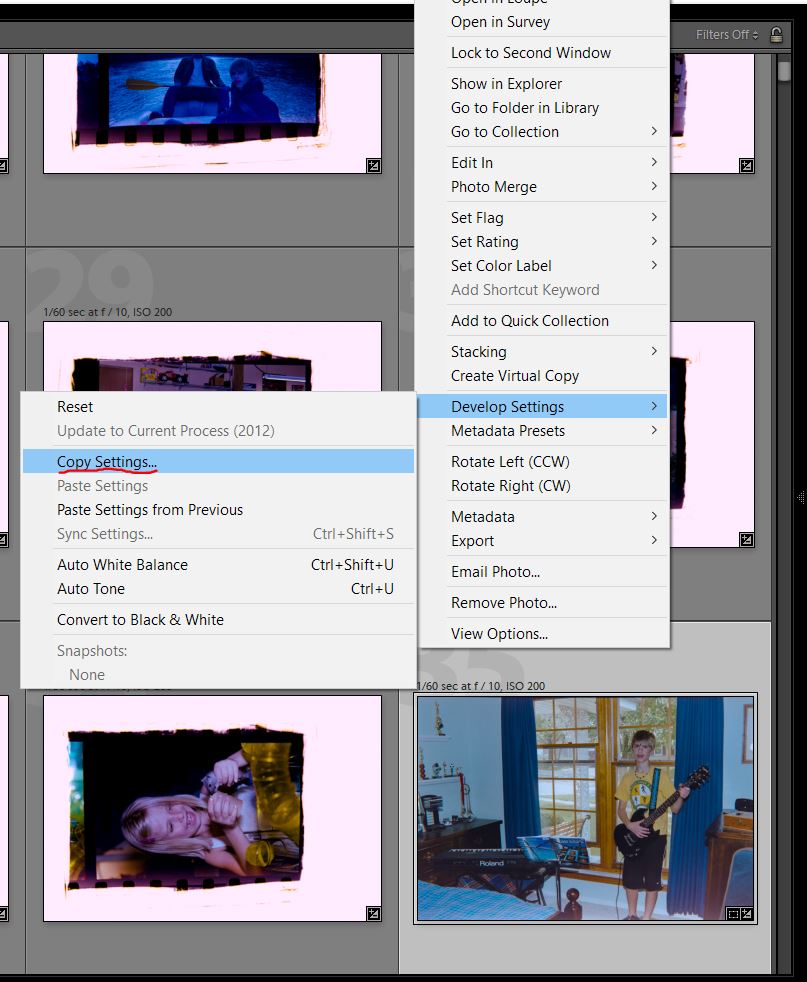
Highlight your edited image, right click and navigate to Develop Settings-> Copy Settings.
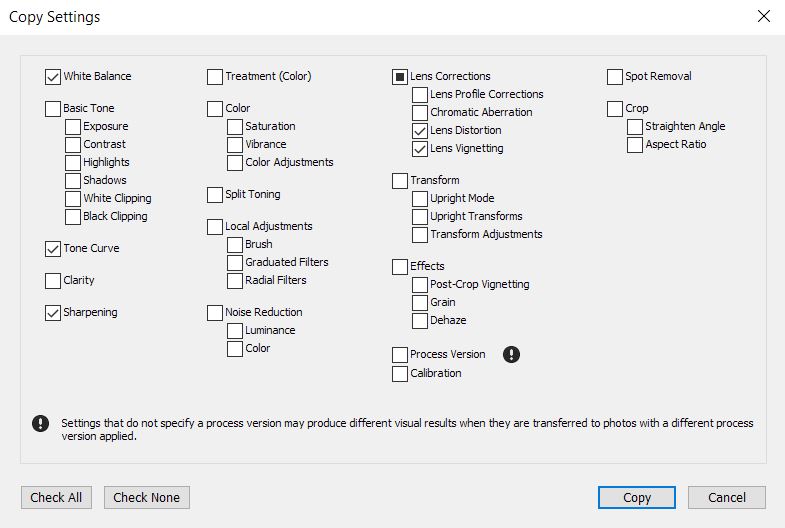 Here are the settings I like to copy over.
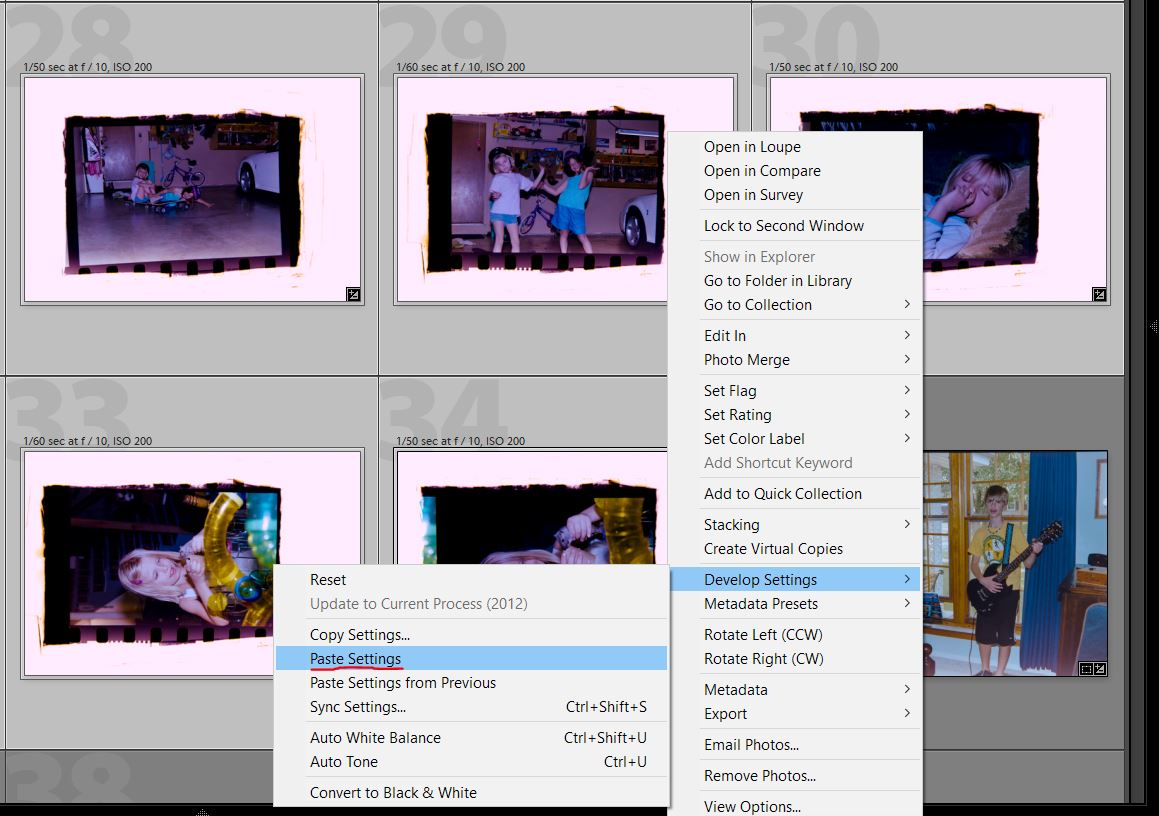 To paste settings, select all the remaining negatives. Right click and navigate to Develop Settings-> Paste Settings.
While this saves me untold hours of work, I still manually adjust the crop and exposure of each image.
To paste settings, select all the remaining negatives. Right click and navigate to Develop Settings-> Paste Settings.
While this saves me untold hours of work, I still manually adjust the crop and exposure of each image.
2018-12 Update
Originally, I scanned about 3,000 photos using the method outlined above. I had another 3,000 photos to scan, so I created a new scanner to quicken the process.
I now have a 3D-printed film scanner. It screws on the filter threads of the lens. I no longer use the macro lens adapter.
This allows for better focus, quicker scanning, and more consistent results.