This provides an overview of adding a Zooz ZEN34 smart switch to Home Assistant and using it to trigger automations.
This guide was written for HA 2021.6.6.
Prerequisites
- Home Assistant
- Z-Wave USB Hub
- I recommend either the Aeotec Z-Stick 7 or Z-Stick 5.
- Z-Wave JS integration on Home Assistant
- See setup instructions here.
- Zooz ZEN34 Smart Wireless Z-Wave Switch
Add ZEN34 to Z-WaveJS
- Remove the paper battery tabs from the switch to power it on
- Log in to Home Assistant
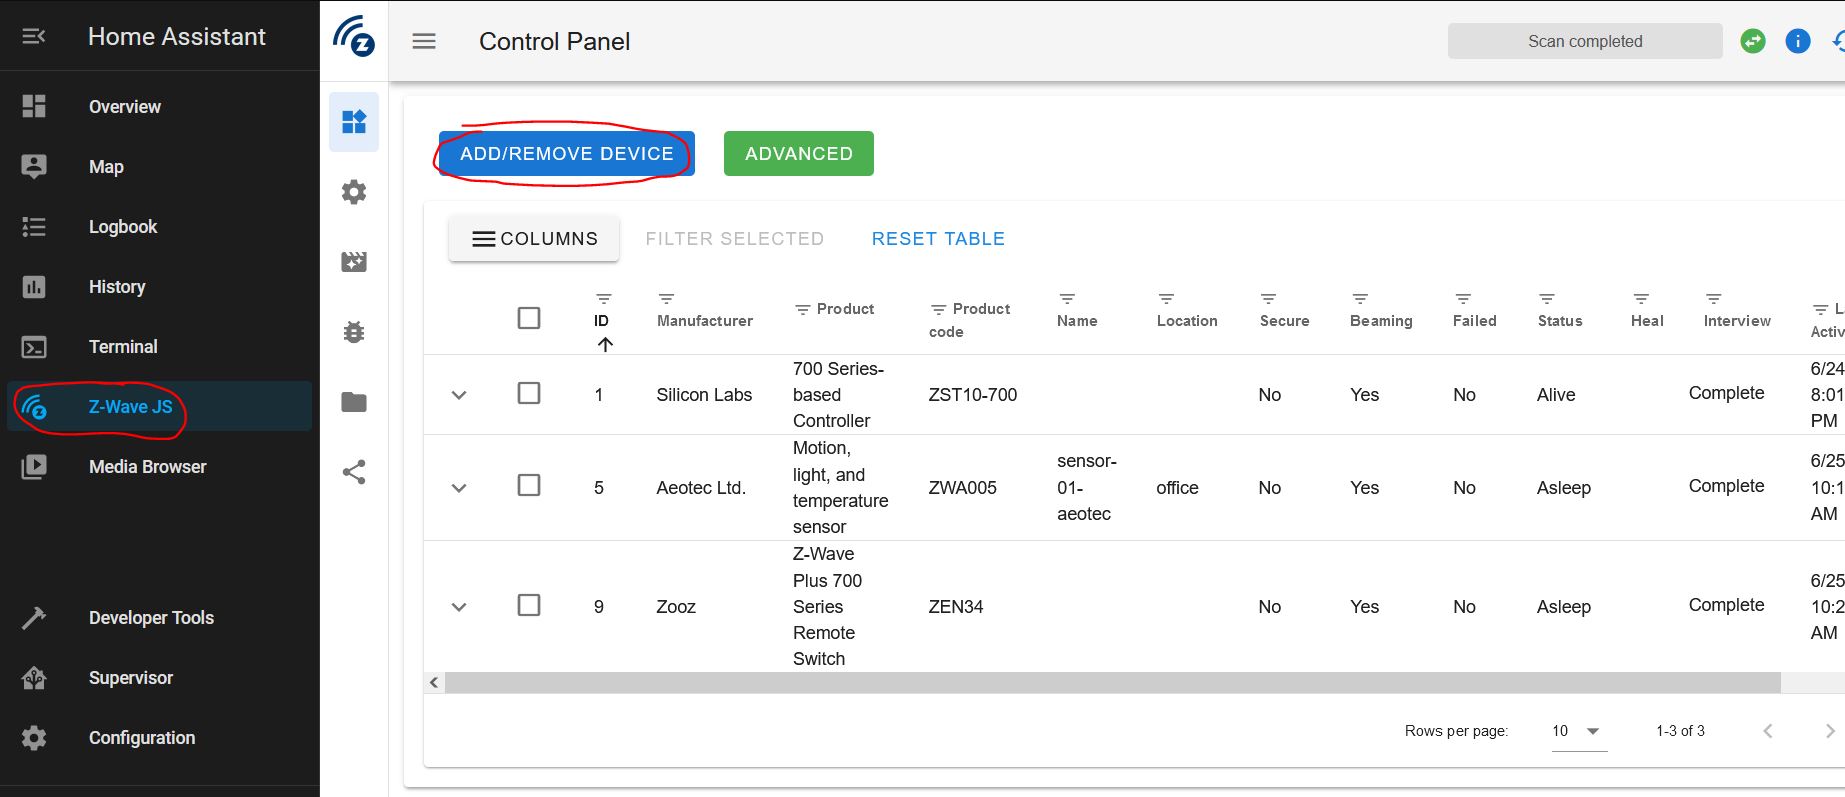
- Go to Z-Wave JS and press “Add/Remove Device”
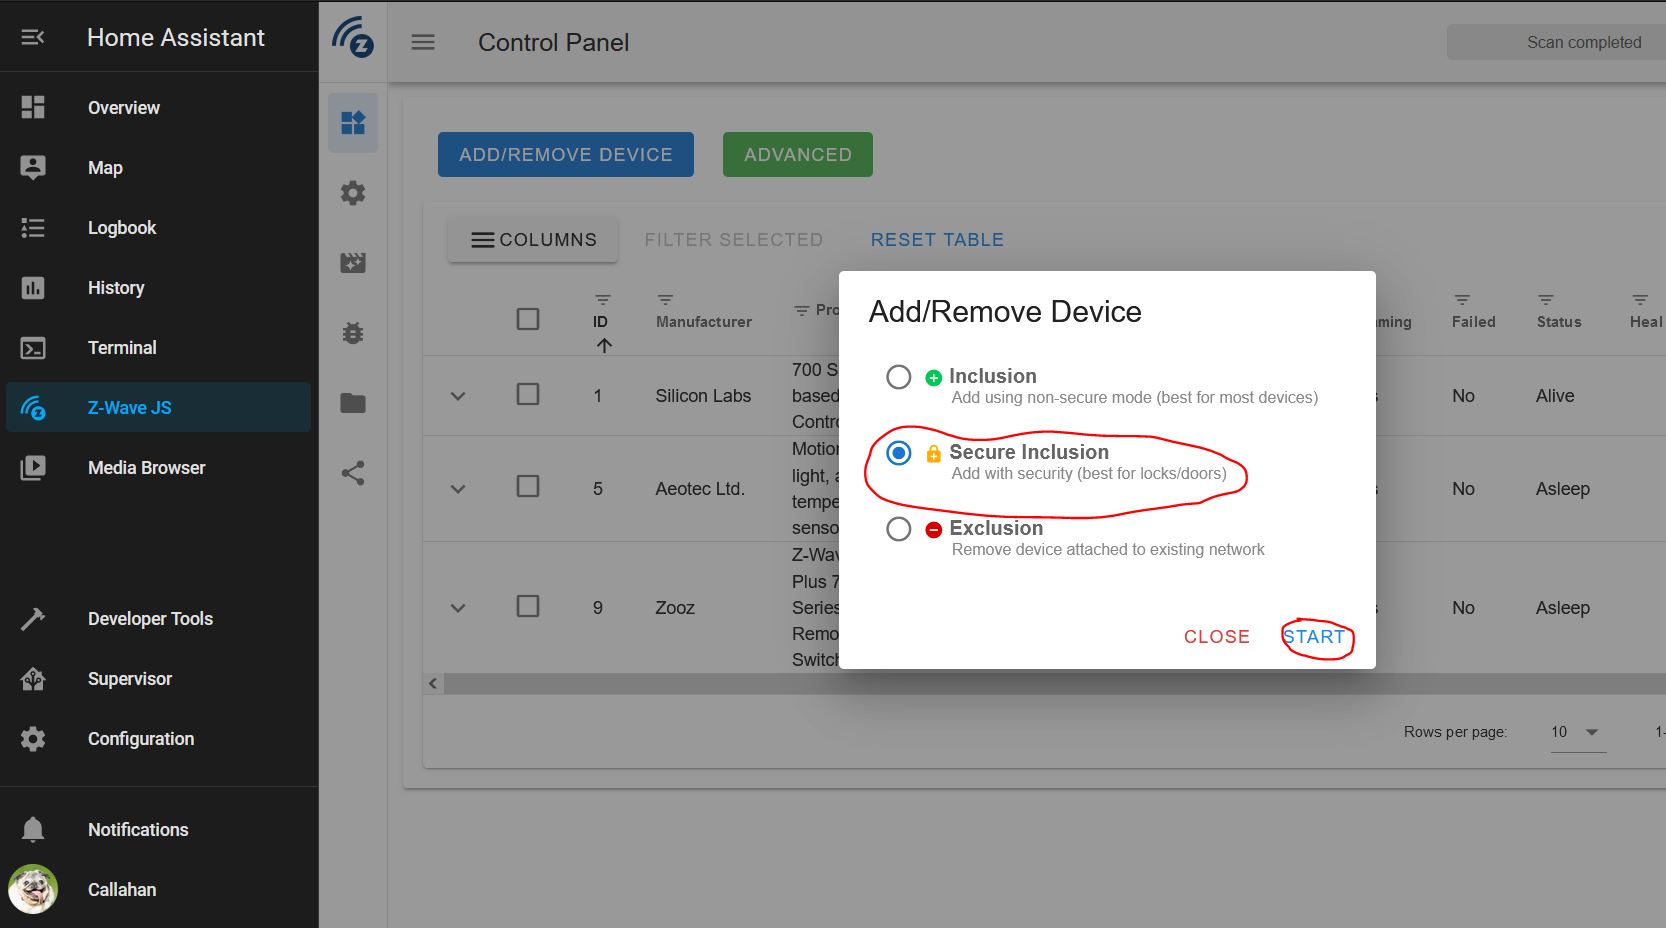
- Select “Secure Inclusion” and press “Start”
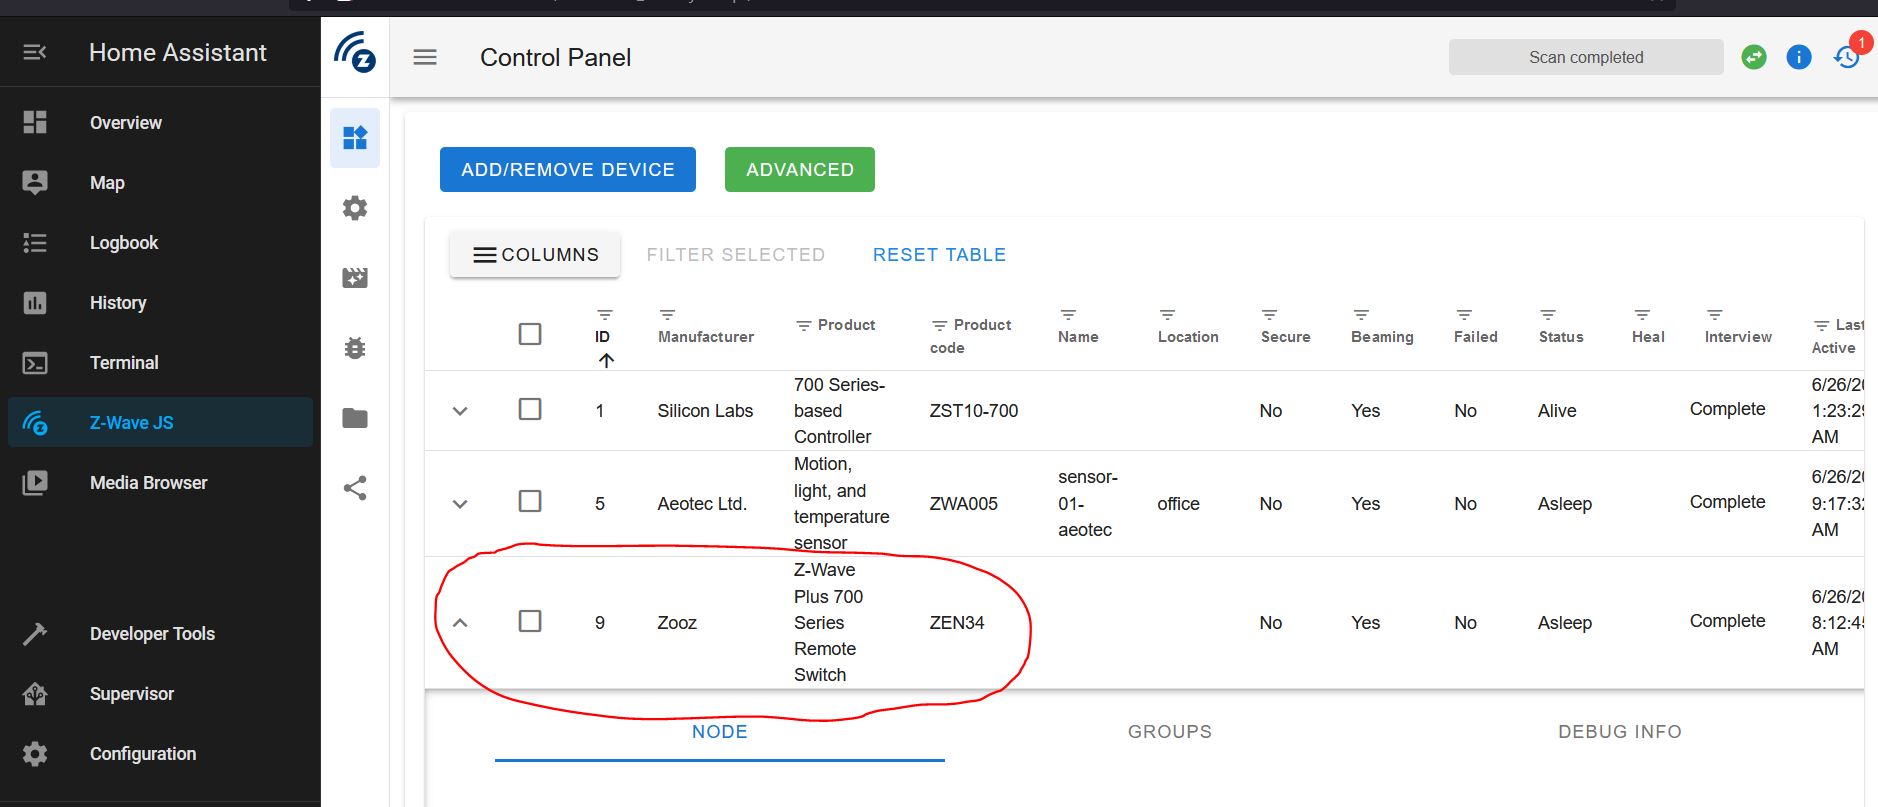
- The switch should show up on the Z-Wave JS Control Panel.
If the fields aren’t fully filled in (they show “unknown” or “dead”), wait 5 minutes.
If the fields still haven’t shown up, press the upper paddle 7 times to force the switch to wake up and send/receive
configuration data.
Listen for Switch Presses
The switch should show up as a device under Configuration->Devices. Unintuitively, the switch will not have any entities for the two buttons, but just entities for battery status.
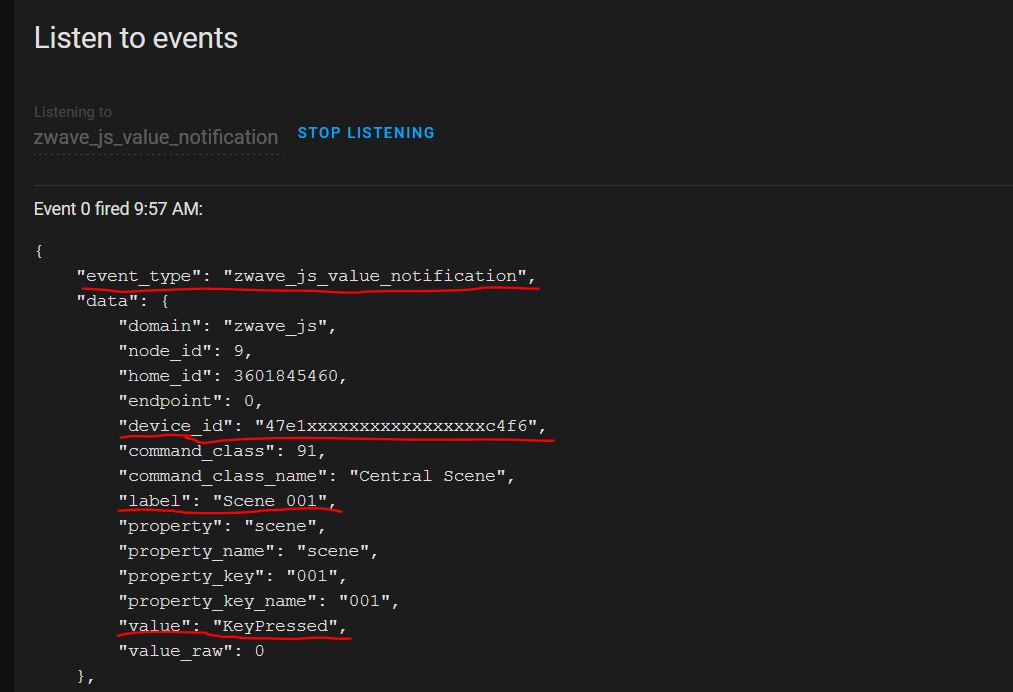
When the switch is pressed, a zwave_js_value_notification event is generated. The event contains data about which
button was pressed and how many times it was pressed. To use the switch for an automation, we will use this event as the
trigger.
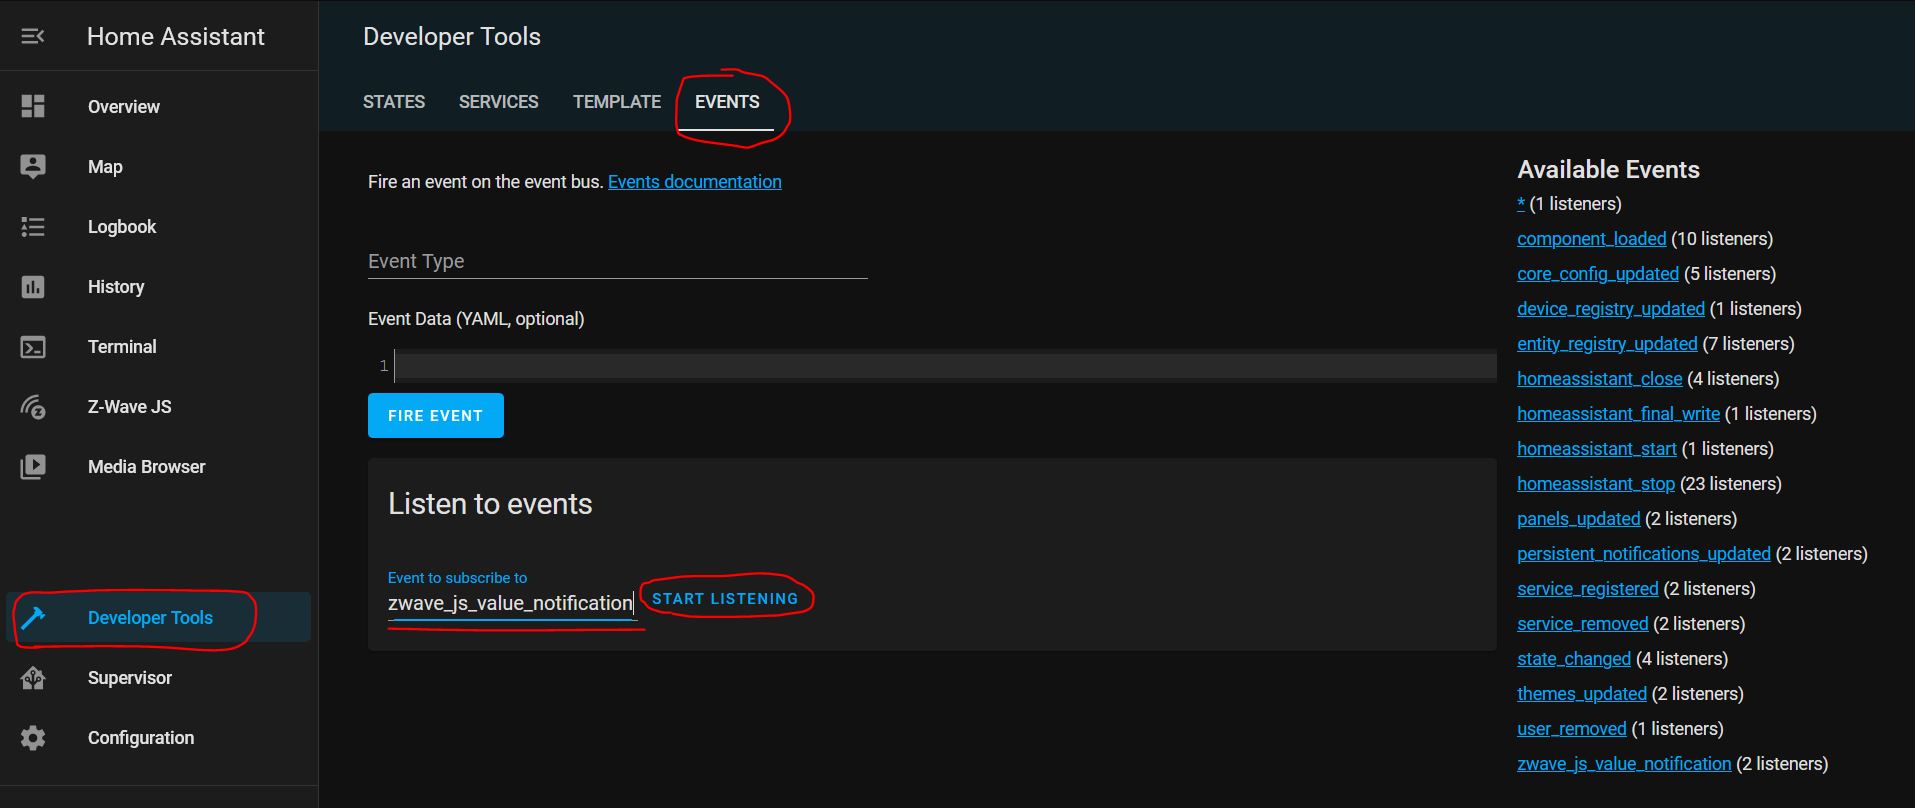
- Go to Developer Tools->Events
- Under “Listen to events”, enter
zwave_js_value_notificationand press “Start Listening”
Note - you can also enter “*” to listen to all events.
- Press a button on the switch. You should see the event appear.
The important data are event_type, device_id, label, and value.
device_id- identifies the switchlabel- “Scene 001” = upper button, “Scene 002” = lower buttonvalue- how many times the button has been pressed
We can now use this data to trigger an automation.
Trigger an Automation
- Go to Configuration->Automation->Add Automation
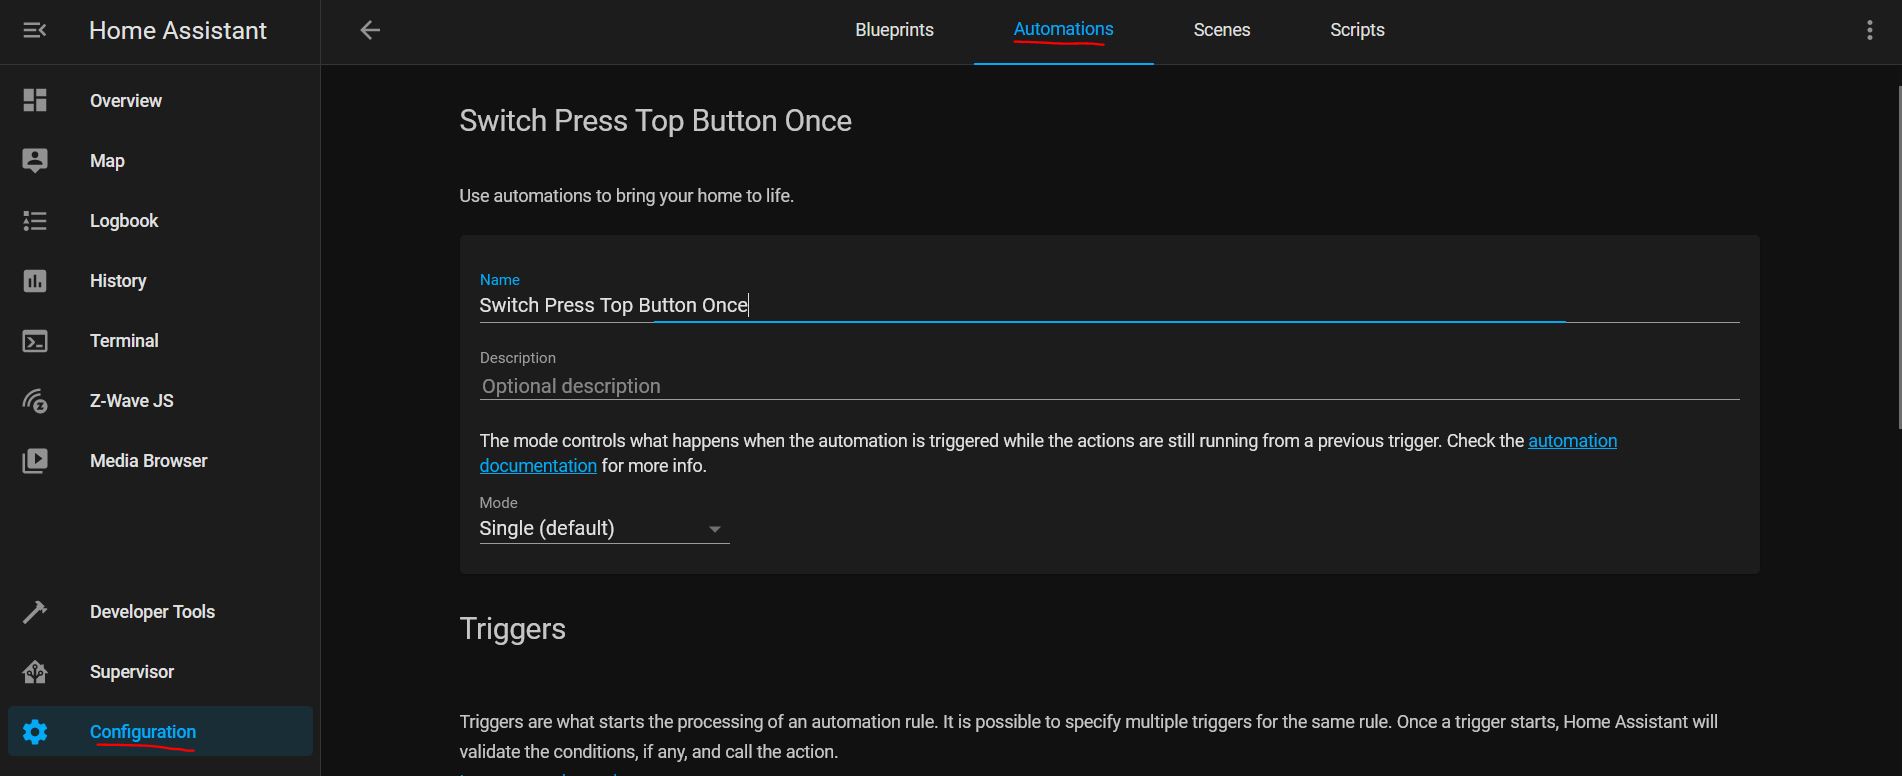
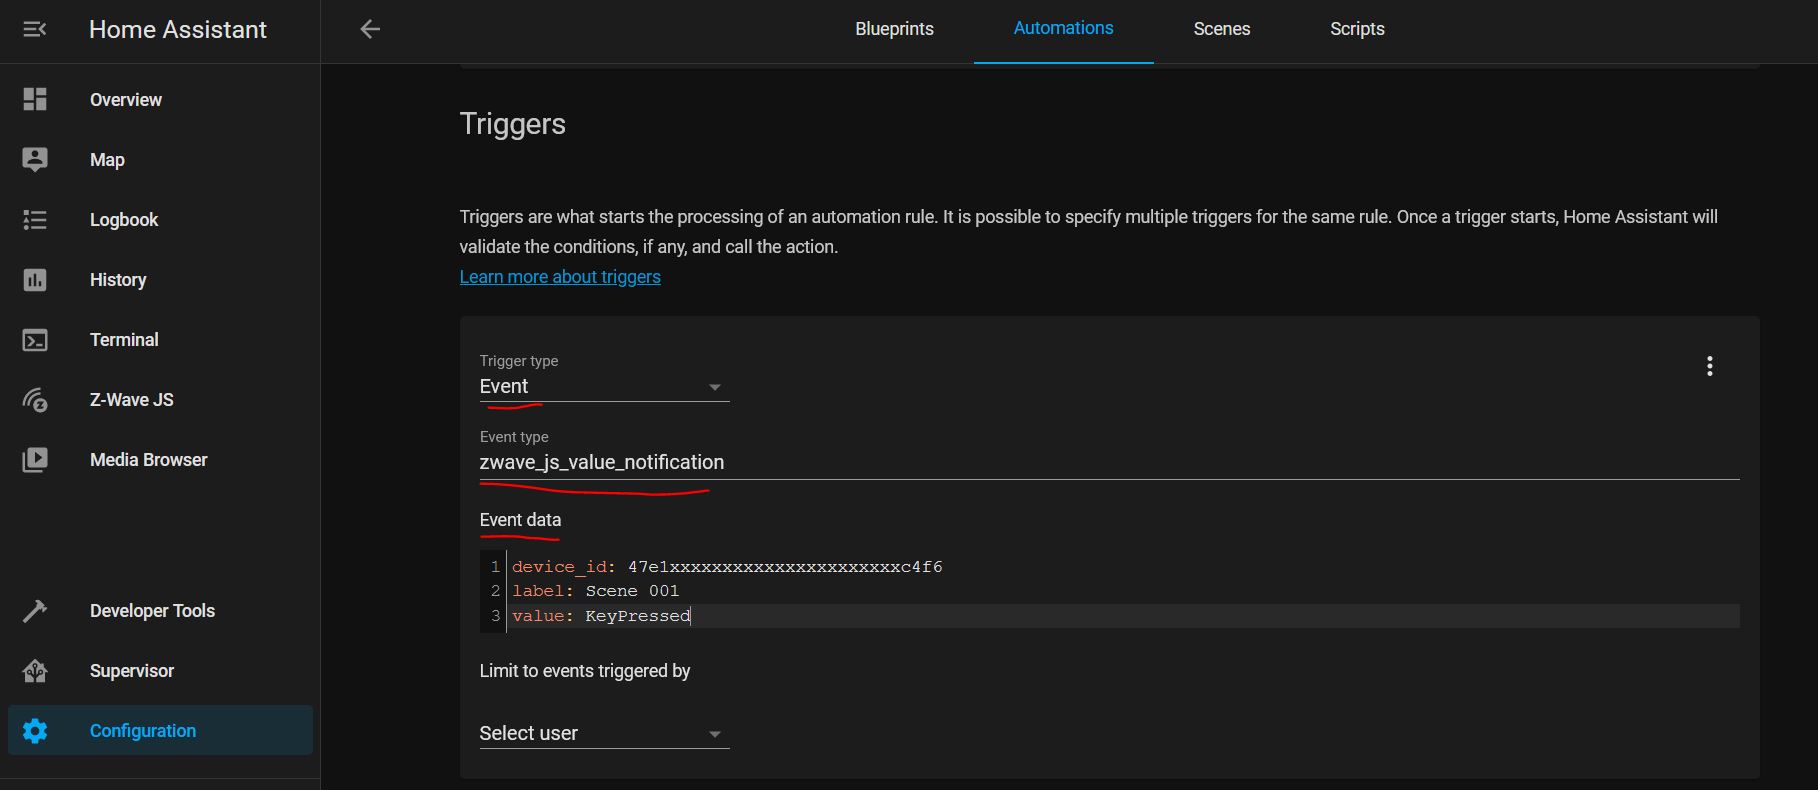
- Under Triggers:
- Trigger Type:
Event - Event Type:
zwave_js_value_notification - Event Data (from the “Listen for Events” step):
device_id: <your_device_id> label: <your_label> value: <your_value>
- Add the rest of your automation’s conditions and actions.
List of Event Data
The ZEN34 switch supports multiple presses (up to 5 presses) and long holds.
The table below shows the label and value data to use in your automation trigger’s event data.
| Button | Action | Label | Value |
|---|---|---|---|
| Upper Button | 1 Press | Scene 001 | KeyPressed |
| Upper Button | 2 Presses | Scene 001 | KeyPressed2x |
| Upper Button | 3 Presses | Scene 001 | KeyPressed3x |
| Upper Button | 4 Presses | Scene 001 | KeyPressed4x |
| Upper Button | 5 Presses | Scene 001 | KeyPressed5x |
| Upper Button | Key Held Down (long press) | Scene 001 | KeyHeldDown |
| Upper Button | Key Released (long press) | Scene 001 | KeyReleased |
| Lower Button | 1 Press | Scene 002 | KeyPressed |
| Lower Button | 2 Presses | Scene 002 | KeyPressed2x |
| Lower Button | 3 Presses | Scene 002 | KeyPressed3x |
| Lower Button | 4 Presses | Scene 002 | KeyPressed4x |
| Lower Button | 5 Presses | Scene 002 | KeyPressed5x |
| Lower Button | Key Held Down (long press) | Scene 002 | KeyHeldDown |
| Lower Button | Key Released (long press) | Scene 002 | KeyReleased |